
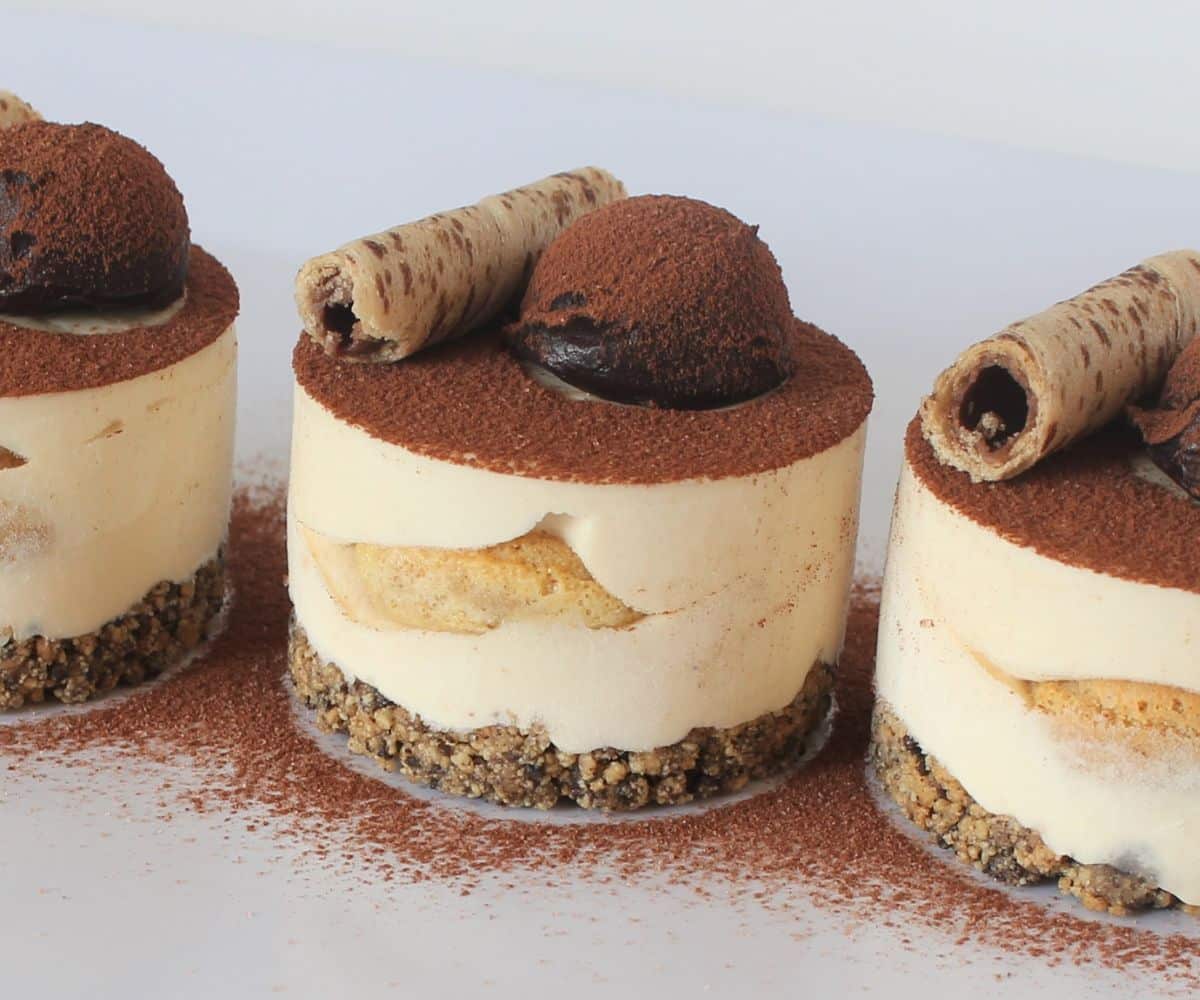
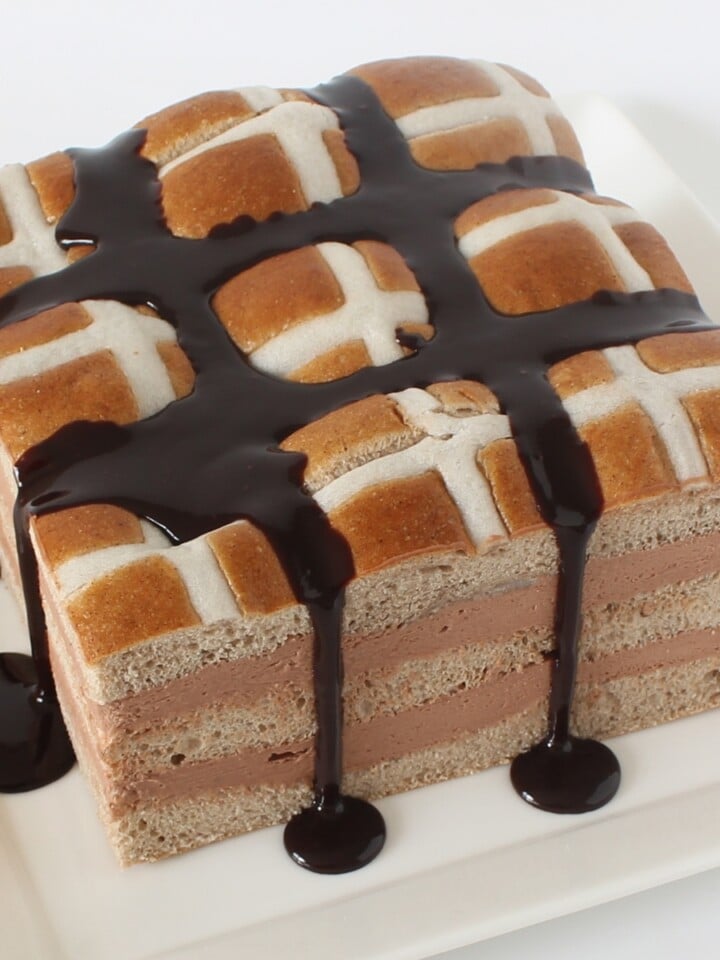
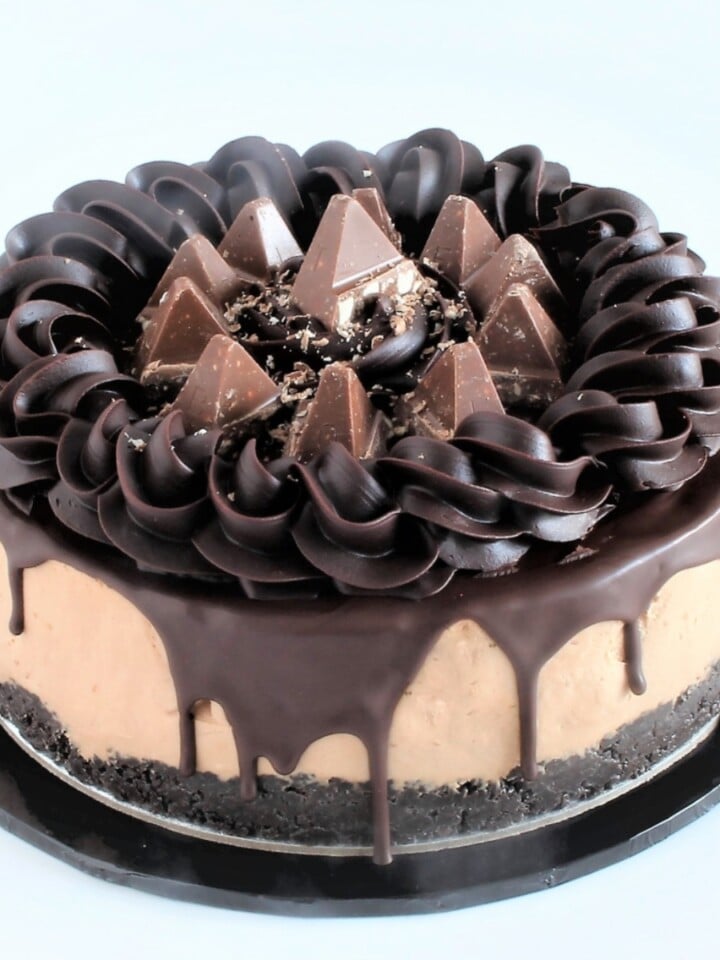
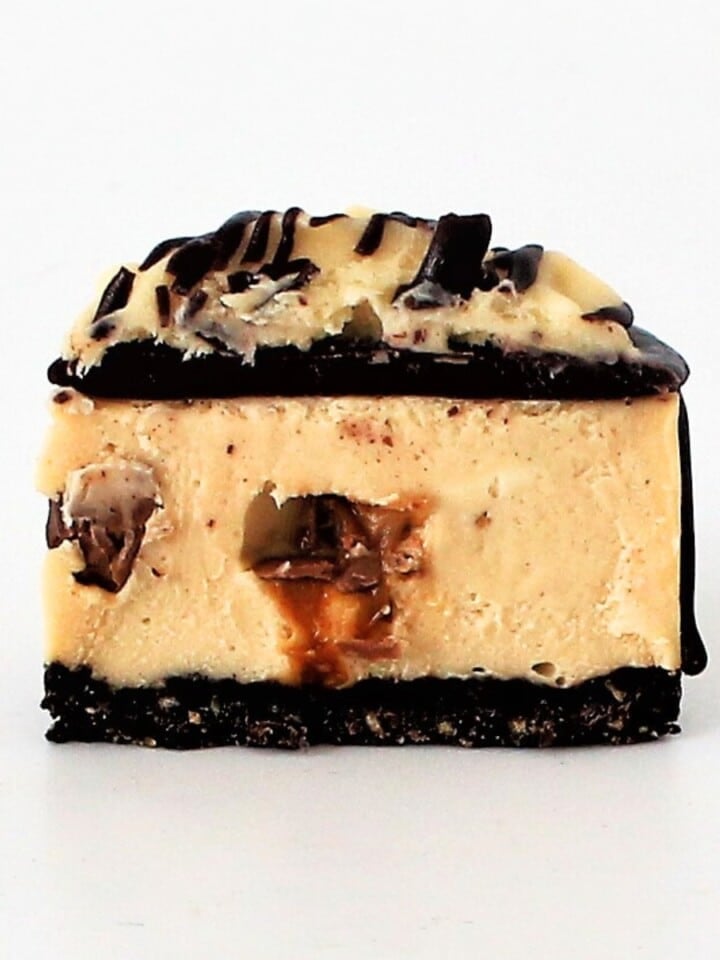
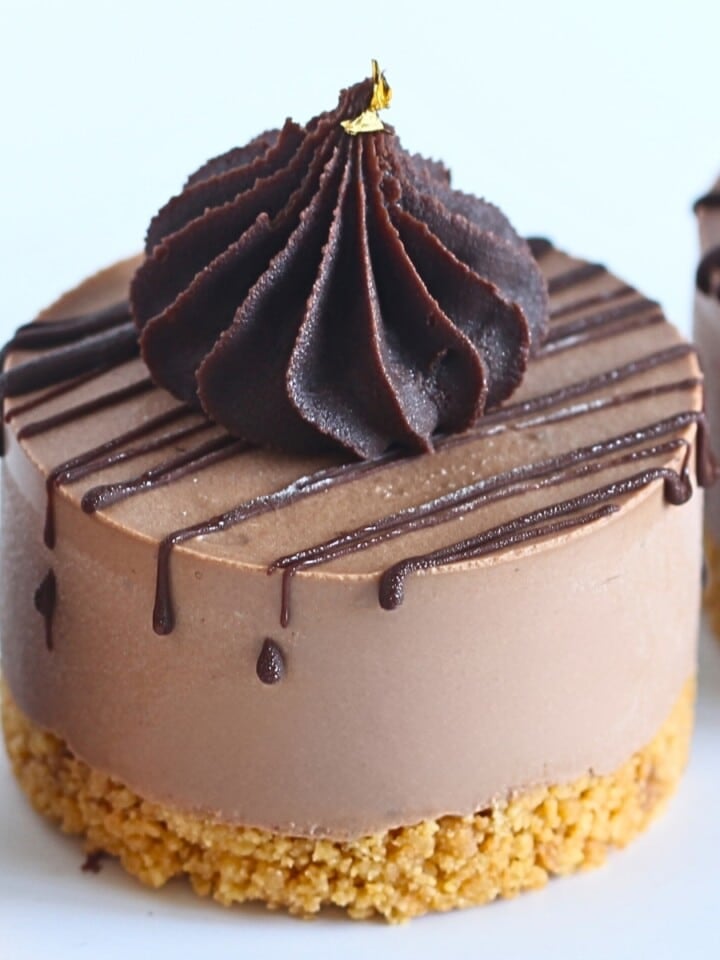
You'll love these Mini Tiramisu Cheesecakes for their creamy coffee cheesecake filling and buttery biscuit base. They've got all the classic tiramisu cheesecake flavor packed into an easy no bake cheesecake that sets beautifully after chilling. Each one's topped with a rich chocolate ganache truffle and a dusting of cocoa for that finishing touch. They're make-ahead friendly, freezer-safe, and honestly one of the easiest coffee desserts you'll ever whip up.

SUMMARISE AND SAVE THIS RECIPE
Love coffee-flavored desserts? Try my no-bake Mini Cappuccino Coffee Cheesecakes next. Or, if you want the same creamy tiramisu cheesecake flavor in a larger tray to slice and share, check out my Tiramisu Cheesecake. It's a no-bake version made without gelatin that serves a crowd. Perfect for BBQs, potlucks, or dessert buffets.
Why You’ll Love These Mini Tiramisu Cheesecakes
- You'll love this coffee cheesecake for its smooth texture and rich flavor.
- It tastes like tiramisu cheesecake but comes together with simple ingredients.
- You can adjust the coffee strength or choose your favorite biscuit base.
- It's a no bake cheesecake, so no oven needed.
- You can even switch up the filling to chocolate cheesecake or caramel cheesecake for a new twist.
- These mini tiramisu cheesecakes are simple, creamy, and full of coffee flavor every time.
Craving more coffee desserts? My Caramel Coffee Dessert Box or Quick Coffee Ice Cream are another reader favorites.
Tiramisu Cheesecake Ingredients
- Biscuits: Crushed biscuits form the base and add sweetness with a light crunch that balances the creamy cheesecake layer.
- Unsalted Butter: Mixed with the crumbs to hold the base together and give a smooth, buttery flavor.
- Boiling Water: Used to dissolve the gelatine so it blends smoothly into the cheesecake mixture.
- Gelatine Powder: Helps the cheesecake set with a soft, sliceable texture after chilling.
- Cream Cheese: The star of the filling, giving that rich, creamy texture and signature cheesecake taste.
- Powdered Sugar: Sweetens the mixture and blends easily for a smooth, lump-free filling.
- Warm Coffee: Adds that classic tiramisu flavor and mixes smoothly with the cream cheese.
- Vanilla Extract: Brings warmth and rounds out the coffee flavor.
- Whipping Cream: Whipped and folded in for a light, fluffy texture.
- Sponge Finger Biscuits: Dipped quickly in coffee to soak up flavor and add a soft tiramisu-style layer.
- Cold Coffee: Used for dipping the sponge fingers to keep their shape while adding flavor.
- Dark Chocolate: Melted into ganache for the truffle balls and adds rich chocolate depth.
- Heavy Cream: Combined with chocolate to make a smooth ganache for topping.
- Cocoa Powder: Dusts the top of the mini Tiramisu Cheesecakes for a light bitter note and a polished finish.
How To Make Tiramisu Cheesecake
Follow these simple steps to create a smooth coffee cheesecake filling, rich ganache truffle balls, and a soft tiramisu cheesecake texture.
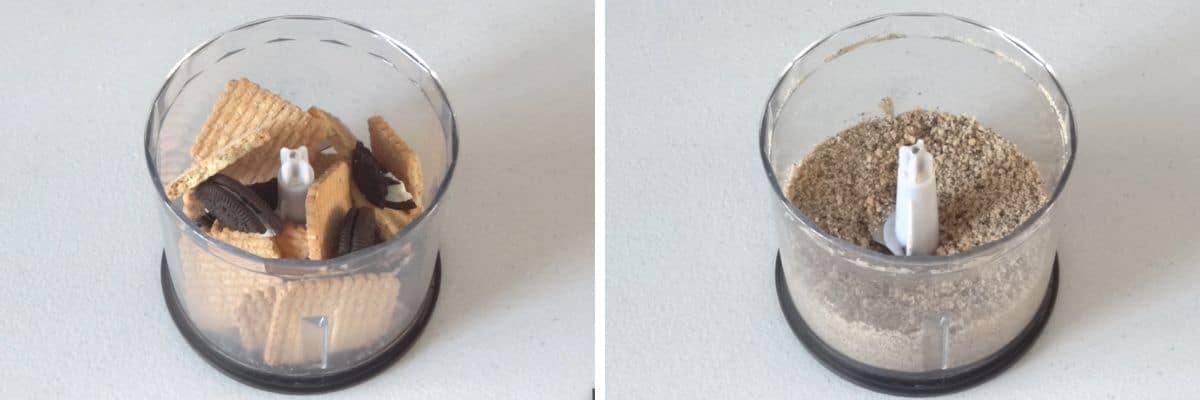
Step 1: Make the Biscuit Base.
Crush your biscuits until fine, then mix with melted butter. Press the mixture firmly into your lined muffin tin or silicone molds. Chill the base while you prepare the filling.
Step 2: Prepare the Mini Tiramisu Cheesecake Filling
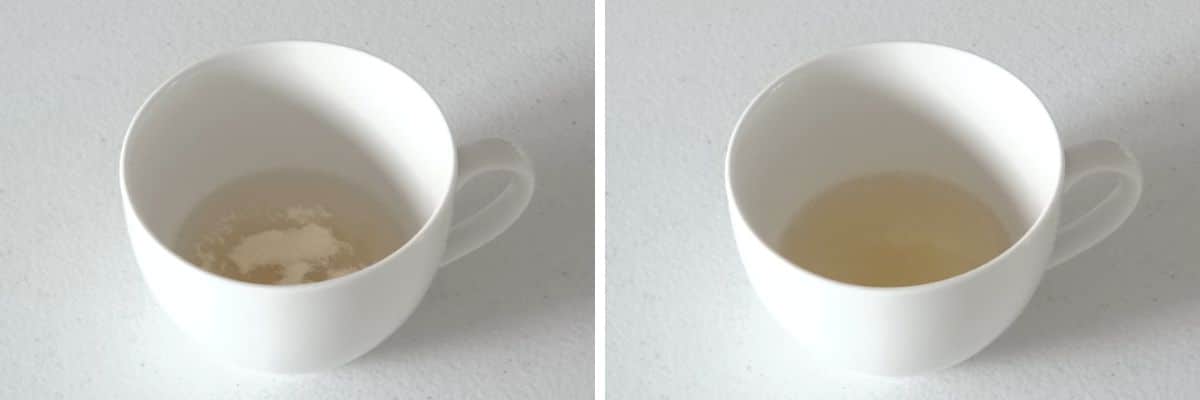
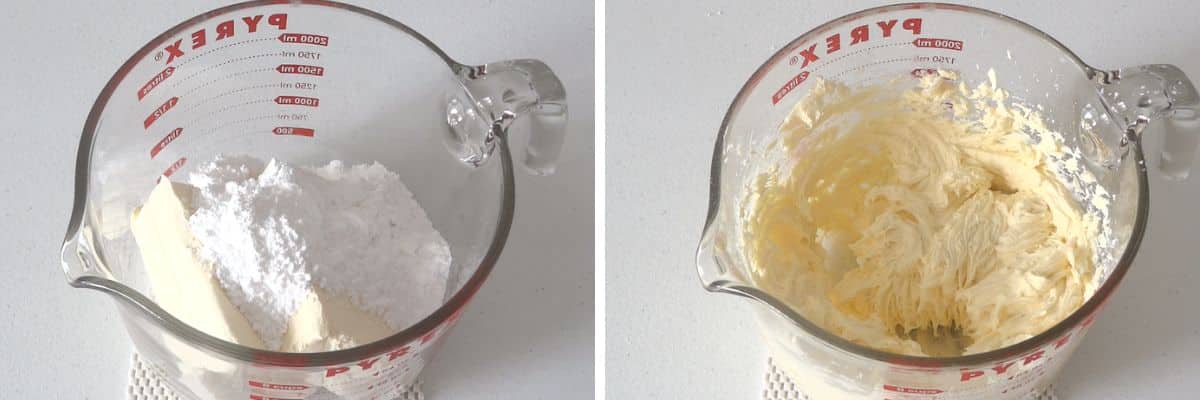
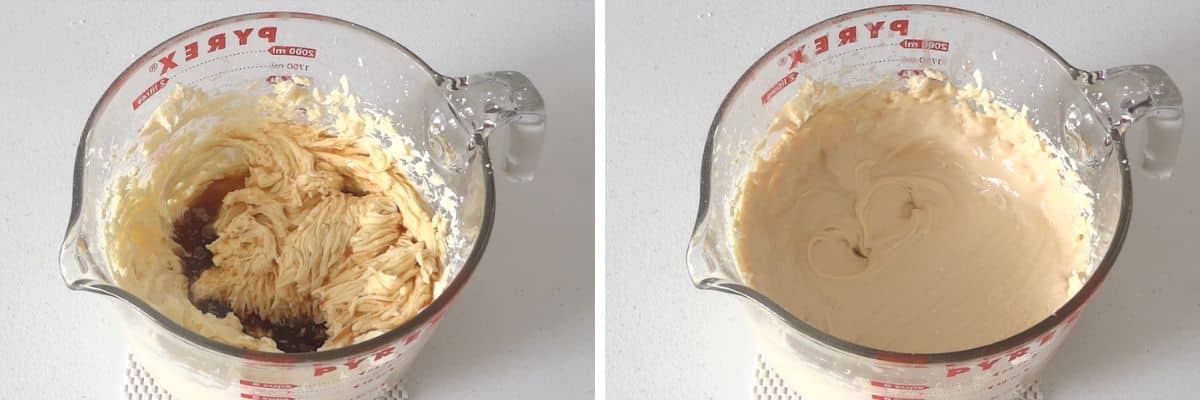
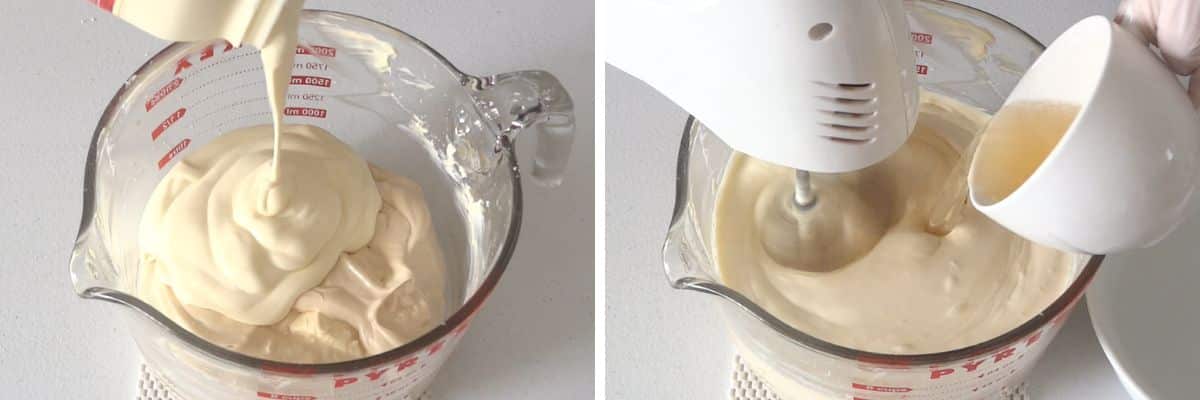
In a small bowl, add the gelatine powder to boiling water and stir until fully dissolved. Set aside while you make the filling. In a large bowl, beat cream cheese and powdered sugar until smooth. Add warm coffee and vanilla extract, then mix again. Pour in the whipping cream and beat until light and fluffy.
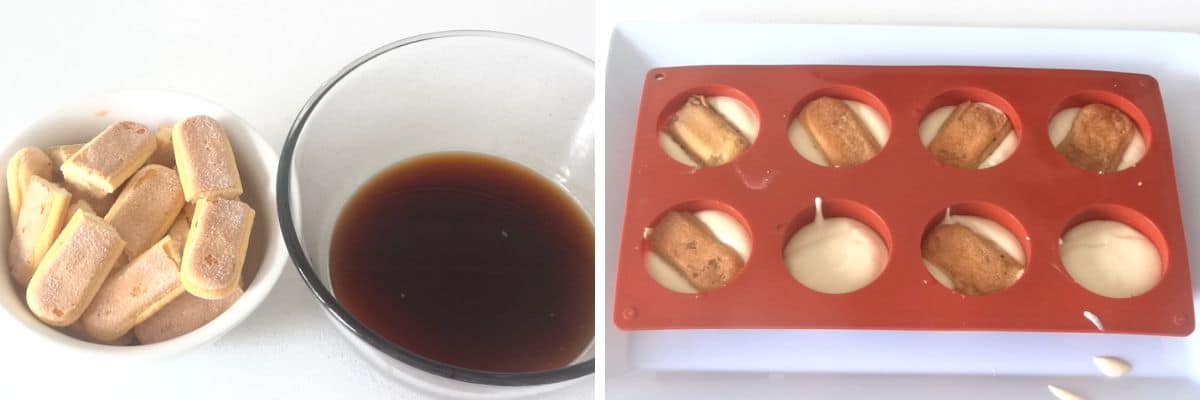
With the mixer running, slowly pour in the gelatine mixture and keep mixing until the coffee cheesecake filling looks silky. Spoon half over the bases. Quickly dip each sponge finger in cold coffee, add one to each, then top with the remaining filling. Smooth the surface and refrigerate for at least four hours, until set.
Step 3: Make the Ganache Truffle Balls.
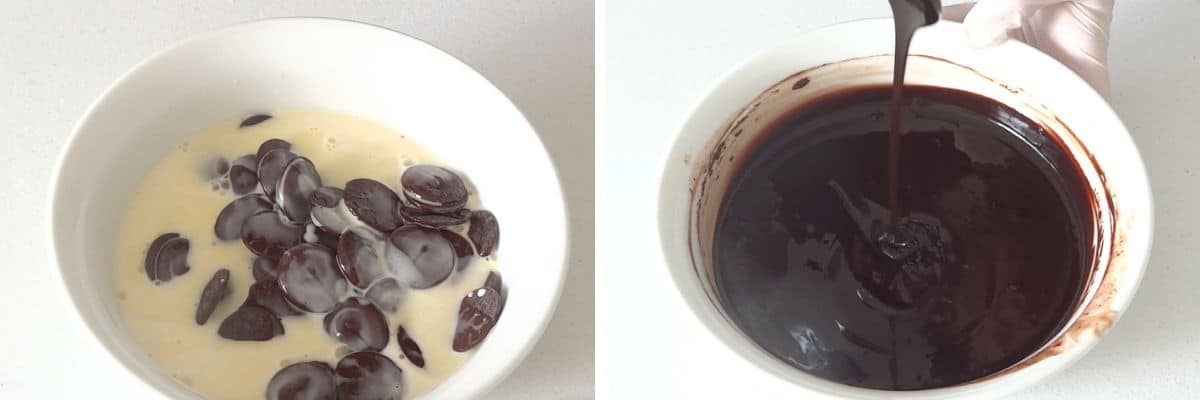
Pour hot heavy cream over chopped dark chocolate. Let it sit for a minute, then stir until smooth and glossy and chill until firm. Scoop small portions and roll them into truffle balls. The ganache truffle balls give the Mini Tiramisu Cheesecake its signature tiramisu twist.
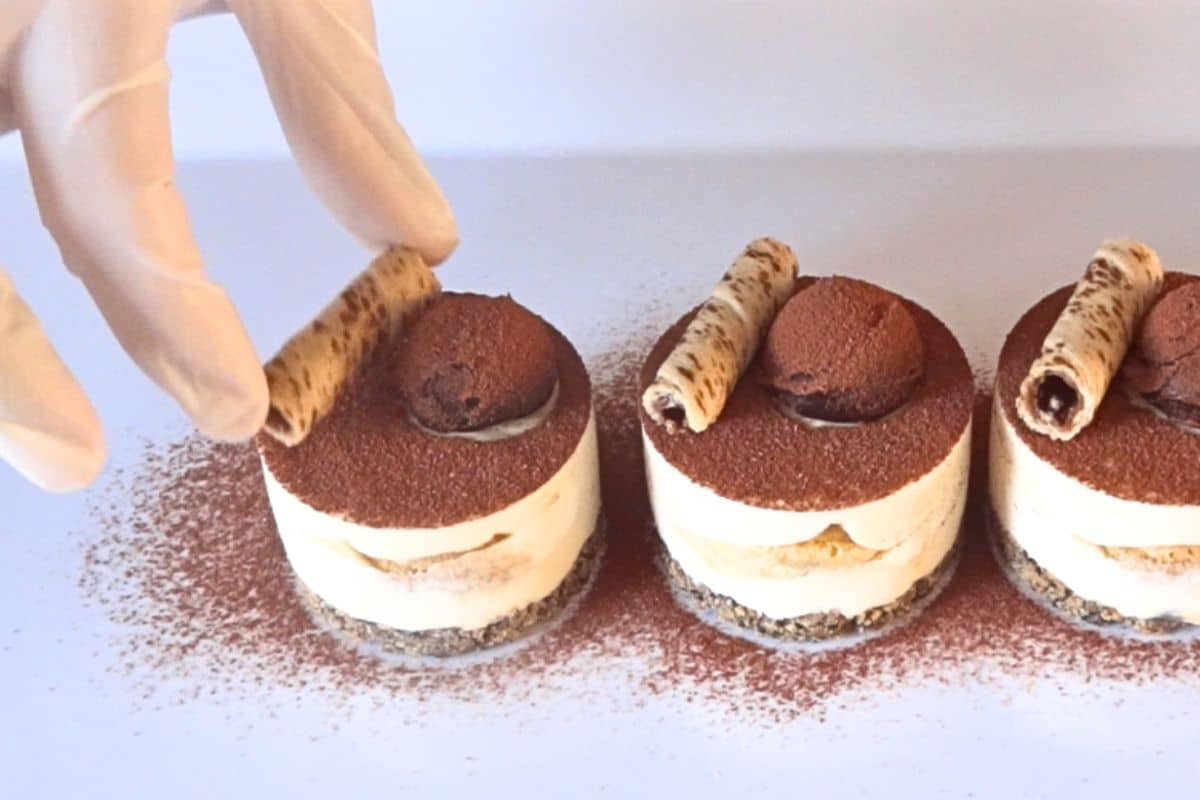
Step 4: Garnish and Serve
To finish your Mini Tiramisu Cheesecake, top with a ganache truffle and cocoa dusting. Once set, remove your cheesecakes from the molds. Top each with a ganache truffle ball, dust lightly with cocoa powder, and add half a wafer roll before serving.

Keep these cheesecakes chilled until ready to serve. They hold beautifully and taste even better the next day.
🎥 Want to see it made step by step? Watch my Tiramisu Cheesecake video tutorial on YouTube. It's packed with tips and shows every part of the process.
Pro Tips for Making Coffee Cheesecake
The trick to a great coffee cheesecake is finding that sweet spot with your coffee strength. You want the flavor to shine, not overpower the cheesecake.
Go for a medium-strength coffee that's good quality. After mixing it in, have a quick taste of the filling. If it's too strong, add a bit more sugar. If it's too light, mix in a splash more coffee until it tastes balanced and smooth.
These Mini Tiramisu Cheesecakes taste even better after a day in the fridge.
If you enjoy creamy coffee desserts, check out my Coffee Cheesecake Dessert Box. It's layered, egg free, and packed with that same rich flavor.
Storage Tips for No Bake Cheesecake
Keep your tiramisu cheesecakes in the fridge so they stay firm and creamy. Store them in an airtight container and they'll hold up beautifully for about three days.
If you're making them ahead, wait to add the cocoa powder and wafer rolls until just before serving. This keeps the tops fresh and stops them from softening.
Delicious Variations
- Different Biscuit Bases: Switch up the base by using chocolate biscuits, graham crackers, or even ginger snaps for a different flavor and texture.
- Espresso or Flavored Coffee: Try espresso for a stronger coffee kick or flavored blends like hazelnut or caramel for something extra.
- Alcohol-Infused: For a more classic tiramisu taste, stir a little coffee liqueur, rum, or Marsala wine into the coffee you use for dipping the sponge fingers.
- Chocolate or Cocoa Layer: Add a thin layer of melted dark chocolate or a dusting of cocoa powder between the biscuit base and cheesecake layer for a rich chocolate note.
- Cheese Variations: Mix in a little mascarpone with the cream cheese if you want that traditional tiramisu flavor.
- Nutty Twist: Sprinkle chopped hazelnuts or almonds on top for crunch and a hint of nuttiness.
- Spice It Up: Stir a pinch of cinnamon or nutmeg into the cheesecake filling for a warm, cozy flavor.
- For a delicious twist, check out my Oreo Cheesecake Dessert Cups for a chocolate cookie base.
- You can use my Cream Cheese Frosting if you want a thicker topping that pipes easily and stays smooth when chilled. It holds its shape nicely on mini cheesecakes.
For another easy no bake idea, my no bake pumpkin cheesecake has a smooth pumpkin filling and looks cute with a little swirl on top.
More No Bake Cheesecake Recipes
If you're loving these mini cheesecakes, you'll definitely want to try a few more of my favorite no bake cheesecake recipes below.


Share Your Tiramisu Cheesecake Creations
If you whip up one of my desserts, I'd love to see it! 😍 Tag me on Instagram or Facebook so I can check out your creation. I'll be reposting my favorites and giving shout-outs in my stories! 🎉 It's always fun to see your unique twists on my recipes, so don't be shy, snap a pic and share it! 📢🍰 #CupcakeSavvysKitchen
Common Questions
Absolutely! These tiramisu cheesecakes are perfect for making ahead. Prepare them as written and keep them chilled. They taste even better the next day once the flavors have settled.
They'll stay fresh for up to three to four days when stored in an airtight container. Keep them refrigerated until you're ready to serve.
You can, but the texture won't be quite as rich or creamy. For the best result, stick with full-fat cream cheese.
Yes, you can use the same recipe to make a single large tiramisu cheesecake. Just use a springform pan and allow extra time for it to set.

Mini Tiramisu Cheesecake Recipe (No Bake Cheesecake)
INGREDIENTS
Base
- 260 g (9 ⅙ oz) cookies mix plain and chocolate
- 120 g (½ cups) butter unsalted
Coffee Cheesecake
- ⅓ cup water hot from the kettle
- 4 teaspoon gelatine powder
- 500 g (2 ⅕ cups) cream cheese
- ¾ cup powdered sugar
- ½ cup coffee warm
- 1 teaspoon vanilla extract
- 450 ml (2 cups) heavy cream
- 12 ladyfingers sponge finger biscuits
- 1½ cups coffee cold
Ganache Truffle Balls
- 300 g (1 5/7 cups) dark chocolate
- 200 g (⅚ cups) heavy cream
Garnish
- ½ tablespoon cocoa powder for dusting
- 6 wafer rolls picollo


INSTRUCTIONS
Step 1: Make the Biscuit Base
- Crush the biscuits into fine crumbs using a stick blender or wooden rolling pin and zip lock bag then mix with melted butter. The addition of the chocolate cookies gives a nice speckled effect.
- Press the mixture into the base of a cupcake tray lined with baking cups or 8 Cavity Silicone Moulds. This ensures easy removal of cheesecakes after freezing. Alternatively, you can line the cupcake tray with baking cups.
- Chill in the refrigerator while preparing the cheesecake layer.
Step 2: Prepare the Coffee Cheesecake Filling
- In a small bowl, dissolve gelatine powder in boiling water. Set aside.
- In a large bowl, beat softened cream cheese and icing sugar until smooth.
- Add warm coffee and vanilla extract to the cream cheese mixture and beat again until well combined.
- Pour in the whipping cream, continuing to beat.
- While beating, slowly add the warm gelatine mixture to the cream cheese mixture, ensuring it is well incorporated.
- Spoon half of the cheesecake mixture over the biscuit base.
- Cut sponge finger biscuits in half. Quickly dip the biscuits into cold coffee and place one on top of the cheesecake layer in each cupcake liner.
- Top with the remaining cheesecake mixture, and smooth the tops.
- Freeze for a minimum of 6 hours or overnight.
Step 3: Make the Ganache Truffle Balls
- Heat the heavy cream in a saucepan until it just begins to boil.
- Pour the hot cream over the chopped dark chocolate and let it sit for a minute. Then stir until smooth.
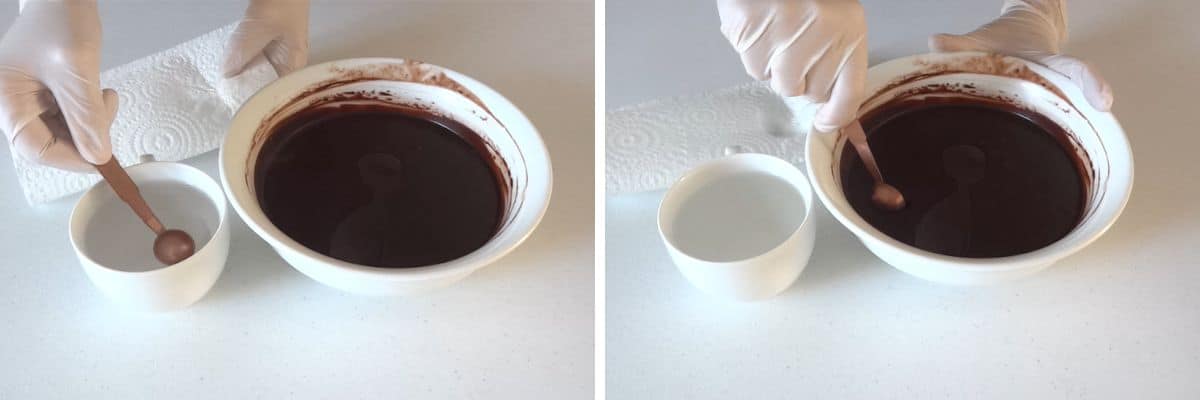
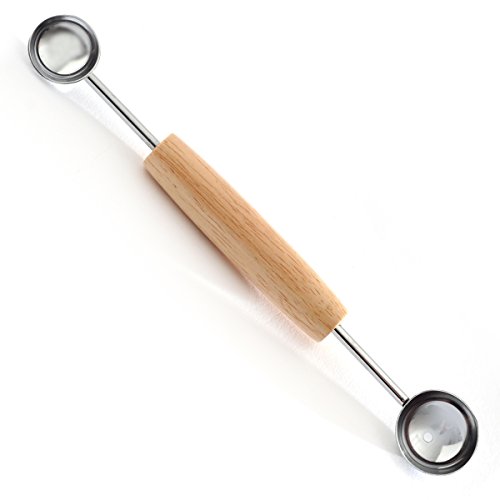
- Refrigerate the ganache until firm, then scoop it into balls using a melon baller.
Step 4: Garnish and Serve
- Once frozen, gently remove the mini cheesecakes from the moulds and place on serving plate.
- Place a ganache ball on top of each mini cheesecake.
- Dust each mini cheesecake with cocoa powder before serving.
- Refrigerate for at least 2 hours to thaw before serving.
NOTES
NUTRITION
Looking for more cheesecake inspiration? Browse all my Cheesecake Recipes next.
Vonnie says
Hi, i love youre recipes. You always use powder gelatine. I can't buy that in the shops here, (Den Helder Netherlands). I only find package with 12 (leaves).
How much grams are a tablespoon of powder gelatine? Thank you
Fay says
Hi Vonnie! As a general rule, two gelatine leaves are equivalent to one teaspoon of powdered gelatine. This can vary from brand to brand (and strength) so you will need to experiment using that as your baseline.
Mari Martinez says
I absolutely love your recipes! I'm about to make one of them for a church event. I'm sure my guests are going to love them. Thank you for sharing your recipes, may God bless you in a mighty way.
Fay says
How fabulous! I'm thrilled you enjoy my recipes. Thank you so much for your support Mari!
Silvia says
Hello Faye, thank you for this recipe, sounds great. I am a bit confused though, it says "Servings: 24 Mini Cheesecakes", but as I keep reading I see you are referring to using an 8 Cavity Silicone Moulds.
So how many mini cheesecakes does this recipe make, 8 or 24? Thank you!
Fay says
Hi Silvia! Apologies for the confusion. This is a double batch recipe so it makes more than my usual mini cheesecake recipes. I have 3 of the silicone trays, each of which has 8 cavities making 24 in total. The recipe may make more or less depending on the size of the cavities. Feel free to halve the recipe. You can also assemble the layers in mini desserts cups if you prefer, I hope that helps.
Silvia says
Thank you Faye. I followed the recipe thoroughly and yes, it made 24 small ones. Perfect amount of gelatine (that is where most no-bake cheesecakes fail). They are absolutely lovely! Thank you again 🙂
Fay says
Fabulous! Please consider rating the recipe 🙂