
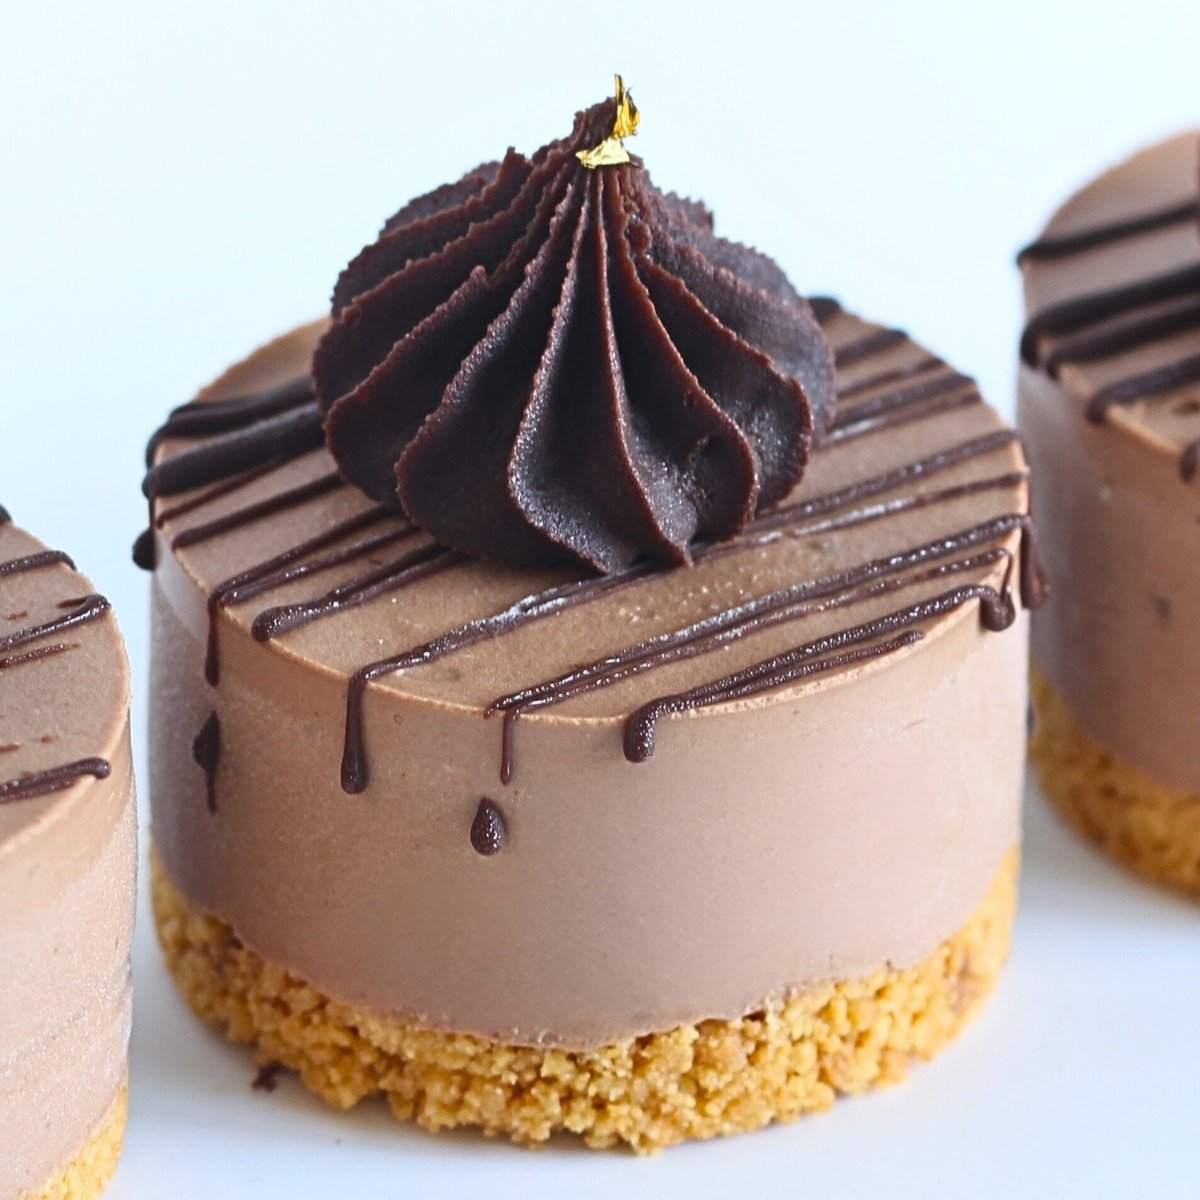
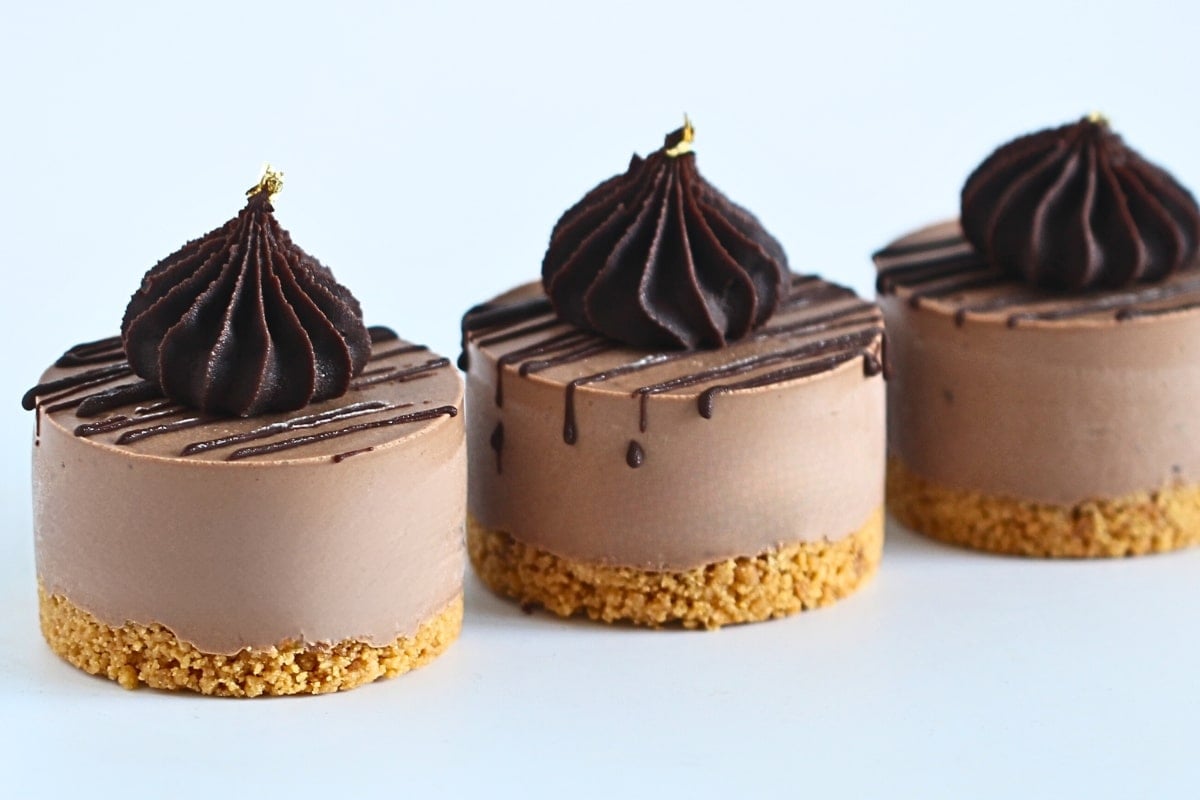
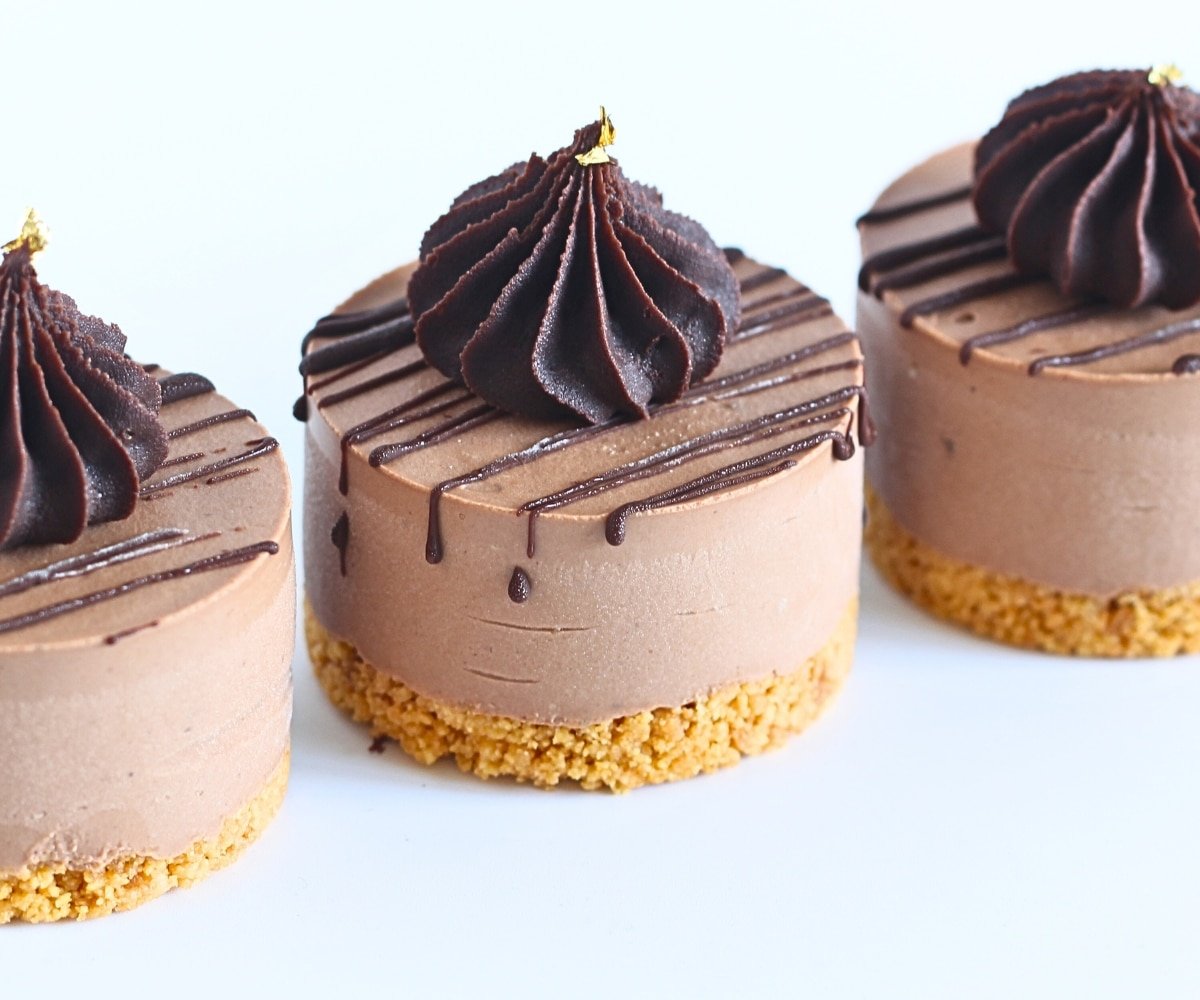
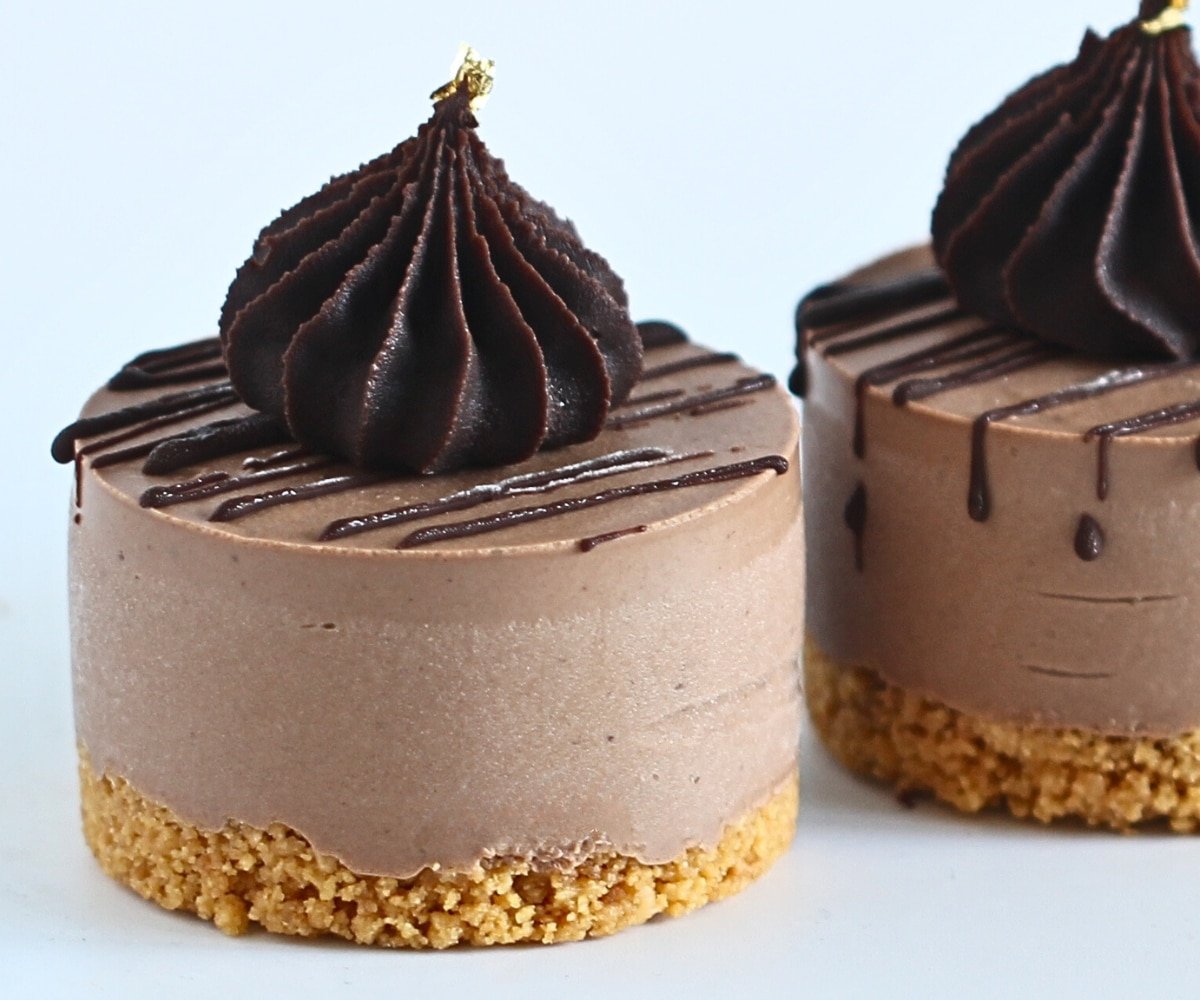
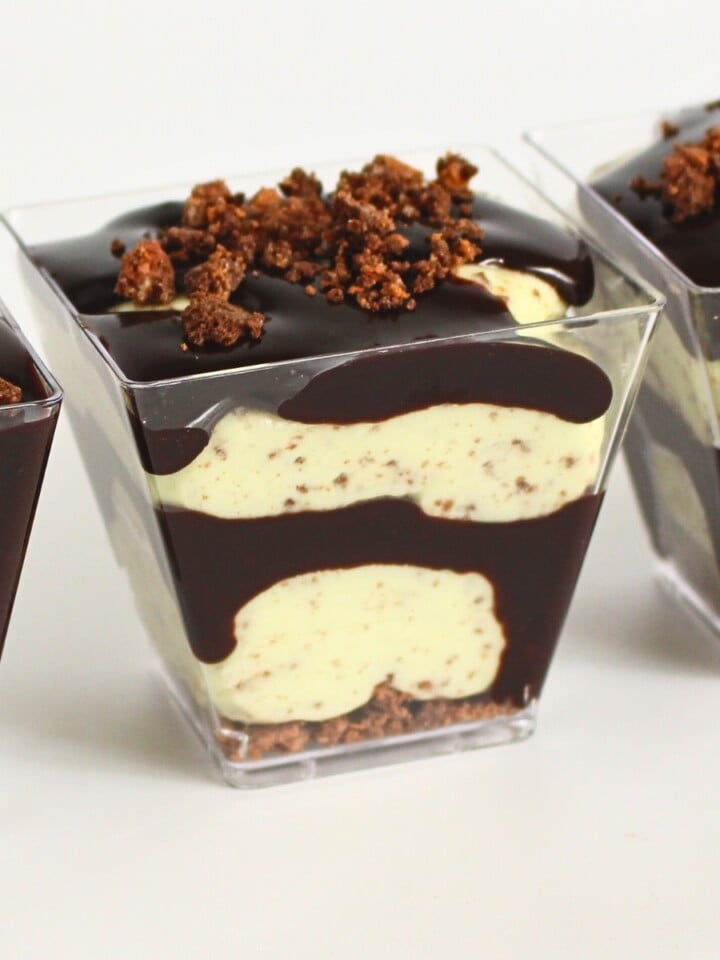
These Mini Chocolate Cheesecakes are a rich and creamy treat with a crunchy graham cracker base. Each bite features a luscious chocolate filling topped with a smooth chocolate truffle. Perfectly portioned, they make a delicious and elegant dessert.
Why Silicone Moulds Work Well
Using silicone molds for these Mini Chocolate Cheesecakes offers several advantages. The cheesecakes are frozen in the molds, ensuring they release easily and maintain a clean, sharp finish without damage, resulting in a professional appearance.
Silicone molds are flexible and non-stick, making it simple to remove the cheesecakes without losing their shape. Additionally, they are reusable, durable, and easy to clean, making them a convenient and eco-friendly choice. If preferred, you can assemble the cheesecakes in cupcake trays with baking cups, and they will still look great.
Ingredients in Mini Chocolate Cheesecakes
Base:
- 200g Crushed Graham Crackers / 7 oz: Provides a crunchy, slightly sweet base for the cheesecakes.
- 80g Melted Unsalted Butter / 5.6 tbsp: Binds the crushed graham crackers together to form a solid crust.
Chocolate Cheesecake Filling:
- 3 Teaspoons Gelatine Powder: Helps set the filling, giving it a firm yet creamy texture.
- 3 Tablespoons Boiling Water: Used to dissolve the gelatin powder.
- 250g Cream Cheese / 8.8 oz: The main ingredient for the cheesecake filling, providing a rich and creamy base.
- 150g Sugar / ¾ cup: Adds sweetness to the filling.
- 175g Dark Chocolate / 6.2 oz: Gives the filling a deep, chocolatey flavor.
- 600mL Heavy Cream / 20.3 fl oz: Adds creaminess and volume to the filling.
- 2 Teaspoons Vanilla Extract: Enhances the flavor of the filling.
Chocolate Truffle Topping:
- 300g Dark Chocolate / 10.6 oz: Forms the base of the truffle topping, adding a rich chocolate layer.
- 150mL Whipping Cream / 5.1 fl oz: Creates a smooth, creamy texture for the truffle topping.
How To Make Mini Chocolate Cheesecakes
Base:
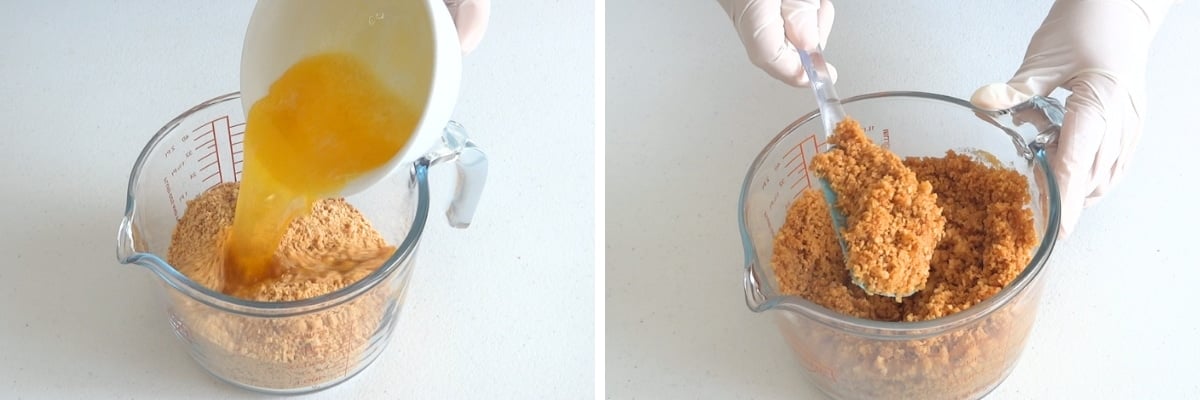
- In a bowl, combine the crushed graham crackers with the melted unsalted butter.
- Stir until the mixture is well combined and resembles wet sand.
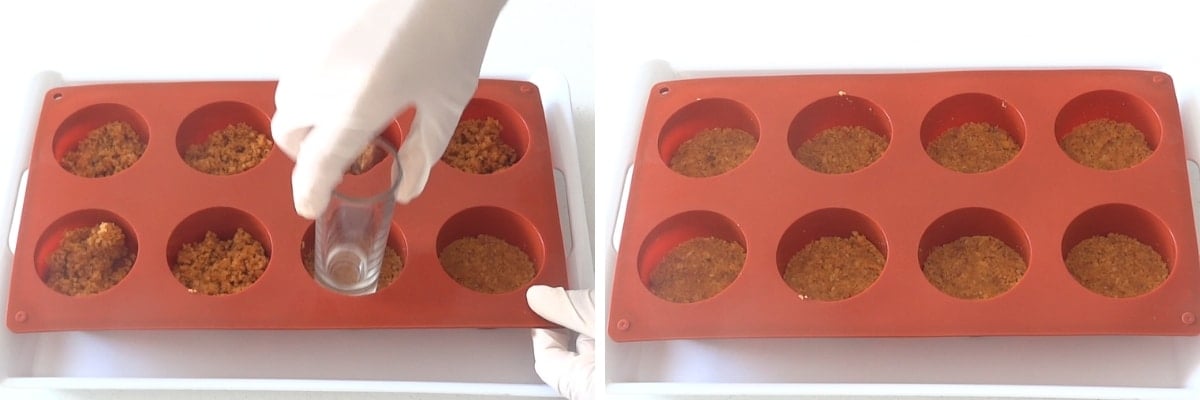
- If using silicone molds, press the graham cracker mixture firmly into the bottom of each cavity. Ensure you create an even and compact base.
- Alternatively, use cupcake trays lined with paper baking cups, pressing the mixture into the bottom of each cup.
- Place the molds or trays in the refrigerator to chill while you prepare the filling. This helps the crust set properly.
Chocolate Cheesecake Filling:
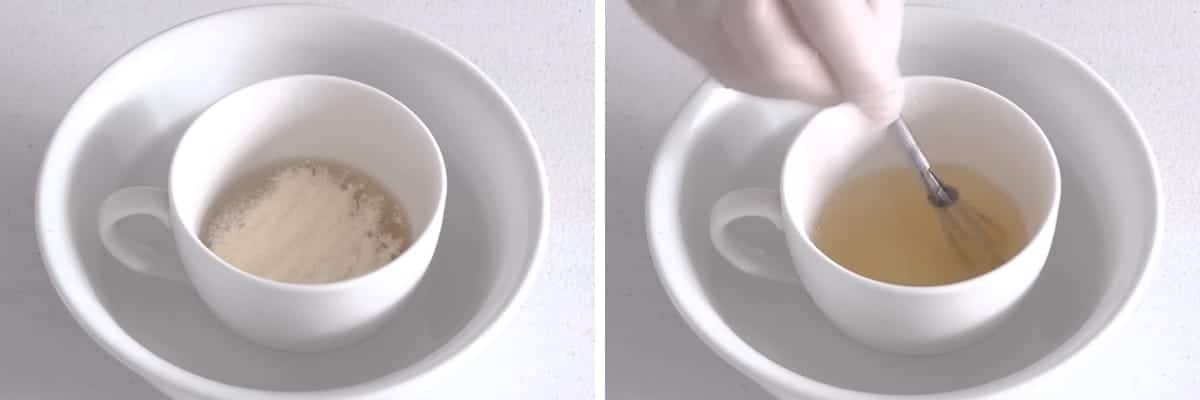
- Dissolve the gelatin powder in boiling water.
- Stir well until all the gelatin crystals are fully dissolved. If needed, microwave the mixture for 10 seconds and stir again.
- Set aside; this mixture will be added to the cream cheese mixture while warm.
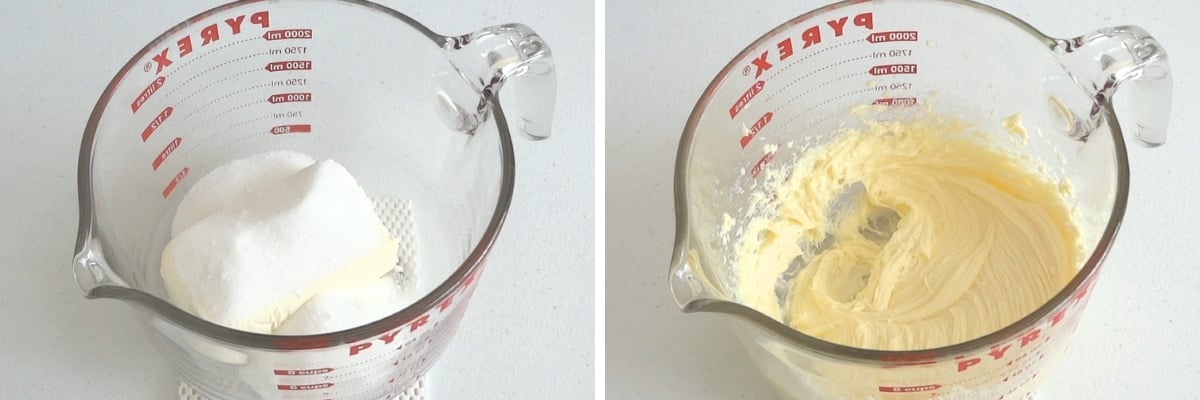
- In a mixing bowl, combine the cream cheese and sugar.
- Use a hand mixer on medium speed to blend until smooth and well mixed.
- Melt the dark chocolate in the microwave in 30-second bursts, stirring each time until fully melted.
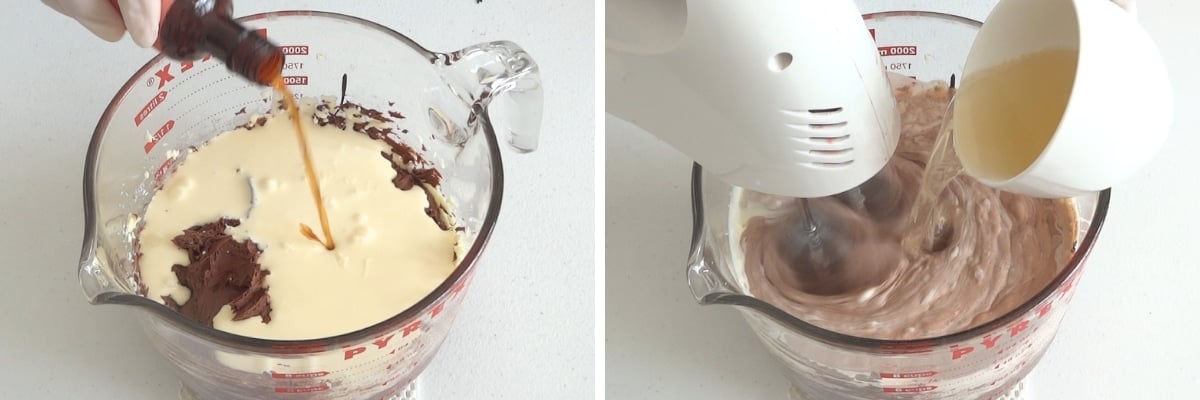
- Add the melted chocolate to the cream cheese mixture and mix well until fully incorporated.

- Add the heavy cream and vanilla extract to the bowl.
- Start mixing on medium speed. With the mixer still running, gradually add the gelatin mixture in two batches.
- Mix well after the second batch is added until the mixture is smooth and well combined.
- Scrape down the sides and bottom of the bowl and mix briefly again.
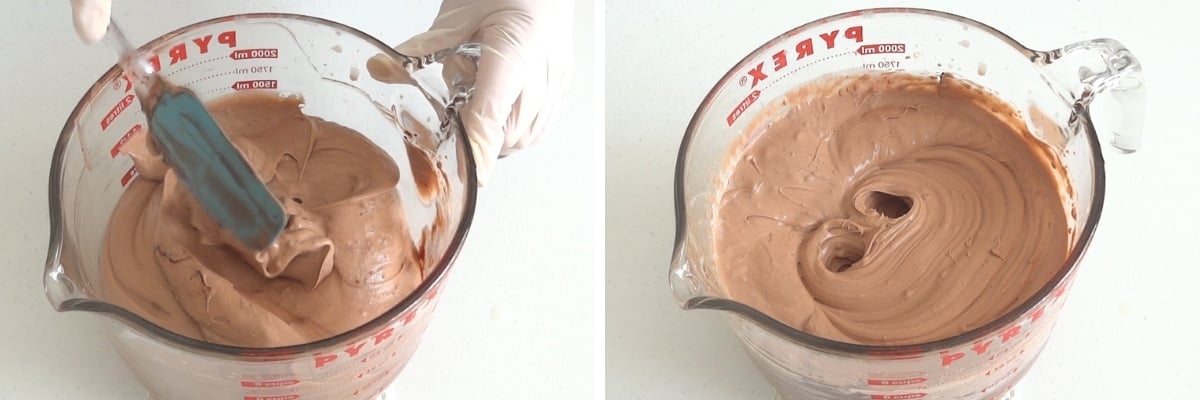
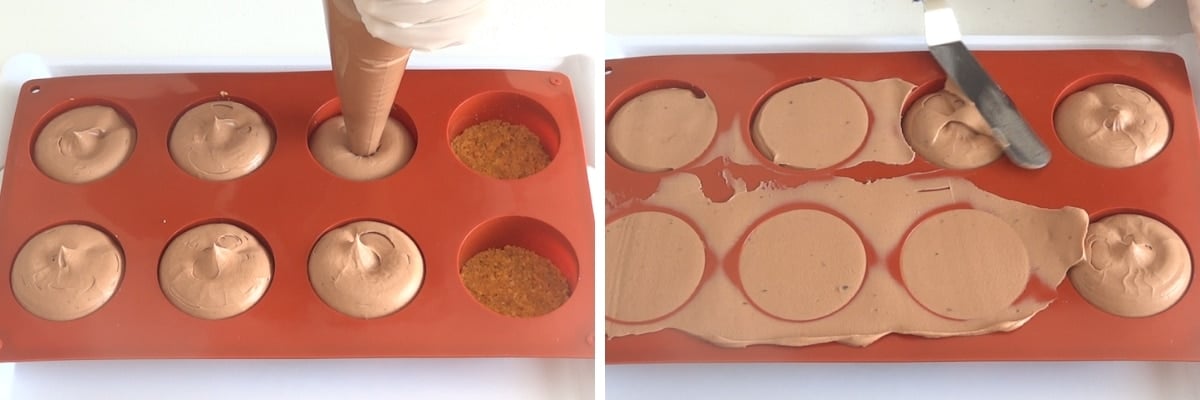
- Pipe or spoon the cheesecake mixture into the molds on top of the crumb base.
- Fill the molds to the top and smooth over with an angled spatula or bench scraper.
- Freeze the cheesecakes overnight to set them completely.
Truffle Topping:
- Heat the whipping cream on the stove just until boiling, then remove immediately.
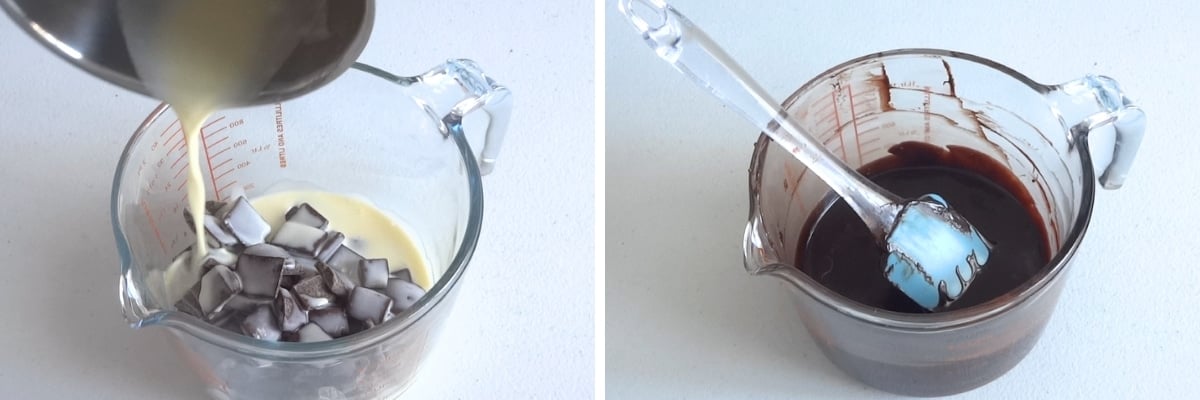
- Place the dark chocolate into a heatproof bowl and pour over the hot cream.
- Let sit for one minute, then mix well until the chocolate is fully melted and the mixture is smooth.
- If lumps remain, microwave for 30 seconds and stir again. Repeat until smooth.
- Reserve a small portion of the ganache for garnish.
- Refrigerate the remaining ganache, stirring every 10 minutes until it cools to a thick piping consistency similar to peanut butter.
Assembly:
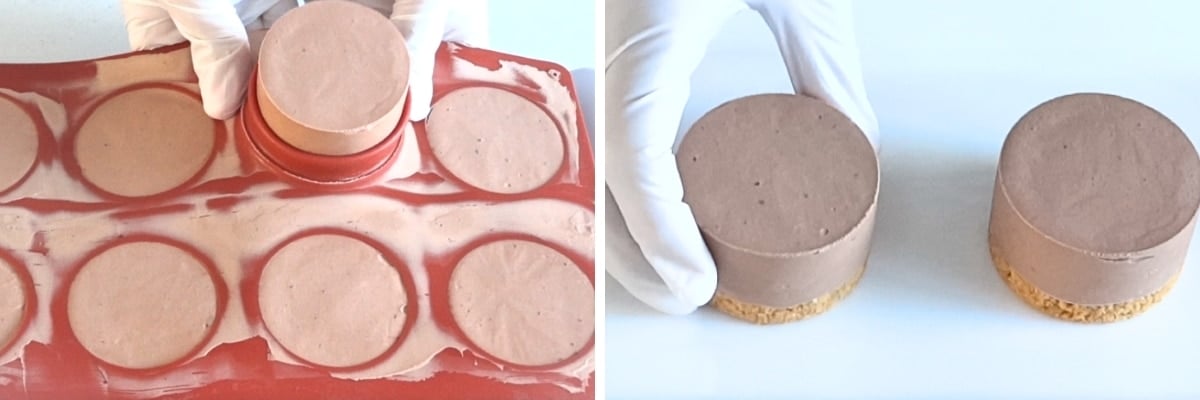
- Remove the mini chocolate cheesecakes from the freezer and gently remove them from the molds.
- Place the cheesecakes onto a serving platter.
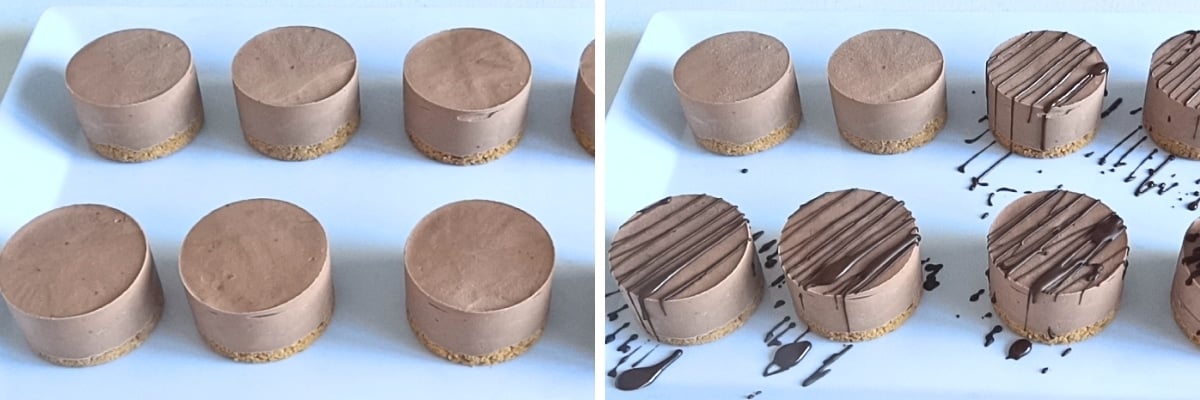
- Take the reserved ganache and heat gently in the microwave for 10 seconds until it reaches a sauce consistency.
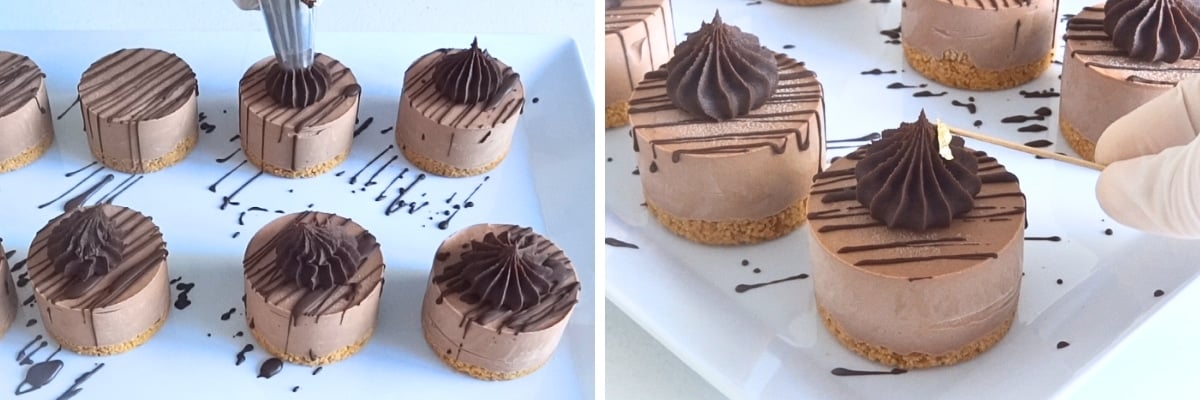
- Drizzle the sauce across the tops of the mini cheesecakes.
- Fit a piping bag with a large French star piping tip and fill the bag with the chilled, thickened ganache.
- Pipe a large ganache kiss on top of each mini cheesecake. Optionally, garnish each ganache kiss with a tiny bit of gold leaf.
- Refrigerate the assembled cheesecakes for two hours to thaw before serving.
Fay's Top Tips
Tip 1: Smooth Chocolate Filling To get a smooth and creamy chocolate filling, make sure the gelatin is completely dissolved before adding it to the cream cheese mixture. Dissolve the gelatin in boiling water, and if any crystals are left, microwave it for 10 seconds and stir again. This will ensure the filling sets properly and stays smooth.
When melting the dark chocolate, use 30-second bursts in the microwave and stir each time to prevent burning. This will help the chocolate melt evenly, giving your cheesecake filling a rich and smooth texture.
Tip 2: Perfect Ganache Consistency Getting the right consistency for the truffle topping is key for a professional look. After melting the dark chocolate with hot cream, stir until the mixture is smooth. If lumps remain, microwave it for another 30 seconds and stir again. Once smooth, refrigerate the ganache, stirring every 10 minutes until it thickens to a consistency like peanut butter.
This makes it easy to pipe the ganache neatly onto the mini chocolate cheesecakes. If the ganache is too thin, it won’t hold its shape; if it’s too thick, it will be hard to pipe. This step ensures your mini cheesecakes have a beautiful, glossy truffle topping.
Recipe Variations
- Berry Swirl Cheesecakes: Add a swirl of raspberry or strawberry puree to the chocolate filling before freezing. Simply spoon small amounts of puree into the filling and swirl with a toothpick for a marbled effect.
- Mint Chocolate Cheesecakes: Add a few drops of mint extract to the chocolate filling for a refreshing twist. Garnish with a sprinkle of crushed peppermint candies or a mint leaf.
- Peanut Butter Chocolate Cheesecakes: Add a layer of creamy peanut butter between the graham cracker base and the chocolate filling. Top with a drizzle of melted peanut butter mixed with the chocolate ganache.
- White Chocolate Cheesecakes: Substitute dark chocolate with white chocolate for a lighter, sweeter version. Top with fresh berries or a raspberry sauce for a burst of flavor.
- Salted Caramel Cheesecakes: Drizzle homemade or store-bought salted caramel sauce over the chocolate filling before freezing. Top with a sprinkle of sea salt flakes for a delicious contrast.
Serving Suggestions for Mini Chocolate Cheesecakes
Fresh Fruit Topping: Serve the mini cheesecakes with fresh berries like raspberries, strawberries, or blueberries for a fresh and colorful presentation.
Whipped Cream: Add a dollop of whipped cream on top of each cheesecake for extra creaminess. You can flavor the whipped cream with a bit of vanilla or cocoa powder.
Chocolate Shavings: Garnish with chocolate shavings or curls made from a bar of dark or white chocolate for an elegant touch.
Edible Flowers: Decorate with edible flowers like violets or pansies to add a touch of elegance and color.
Crushed Nuts: Sprinkle chopped nuts such as almonds, hazelnuts, or pecans over the ganache topping for added crunch and flavor.
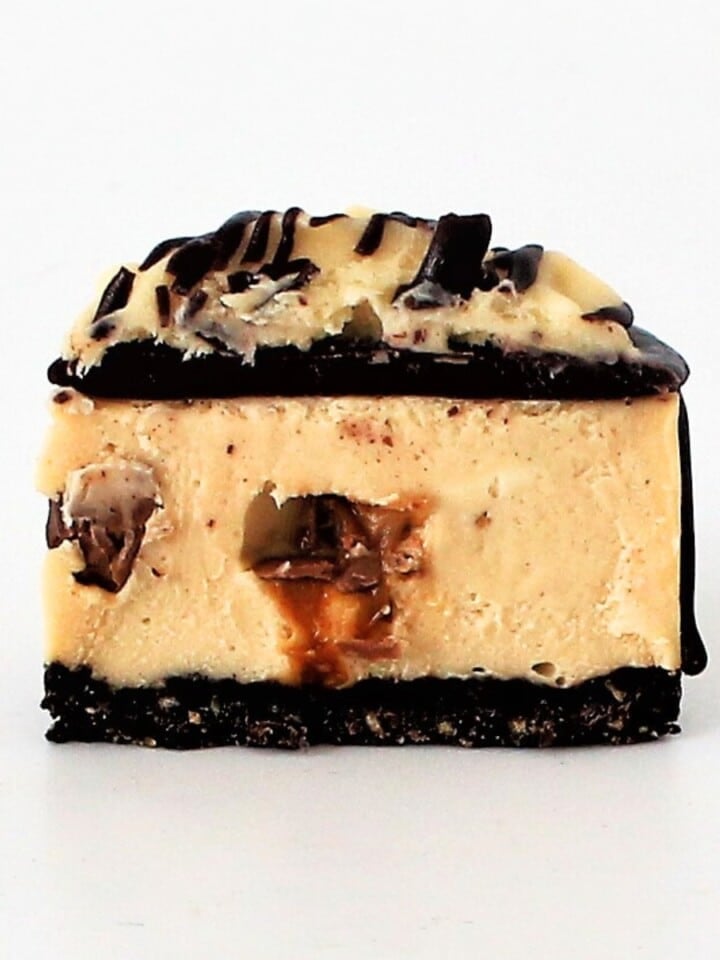
- Tim Tam Mini Cheesecakes
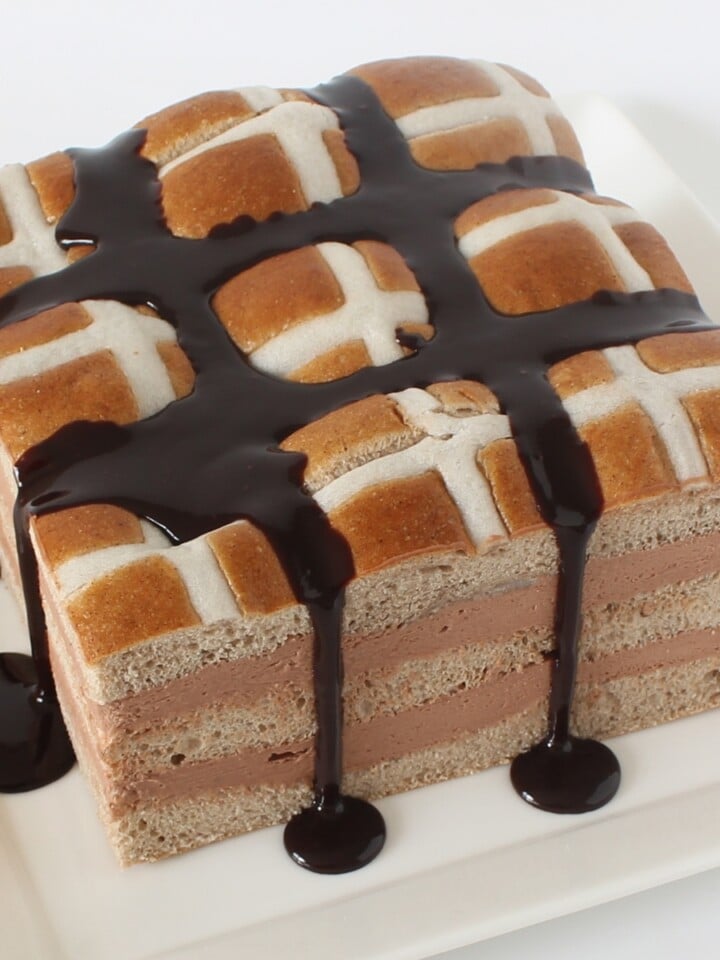
- Hot Cross Bun Chocolate Cheesecake
- Mint Chocolate Cheesecake Cups
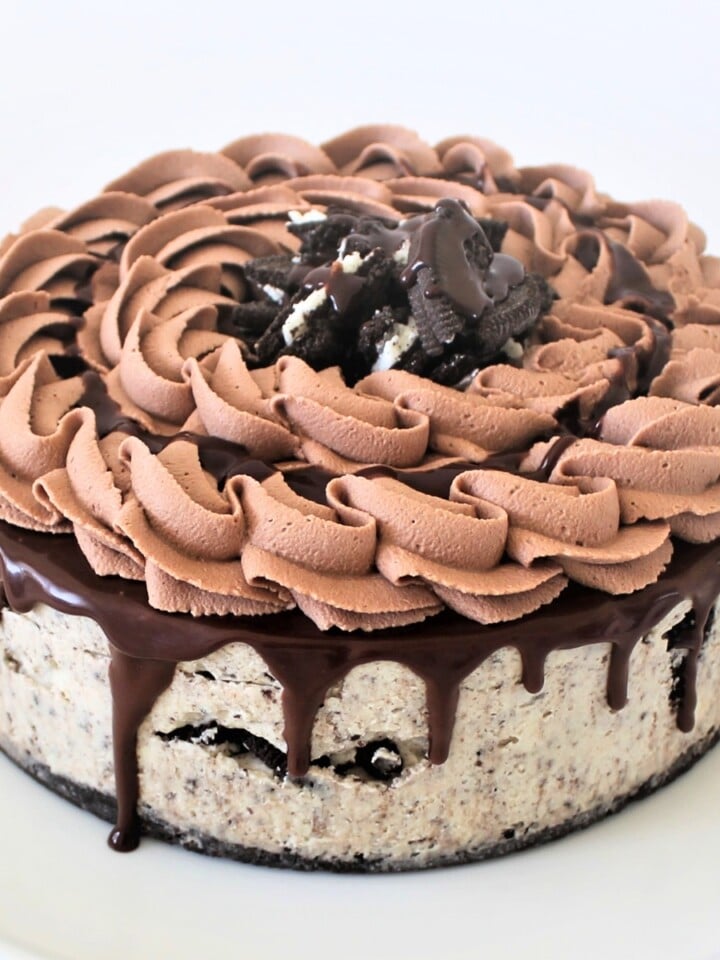
- Oreo Cheesecake Recipe

Common Questions
Yes, you can use any type of cookie you prefer. Oreos, digestive biscuits, or even shortbread cookies work well as alternatives to graham crackers.
The mini cheesecakes should be frozen overnight to ensure they are fully set and easy to remove from the molds.
Store the mini cheesecakes in an airtight container in the refrigerator for up to 3 days. If you need to store them longer, keep them in the freezer for up to 2 months and thaw in the refrigerator before serving.
Yes, you can substitute milk chocolate for dark chocolate if you prefer a sweeter taste. Adjust the sugar level according to your taste, as milk chocolate is already sweeter than dark chocolate.
Mini Chocolate Cheesecakes
INGREDIENTS
Base
- 200 g (7 oz) graham crackers crushed
- 80 g (5.6 tablespoon) butter unsalted, melted
Chocolate Cheesecake Filling
- 3 teaspoon (3 teaspoon) gelatine powder
- 3 tablespoon (3 tablespoon) water hot
- 250 g (8.8 oz) cream cheese
- 150 g (¾ cups) sugar
- 175 g (6.2 oz) dark chocolate
- 600 ml (20.3 floz) heavy cream
- 2 teaspoon (2 teaspoon) vanilla
Chocolate Truffle Topping
- 300 g (10.6 oz) dark chocolate
- 150 ml (5.1 floz) heavy cream
Optional Garnish
- edible gold leaf
INSTRUCTIONS
Base
- Mix crushed graham crackers and melted butter in a bowl.
- Press the mixture firmly into the bottom of each cavity of a silicone mold or cupcake tray lined with paper baking cups.
- Refrigerate while preparing the filling.
Chocolate Cheesecake Filling
- Add gelatine and hot water to a small bowl or cup and stir well to dissolve gelatine. Microwave for 10 seconds if crystals remain.
- Beat cream cheese and sugar on medium speed until smooth.
- Melt dark chocolate in 30-second bursts in the microwave, stirring each time.
- Add melted chocolate to the cream cheese mixture and mix well.
- Add heavy cream and vanilla extract to the bowl and mix on medium speed.
- With the mixer running, gradually add the gelatin mixture, continuing to mix until well combined.
- Pipe or spoon the mixture over the crumb base, filling the molds to the top.
- Smooth the tops with an angled spatula and freeze overnight.
Truffle Topping
- Heat cream until just before boiling, then pour over the dark chocolate in a heatproof bowl.
- Let sit for one minute, then stir until smooth. Microwave in 30-second intervals if lumps remain.
- Reserve 2 tablespoons of the ganache for garnish, and refrigerate the rest, stirring every 10 minutes until thickened.
Assembly
- Remove cheesecakes from the molds and place them on a serving platter.
- Reheat the reserved ganache for 10 seconds and drizzle over the cheesecakes.
- Fit a piping bag fitted with a large French star tip and fill with the thickened ganache.
- Pipe a ganache kiss on top of each cheesecake.
- Optionally, garnish the truffle kiss with a tiny piece of gold leaf.
- Refrigerate for two hours to thaw before serving.
NOTES
- Crush the graham crackers finely for a smoother base.
- Ensure the gelatin is fully dissolved for a smooth filling.
- Use good quality dark chocolate for a richer taste.
- Allow the ganache to cool to the right consistency before piping.
- Freeze the cheesecakes overnight for the best results.

Jayna says
I tried making these in 2021 and they came out so good! I am excited to make them again this spring.
Fay says
How fabulous Jayna!
Jeannie says
I have tried a few of your cheesecake recipes now, and I know it's an issue on my end, but no matter how liquified my gelatin is, and no matter how room temperature my other ingredients are, once the gelatin touches the cooler cheesecake mix, it immediately begins to turn to gelatin and doesn't mix cohesively. Of course, this is a turnoff when you're eating it and find a gelatinous bit. Any tips? I've watched many of your videos and this never appears to happen to you. Is there a tip you can provide that could help?
Fay says
Hi Jeannie, You’re not alone—this is a super common issue when working with gelatin in no-bake cheesecakes. And I totally get how off-putting those rubbery bits can be!
Here’s what’s likely happening: even if your gelatin is fully dissolved and your cheesecake mixture is at room temp, the gelatin can still "shock set" when it hits a slightly cooler batter. That means it starts to firm up the second it touches anything cooler than itself. But there’s a simple fix that works like magic every time.
Try this tip: Once your gelatin is fully dissolved and liquid (either in water or whatever liquid you’ve bloomed it in), take a few tablespoons of your cheesecake mixture and quickly whisk it into the warm gelatin. This step tempers the gelatin, bringing both components closer to the same temperature. Then pour that combined mix back into your main cheesecake batter and mix well. This avoids sudden temperature drops and helps the gelatin stay smooth and evenly distributed.
A few extra things that help:
1. Don’t let the gelatin cool too much before adding it. You want it warm but not hot (this is brand dependent as I can use hot).
2. Work fairly quickly once it’s mixed. If it sits too long, it starts setting even before it’s fully blended.
3. A stick blender can help fix small lumps if you catch them early, but prevention with tempering is always best.
Hope that helps!