
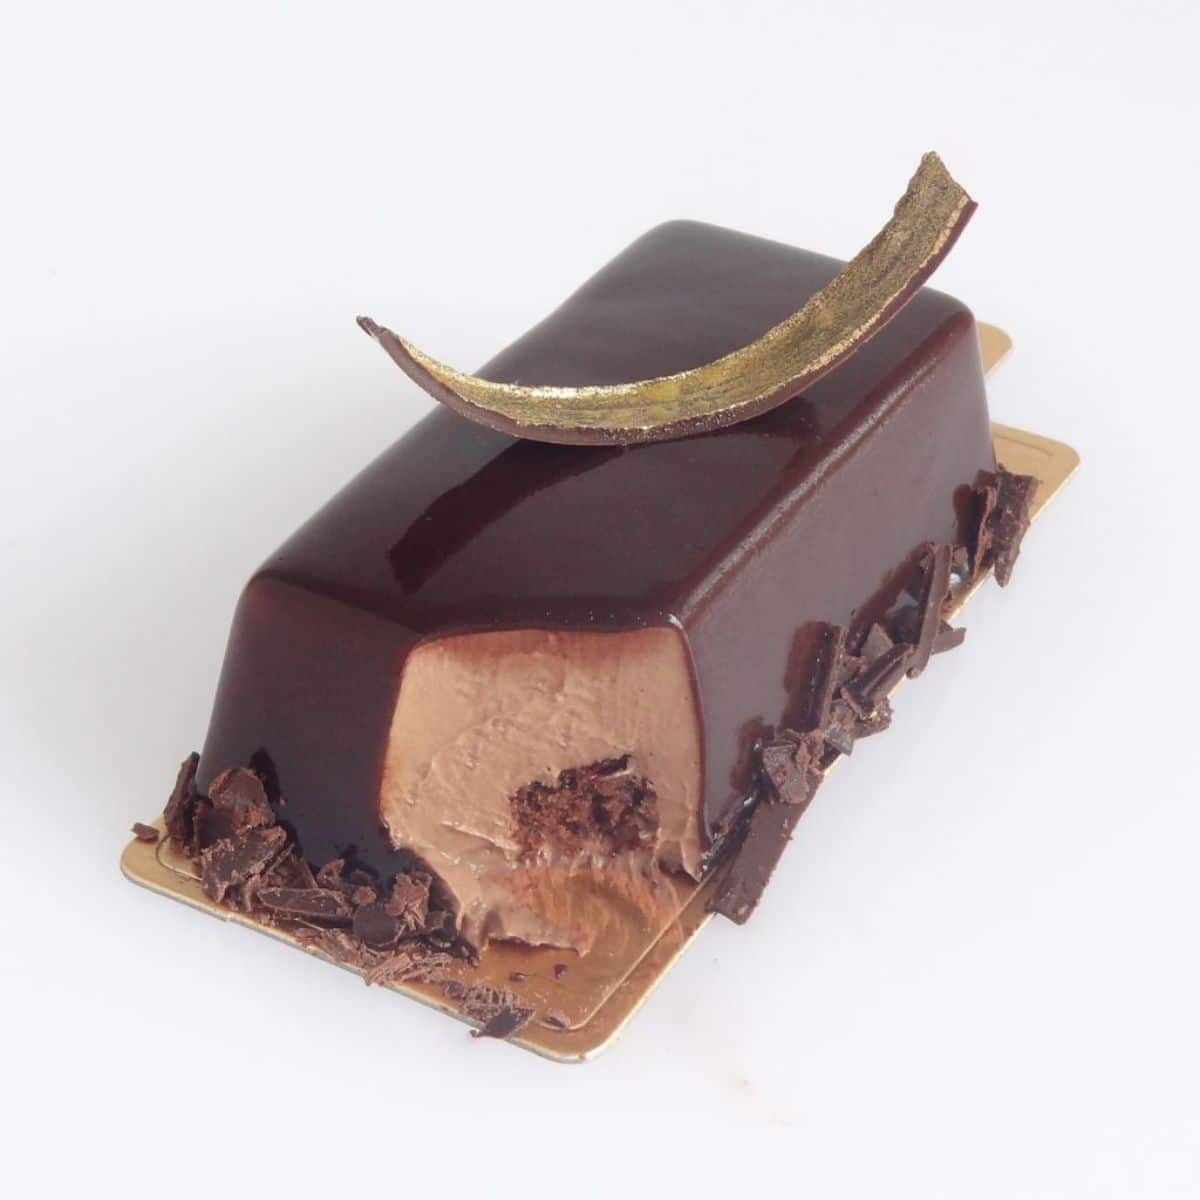
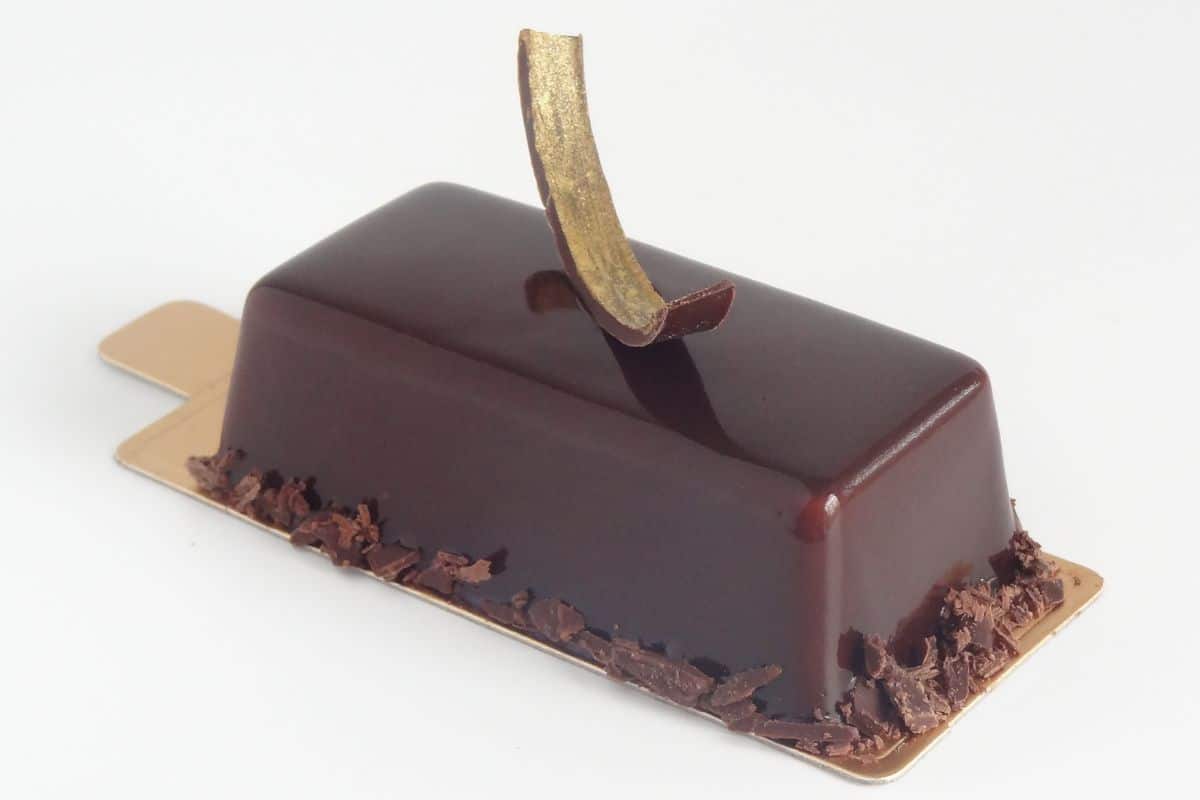
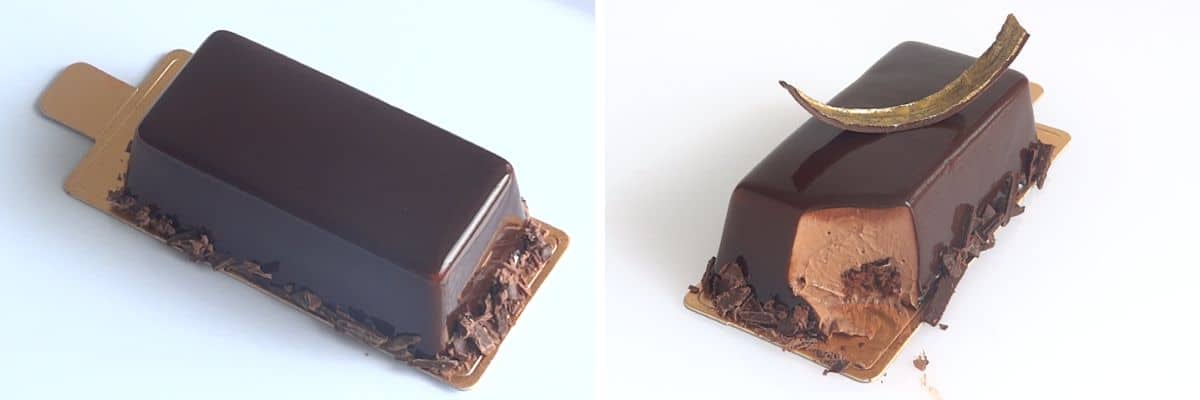
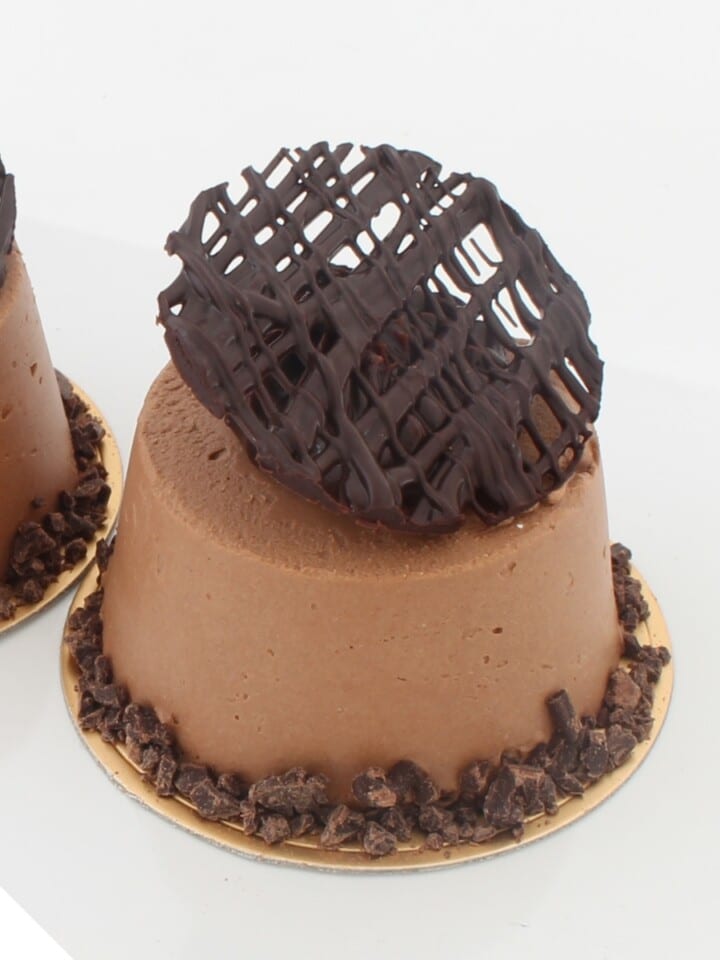
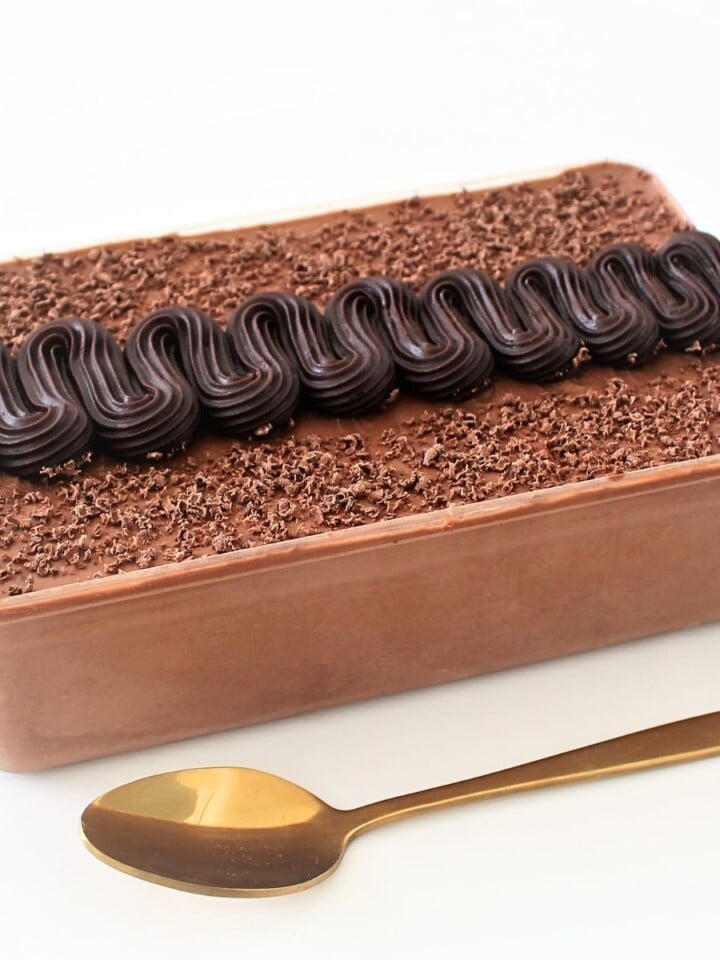
Mirror Glaze Chocolate Mousse Bars! This delectable dessert combines the velvety richness of dark chocolate mousse with a glossy mirror glaze. This creates a dessert that's as stunning as it is delicious. It has layers of velvety chocolate mousse and a surprising twist of cookies that soften into a cake-like texture. These bars offer an irresistible blend of textures and flavors. This chocolate mousse recipe is where it's at!
SUMMARISE AND SAVE THIS RECIPE
Why You'll Love My Chocolate Mousse Recipe
Easy-to-Make Mousse: The chocolate mousse in this recipe is incredibly simple to whip up. The simple step-by-step instructions will mean success every time!
Decadent Chocolate Flavor: These bars offer an intense, rich chocolate flavor that's hard for any chocolate lover to resist.
Visually Stunning: The mirror glaze gives them a shiny finish. This makes them look like they're straight from a fancy bakery.
Impressive Presentation: Serving these bars will seriously impress your guests. You will make them feel like they're having a high-end dessert experience.
Satisfies Sweet Cravings: Whether you're a big fan of sweets or just want a dessert that hits the spot, these bars are perfect for satisfying your cravings.
Last-Minute Dessert: If you keep a batch in the freezer, and you'll always have an amazing dessert option. This is great when unexpected guests or when you get a spontaneous sweet tooth. You can even use a simple finish like a dusting of cocoa powder for an easier variation!
For a Christmas themed glazed dessert, try my Red Mirror Glaze Christmas Ornament Dessert.
Ingredients In Mirror Glaze Chocolate Mousse Bars
Chocolate Mousse Recipe:
- Gelatine: Gelatine is a setting agent that helps the mousse hold its shape. I softened it in cold water before I used it.
- Dark Chocolate: Dark chocolate with a high cocoa content provides the rich and intense chocolate flavor that forms the base of the mousse.
- Heavy Cream: Heavy cream, also known as whipping cream, adds creaminess and richness to the mousse.
- Chocolate Cookies: IO broke the cookies into pieces and added between the mousse layers. Over time, they soften and take on a cake-like texture, providing a delightful textural contrast.
Chocolate Mirror Glaze Recipe:
- Sugar: I used sugar to sweeten the glaze and give it a glossy finish.
- Water: Water is combined with sugar and other ingredients to create a syrup that forms the base of the glaze. More importantly, when properly prepared, results in the characteristic glossy appearance of the glaze.
- Cocoa Powder: Cocoa powder contributes to the chocolate flavor of the glaze and also adds depth to its color.
- Heavy Cream: Similar to the mousse, heavy cream is used in the glaze to add creaminess and richness.
- Gelatine: Gelatine is used to help the glaze set and create a smooth, mirror-like finish. It's bloomed in water before adding to the glaze.
Garnishes:
- Grated Chocolate: I chose grated chocolate to garnish the mousse bars, adding both visual appeal and a touch of extra chocolate flavor.
- Melted Chocolate: Melted chocolate is applied to acetate strips to create the decorative chocolate curls..
- Edible Gold Dust: I mixed edible gold dust with vodka to paint the chocolate curls for an elegant and luxurious finish. You could also use lemon extract.

How To Make Glazed Chocolate Mousse Bars
Chocolate Mousse Recipe:
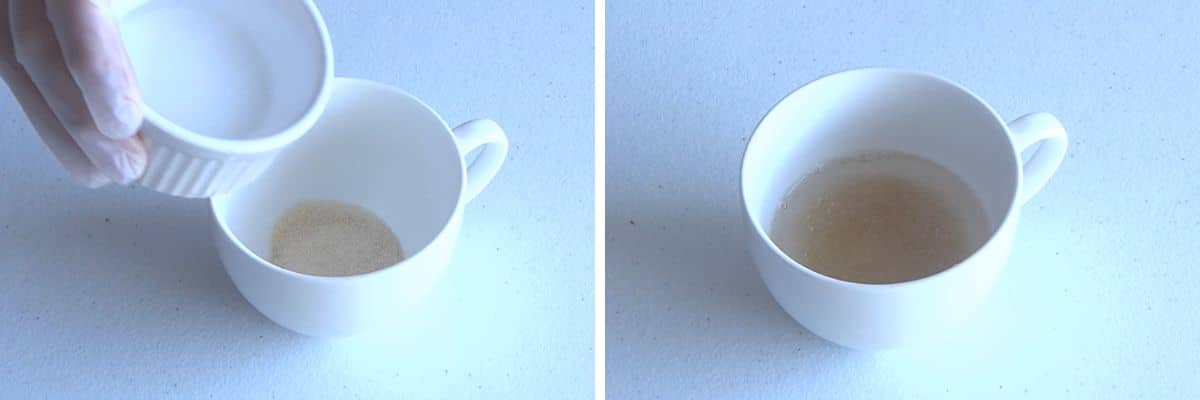
Prepare Gelatine: Start by mixing gelatine with cold water in a small bowl. Allow the gelatine to sit for about 5 minutes. During this time, it will absorb the water and become soft and pliable.
Heat Cream: In a saucepan, gently heat the heavy cream. You want it to be just on the verge of boiling, so keep a close eye on it. As soon as it's about to boil, remove it from the heat source.
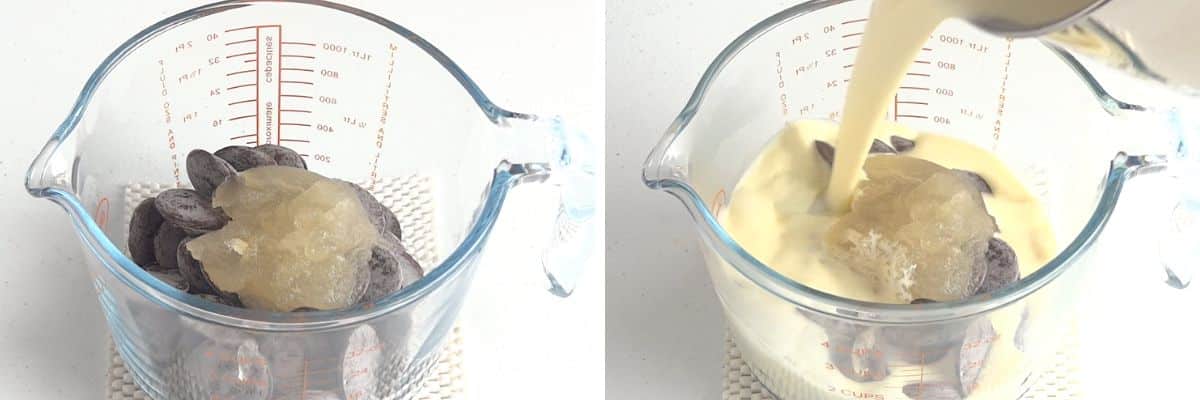
Melt Chocolate: Place your dark chocolate and bloomed in a heatproof bowl. Pour the hot cream over the chocolate and gelatine and let it sit for a couple of minutes. This will cause the chocolate to melt.
Use a stick blender to blend the mixture until it's completely smooth and the gelatine is fully dissolved in the chocolate mixture.
Strain the Mousse: To ensure an ultra-smooth texture, pass the chocolate mousse through a fine mesh strainer. This step removes any potential lumps and ensures a silky consistency.

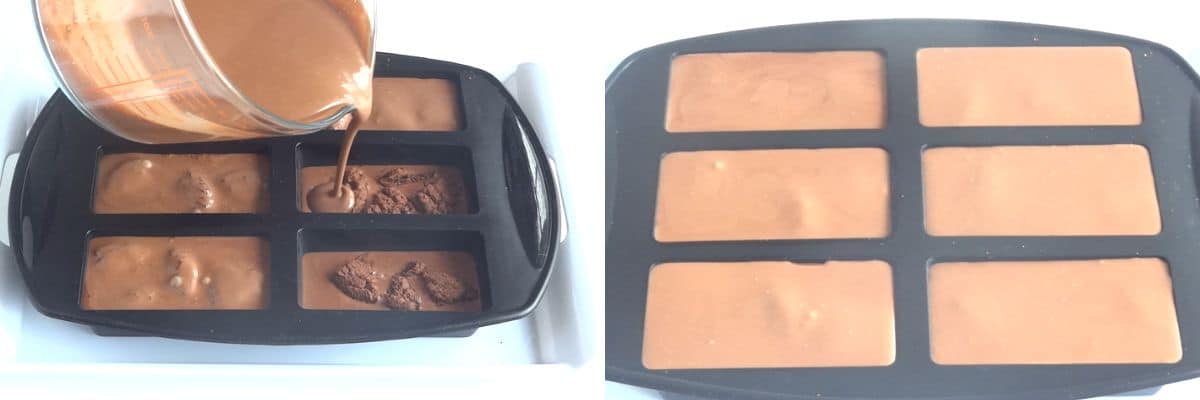
Layering: Half-fill silicone mini loaf molds with the chocolate mousse mixture. Then, add a layer of broken chocolate cookies on top. These cookies will soften and take on a cake-like texture over time. Finally, pour the remaining mousse over the cookies.

Freeze Overnight: Place the molds in the freezer and allow the mousse bars to freeze overnight. This extended freezing time is essential for setting the mousse properly.
Chocolate Mirror Glaze:
Prepare Gelatine: Similar to the mousse, bloom gelatine in a small bowl with cold water. Let it sit for about 5 minutes.
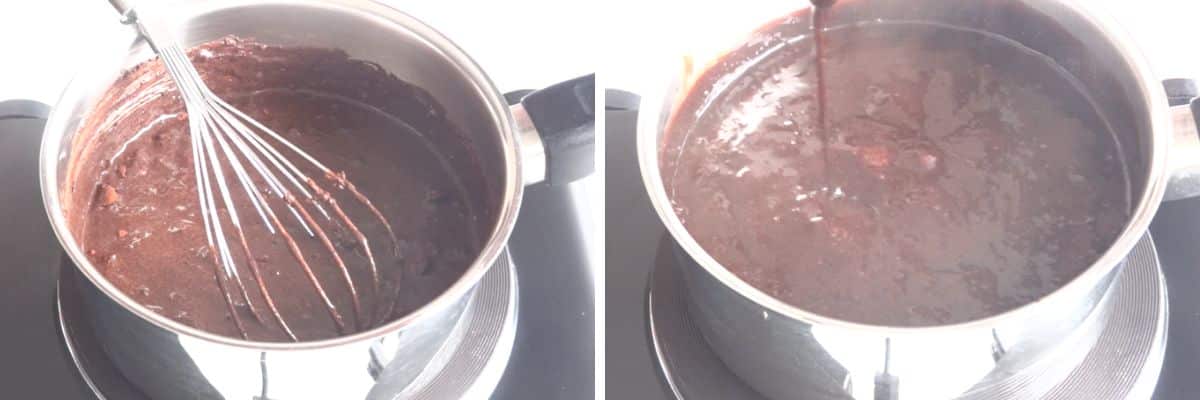
Create Glaze Base: In a saucepan, combine water, sugar, cocoa powder, and heavy cream. Stir the mixture thoroughly and heat it over medium heat until it's nearly about to boil. Then, reduce the heat and let it simmer for 2 minutes, all while stirring continuously.

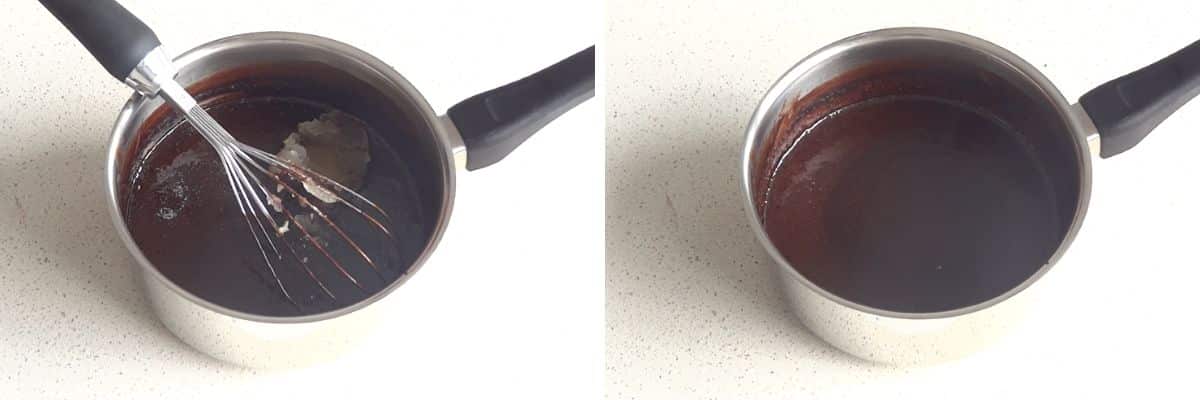
Dissolve Gelatine: Remove the saucepan from the heat source and add the bloomed gelatine. Stir vigorously to dissolve the gelatine entirely and ensure it's well-incorporated into the glaze.
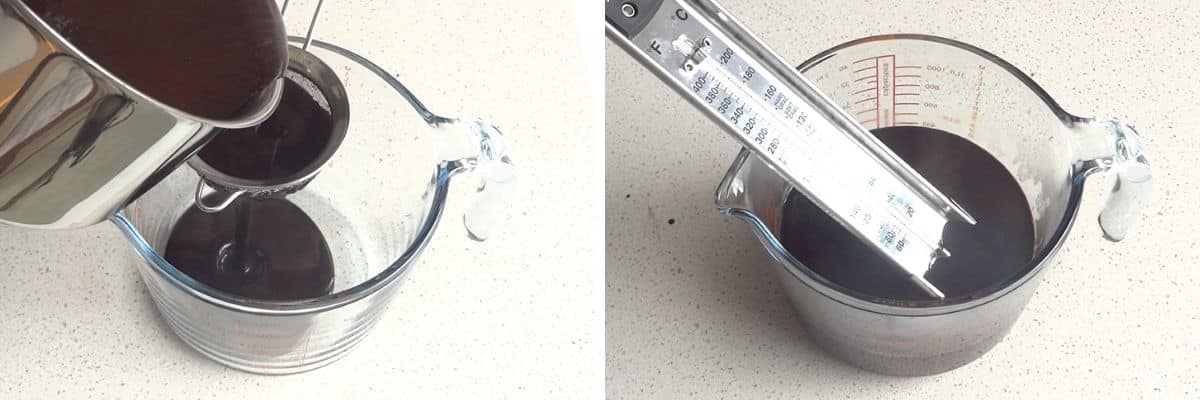
Strain the Glaze: To eliminate any potential lumps or impurities, strain the chocolate glaze through a fine mesh strainer into a heatproof jug.
Cool to the Right Temperature: Allow the glaze to cool down to 35°C (95°F) to achieve the ideal consistency for pouring. If you don't have a candy thermometer, you can aim for lukewarm, which is still suitable.
Assembling the Bars:
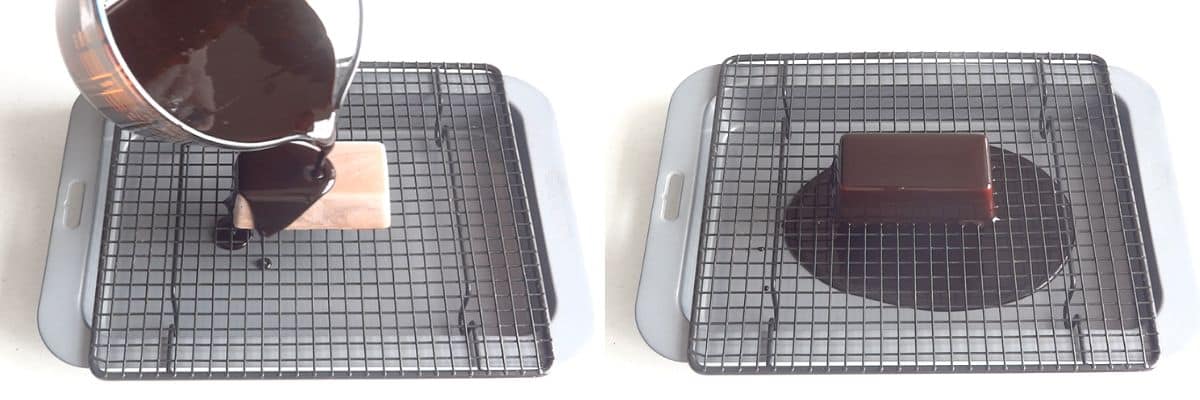
Unmold Mousse Bars: Carefully remove the frozen mousse bars from the molds. They must be fully frozen when applying the glaze.

Glaze the Bars: Place each mousse bar on a wire rack with a tray underneath to catch any excess glaze. Then, evenly pour a thin layer of the chocolate mirror glaze over each bar. Allow any surplus glaze to drip off for a few minutes.
The same temperature control applies when glazing my Speckled Robin's Egg Cheesecake, where the cheesecake is fully frozen before pouring.
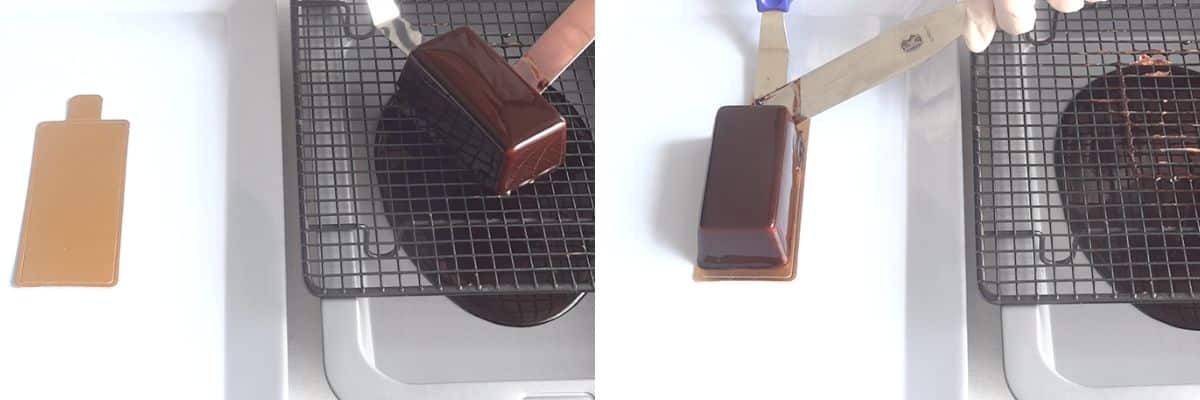
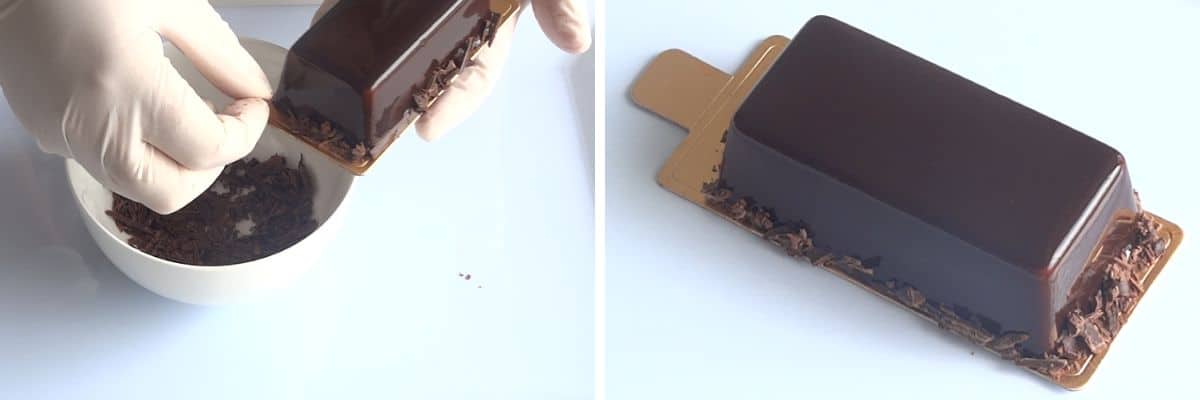
Transfer and Garnish: Gently move the glazed bars onto mini gold cake boards. For a finishing touch, garnish the lower rim of the mousse bars with finely grated chocolate.
Chocolate Decoration (Optional):
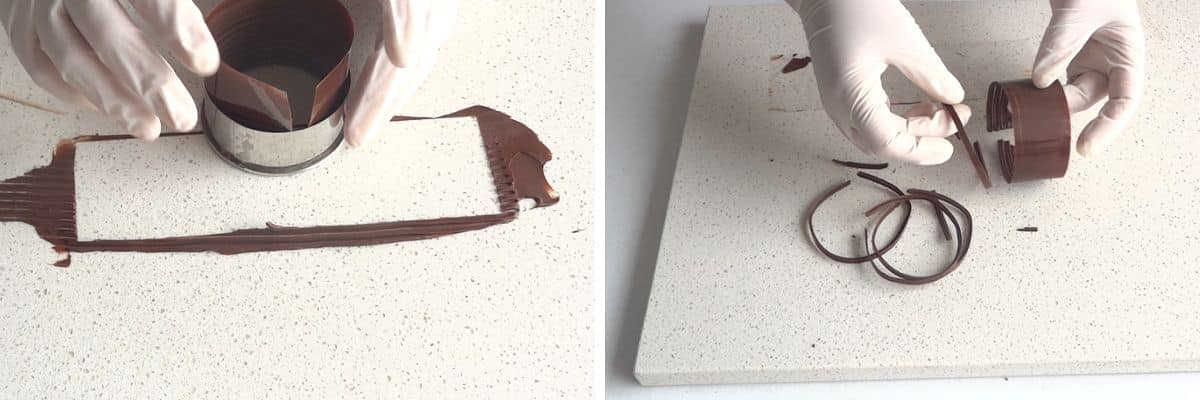
Create Chocolate Strips: Begin by applying melted chocolate to an acetate strip. Use an angled spatula to spread it evenly and run a cake comb along the strip for texture. Bend the strip into a circle and place it inside a cookie cutter for support. Let it dry thoroughly.

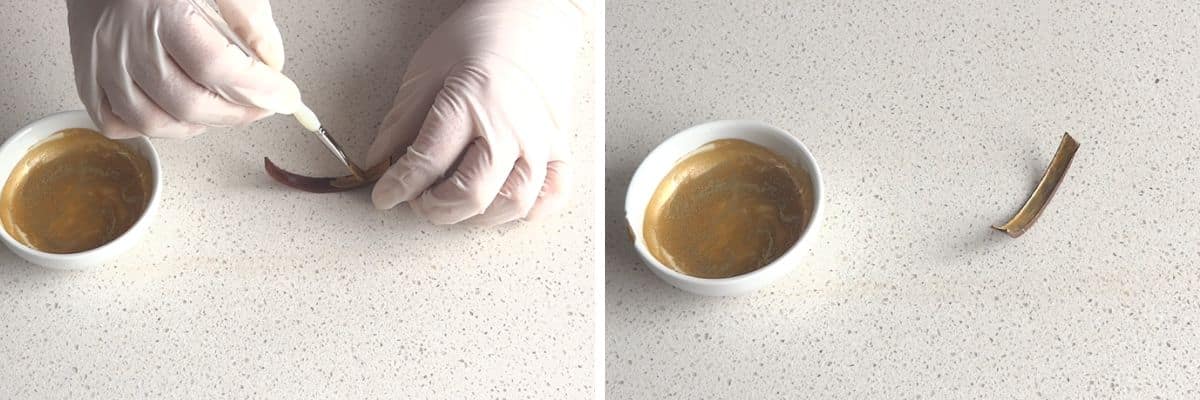
Gold Paint: Mix edible gold dust with vodka to form an edible gold paint. Use this mixture to paint the chocolate curls. Allow them to dry completely.
My Top Tip
The most important tip I can give you when making this chocolate mousse recipe is to make sure that the mousse bars are completely frozen before applying the mirror glaze. Freezing the mousse bars overnight makes them firm and solid. This means the glaze will coat the bars properly and you will be sure to get that amazing glossy finish. Attempting to glaze mousse bars that are not frozen enough can result in the glaze not setting correctly or slipping off. So, patience in the freezing step is really important for achieving the best results in both appearance and texture.

Variations And Substitutions
White Chocolate Mousse: Instead of dark chocolate, use white chocolate for a lighter and creamier mousse.
Milk Chocolate Mousse: Opt for milk chocolate if you prefer a less intense chocolate flavor in your mousse.
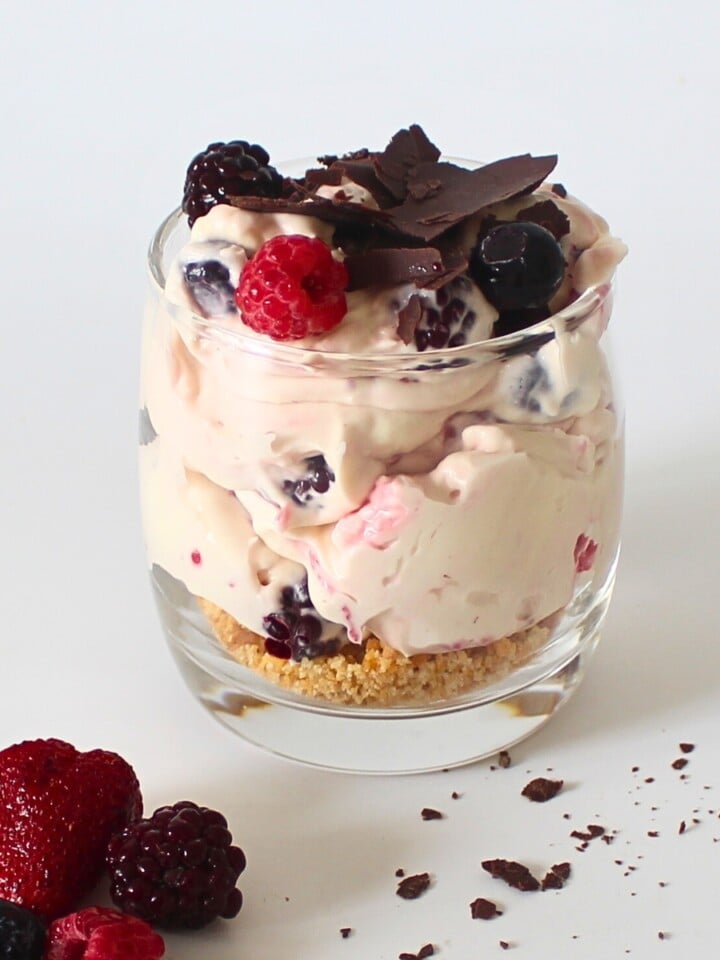
Fruit Fillings: Introduce fruit compote or fresh fruit slices between the mousse layers for a refreshing contrast. Berries, raspberries, strawberries, or passion fruit work well.
Nutty Crunch: Add a layer of crushed nuts, such as toasted almonds or hazelnuts, between the mousse layers for a satisfying crunch and nutty flavor.
Vegan Options: To make a vegan version, substitute heavy cream with coconut cream and use vegan-friendly dark chocolate. Agar agar can replace gelatine for setting. The process for activating agar agar is outline in detail in my Caramel Chocolate Panna Cotta recipe.
Gluten-Free: Choose gluten-free chocolate cookies or omit them altogether if you want to make the dessert gluten-free.
Low-Sugar: If you prefer a dessert with less sugar, use sugar substitutes or reduce the sugar content in both the mousse and glaze. Keep in mind that altering sugar content can affect the texture and consistency, so be cautious.
Decorations: Experiment with different decorations like fresh edible flowers, chopped nuts, or colorful sprinkles to add a unique touch to your mousse bars. You can also use a smidge of edible gold leaf!
Alcohol-Infused: Add a touch of your favorite liqueur, such as Grand Marnier or Amaretto, to the chocolate mousse for a boozy twist (be mindful of the amount to avoid overpowering the flavor).
More Mousse Recipes
Common Questions
Yes, unglazed bars are perfect for making ahead of time. You can store them in the freezer for several weeks, allowing you to prepare in advance for special occasions.
You can use other silicone molds or even traditional glass or metal dessert molds. Just be sure to line them with plastic wrap for easier removal. Be mindful that the surface of the chocolate mousse will not be as smooth.
Certainly! While the mirror glaze adds a stunning finish, you can opt for a simpler topping like a dusting of cocoa powder, whipped cream, or fresh berries if you prefer a quicker and easier decoration.
If you have leftovers, wrap them tightly in plastic wrap and store them in an airtight container in the freezer. When you are ready to use, bring to room temperature and re-heat very gently.
Absolutely! Feel free to experiment with your favorite cookies or biscuit flavors to add variety and customize the dessert to your liking.
Vodka is used to dilute the edible gold dust and create an edible gold paint that can be easily brushed onto the chocolate curls. It evaporates quickly, leaving behind the gold dust for an elegant finish. Lemon extract is an effective substitute.

Mirror Glaze Chocolate Mousse Bars
INGREDIENTS
Chocolate Mousse
- 3 teaspoon (3 teaspoon) gelatine
- 3 tablespoon (3 tablespoon) water cold
- 255 g (1 ½ cups) dark chocolate
- 600 ml (2 ½ cups) heavy cream
- 8 (8) chocolate cookies
Chocolate Mirror Glaze
- 3 teaspoon (3 teaspoon) gelatine
- 3 tablespoon (3 tablespoon) water
- 210 g (1 cups) sugar
- 75 g (5 tablespoon) water
- 70 g (⅘ cups) cocoa powder
- 145 g (⅗ cups) heavy cream
Garnishes
- ½ cup (½ cup) chocolate finely grated
- ¼ cup (¼ cup) chocolate melted
- ½ teaspoon (½ teaspoon) edible gold dust
- ¼ teaspoon (¼ teaspoon) vodka or lemon extract
INSTRUCTIONS
Chocolate Mousse
- Mix the gelatine and cold water in a small bowl. Allow it to sit for 5 minutes to bloom.
- In a saucepan, heat the heavy cream over medium heat until it is just about to boil. Remove it from the heat immediately.
- Place the dark chocolate and bloomed gelatine in a heatproof bowl and pour the hot cream over it. Allow it to sit for a couple of minutes to melt the chocolate. Then, use a stick blender to blend until smooth.
- Mix for a minute or so until the gelatine is fully dissolved.
- Pass the mixture through a fine mesh strainer to remove any lumps.
- Half-fill silicone mini loaf molds with the chocolate mousse mixture.
- Add a layer of broken chocolate cookies on top of the mousse. The cookies will soften and take on a cake-like texture.
- Fill the molds with the remaining chocolate mousse mixture.
- Freeze the mousse bars overnight to set.
Chocolate Mirror Glaze
- In a small bowl, add cold water to the gelatine. Stir and set it aside to bloom before using.
- In a saucepan, combine water, sugar, cocoa powder, and heavy cream. Stir well and place it over medium heat.
- Stir the mixture constantly while bringing it to a boil.
- Once it boils, reduce the heat to a simmer and continue stirring for 2 minutes.
- Remove the saucepan from the heat and add the bloomed gelatine. Stir well to fully dissolve and combine.
- Strain the glaze through a fine mesh strainer into a heatproof jug.
- Cool the glaze to 35°C (95°F) using a candy thermometer to check. If you don't have a candy thermometer, cool it to lukewarm.
- Unmold the frozen mousse bars. They must be frozen when applying the glaze.
- Place the mousse bars on a wire rack with a tray beneath to catch excess glaze.
- Pour a thin, even layer of the chocolate mirror glaze over each mousse bar. Allow excess glaze to drip off for a few minutes.
- Carefully transfer the glazed bars onto mini gold cake boards.
- Garnish around the bottom rim of the mousse bars with finely grated chocolate. The grated chocolate will stick to the glaze.
Chocolate Decoration
- Apply melted chocolate to an acetate strip and evenly spread it with an angled spatula.
- Run a cake comb along the length of the acetate strip.
- Gently bend the strip into a circle and place it inside a cookie cutter for support. Let it dry completely.
- Mix the edible gold dust with vodka to form an edible gold paint, adjusting the consistency as needed.
- Paint the chocolate curls with the edible gold paint and let them dry completely.
- Garnish each glazed mousse bar with one chocolate curl.
- Refrigerate to thaw before serving.
NOTES
NUTRITION
Video Tutorials You Might Like


Sally McCoy says
These look delicious. Can't wait to try these out. Thanks. Yum.
Fay says
They are surprisingly easy to make and look so lush! 🙂