
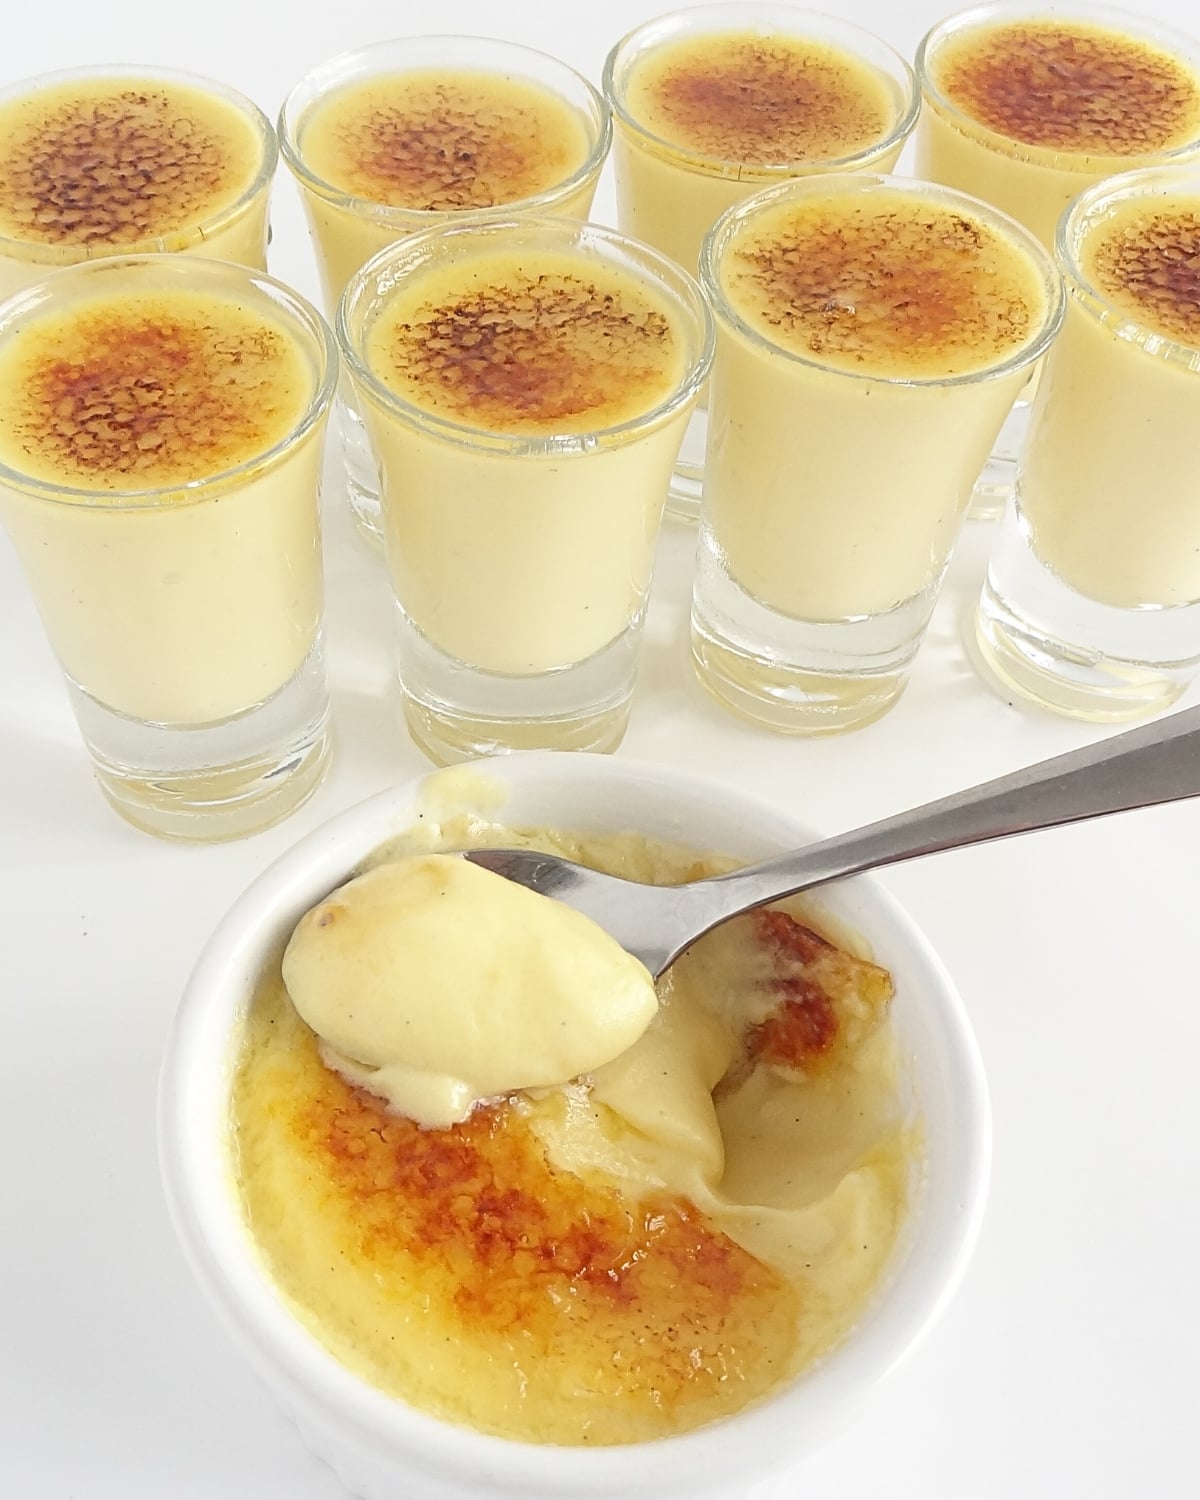
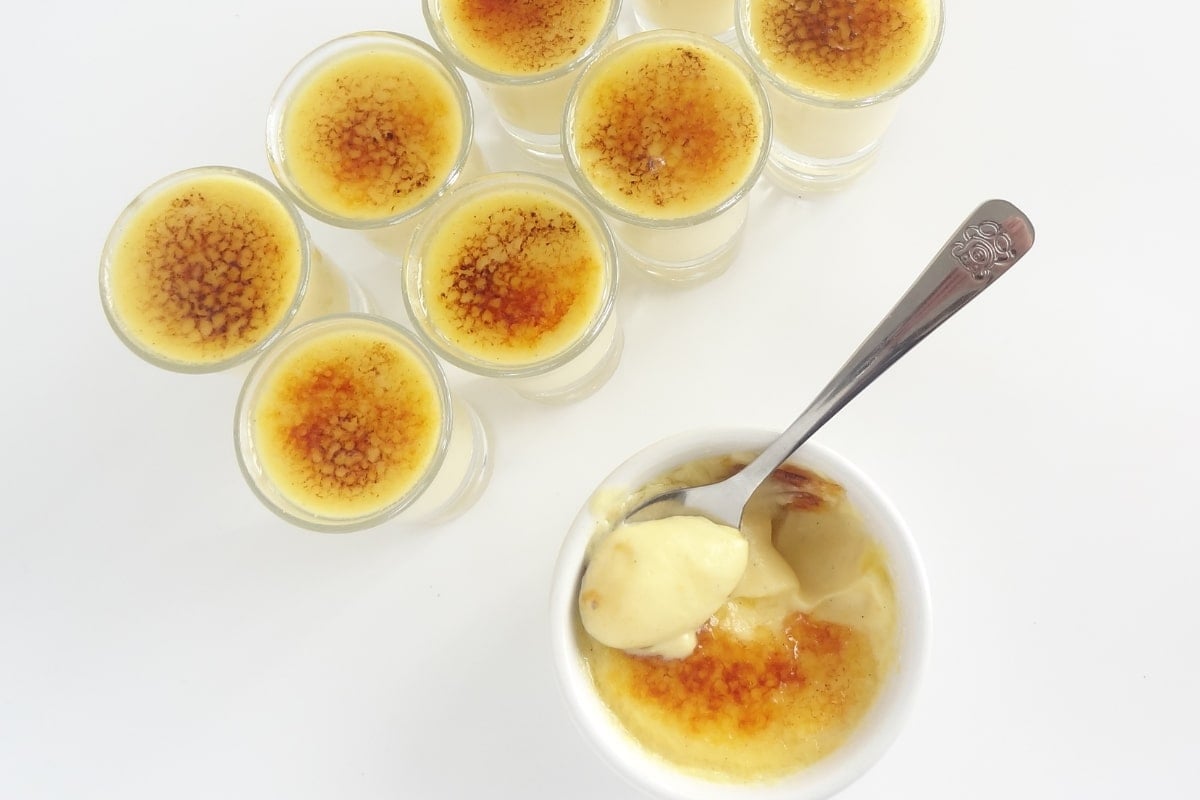
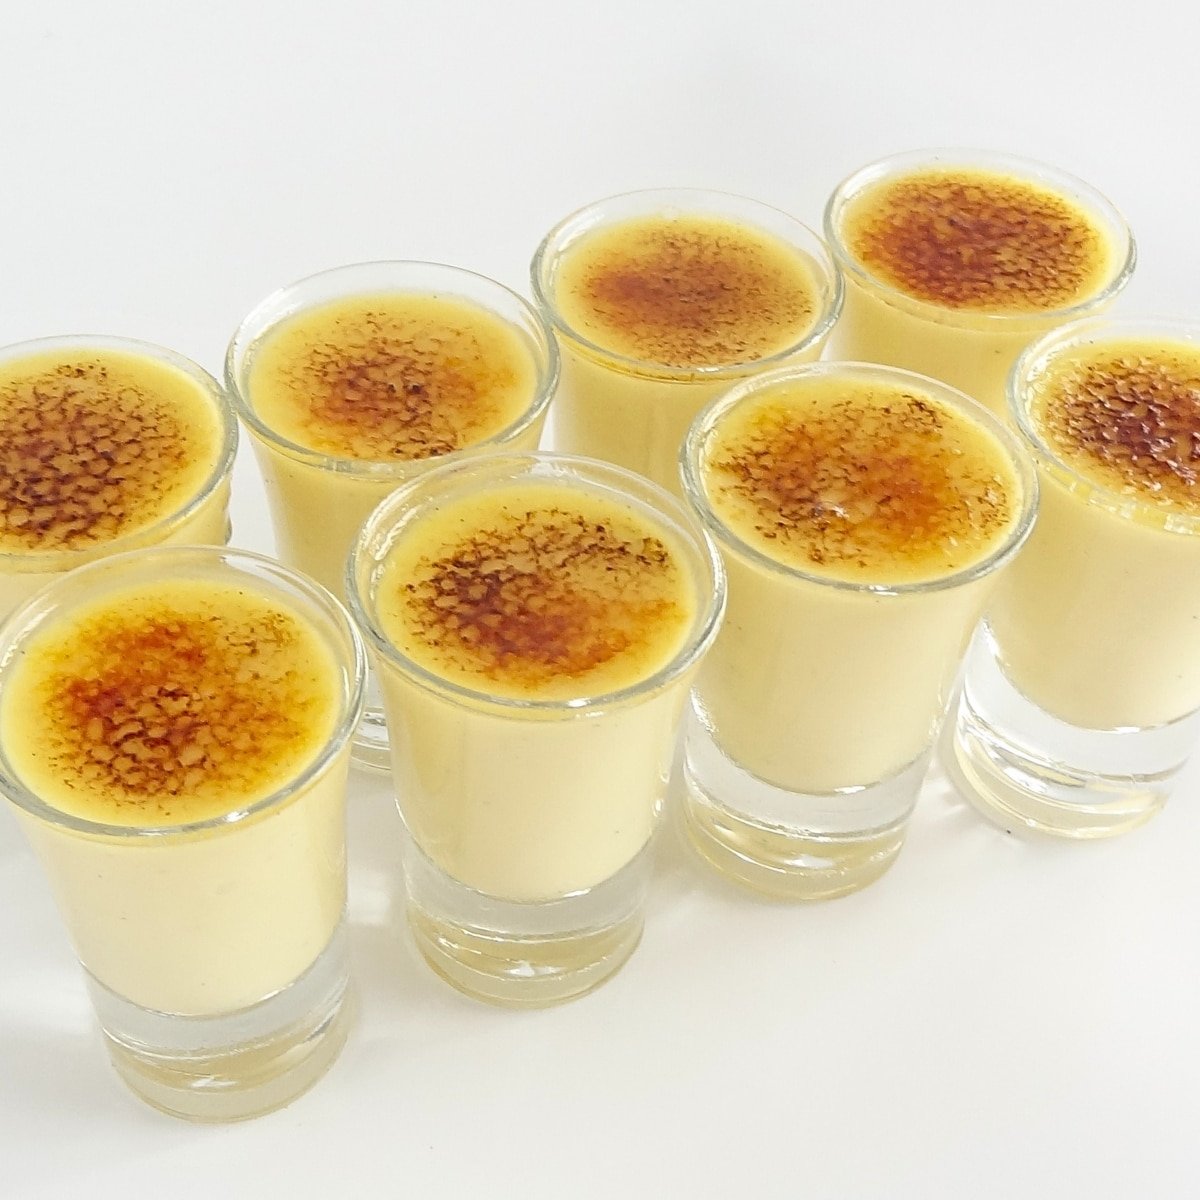
These no bake Crème Brûlée Shots are creamy, smooth, and loaded with vanilla custard flavor. You still get that crispy caramelized sugar top, just without the oven drama. They chill perfectly in mini glasses, so they're an easy make-ahead dessert that looks fancy with almost no effort.
SUMMARISE AND SAVE THIS RECIPE
Why You’ll Love These Crème Brûlée Shots
You're going to love these no bake crème brûlée shots because they've got all the flavor of classic French crème brûlée, just without the oven drama. The vanilla custard is creamy and smooth, and the caramelized sugar top gives that satisfying crack when you tap it with your spoon.
Fun fact, crème brûlée literally means "burnt cream" in French, which totally fits that golden sugar layer on top. These mini desserts in shot glasses look fancy but come together in minutes, making them the perfect make-ahead dessert for when you want something impressive with almost no effort.
Ingredients in Crème Brûlée Shots
- Sugar (3 tablespoons / 40g): Sweetens the custard and helps create that caramelized top layer.
- Cornstarch (1 tablespoon / 10g): Thickens the custard so it sets perfectly.
- Salt (pinch): Balances the sweetness and enhances the flavor.
- Large Egg Yolks (3): Add richness and give the custard body.
- Heavy Cream (16 oz / 450ml): Creates a smooth and creamy base for the custard.
- Vanilla Bean Paste (1 teaspoon / 5ml): Brings that deep vanilla flavor we all love.
- Extra Sugar for Torching (4 tablespoons / 50g): Used for the crisp, caramelized sugar topping right before serving.
These ingredients come together to make a rich, creamy vanilla custard with a sweet crackly sugar top. The sugar and cream keep it smooth, the vanilla bean paste adds that classic flavor, and the egg yolks and cornstarch help the custard set just right.
How To Make Crème Brûlée Shots
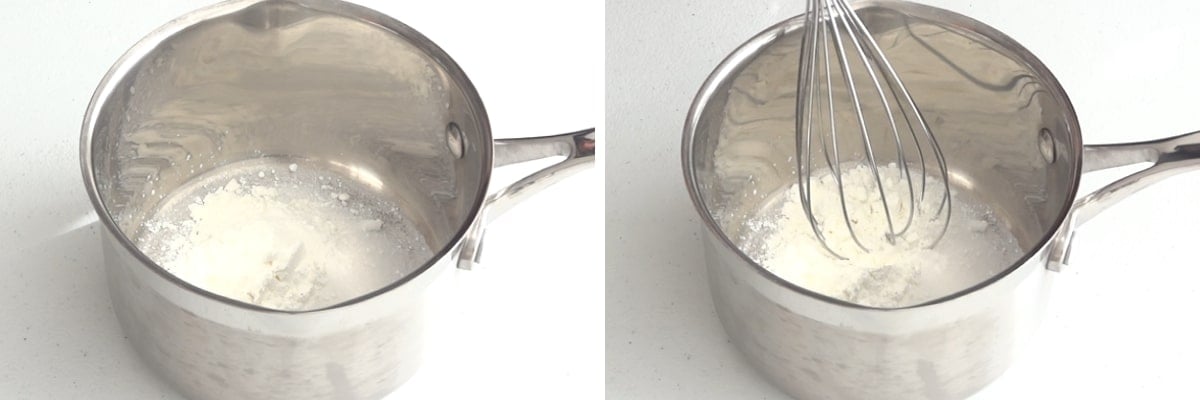
Combine Dry Ingredients: Add the sugar, cornstarch, and a pinch of salt to a saucepan. Whisk until everything's well combined. This step helps the cornstarch mix evenly so the custard thickens smoothly later on..
Add Egg Yolks: Whisk in the egg yolks until the mixture looks smooth and glossy. The yolks make the custard rich and give it that signature crème brûlée texture.

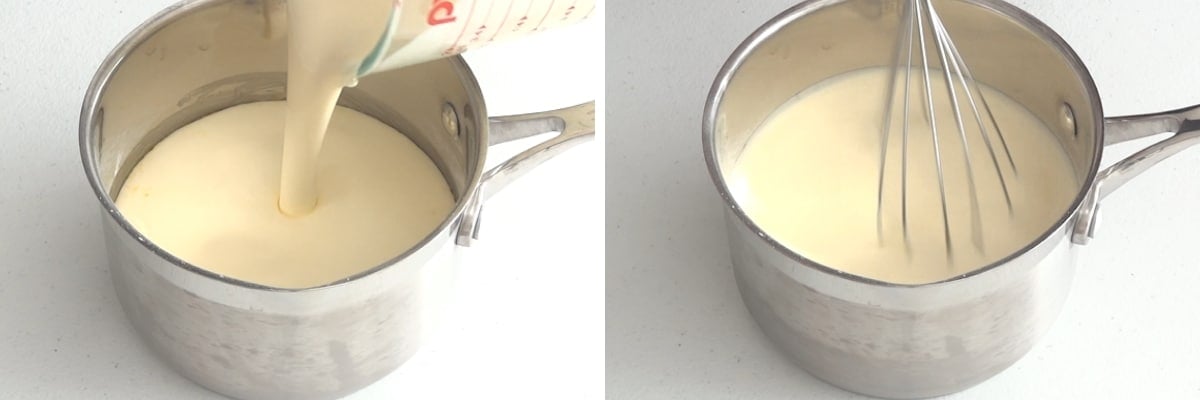
Mix in Cream and Vanilla: Pour in the heavy cream and vanilla bean paste, then whisk again until everything's fully blended. The cream makes the custard base extra silky, and the vanilla adds that deep flavor you expect from classic crème brûlée.
Cook the Mixture: Place the saucepan over medium heat and keep whisking so it doesn't catch on the bottom. Once it starts to thicken and you see tiny bubbles at the edges, take it off the heat. That simmer activates the cornstarch and gives you a smooth, creamy vanilla custard.

Strain the Mixture: Pour the custard through a fine mesh strainer into a jug to catch any cooked bits. This keeps your no bake crème brûlée shots perfectly smooth and lump free.

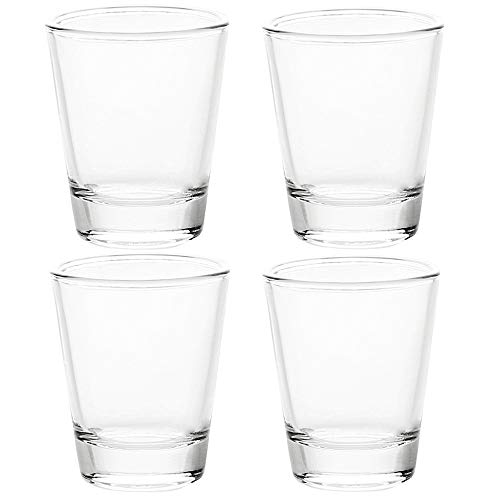
Pour into Glasses: Fill your shot glasses or small ramekins with the warm custard. This recipe makes around 12 servings, depending on the size of your glasses.

Refrigerate: Pop them in the fridge for at least two hours or up to two days. This helps the custard set and the flavors develop.
Serving Crème Brûlée Shots
Torch the Sugar: Right before serving, sprinkle a thin layer of extra fine sugar on top of each custard. Use a kitchen torch to melt and brown the sugar, moving it around constantly so it doesn't burn. Once you've got that beautiful caramelized sugar top, they're ready to serve. The mix of crunchy sugar and creamy custard is everything.


Fay's Top Tips
Keep whisking:
Don't stop whisking while the custard cooks. It keeps the mixture smooth and stops it from catching on the bottom of the saucepan. You'll know it's ready when it starts to look thick and silky.
Let it simmer:
Wait until the custard just starts to bubble before taking it off the heat. That's how the cornstarch does its job and helps your no bake crème brûlée shots set properly. If you pull it too early, it might stay a bit runny.
Torch like a pro:
When you're torching the tops, keep the flame moving in small circles. That way you'll melt the sugar evenly and get that golden caramelized layer without any burnt spots. The contrast of that crunchy top and creamy custard is what makes these so good.

Storage Tips
- Keep your crème brûlée shots covered in the fridge for up to two days before serving.
- The custard will stay smooth and creamy while it chills.
- Torch the sugar just before serving to keep the top crisp and caramelized.
- If already torched, store uncovered in the fridge for only a few hours so the sugar layer doesn't soften.
- These no bake desserts are perfect for making ahead since the custard sets nicely and keeps its texture.
Flavor Twists for Crème Brûlée Shots
Chocolate Crème Brûlée Shots
- Add: Mix 2 tablespoons cocoa powder with the dry ingredients before whisking in the wet.
- Tip: This gives your crème brûlée shots a rich chocolate flavor that pairs perfectly with the creamy custard.
Coffee Crème Brûlée Shots
- Add: Stir 1 teaspoon instant coffee or espresso powder into the cream before adding it to the mixture.
- Tip: You'll get a bold, aromatic coffee kick that turns these into the ultimate no bake dessert for coffee lovers.
Matcha Crème Brûlée Shots
- Add: Whisk 1 teaspoon matcha green tea powder with the dry ingredients.
- Tip: The matcha gives your vanilla custard a pretty green color and adds a smooth, earthy flavor.
Raspberry Crème Brûlée Shots
- Add: Drop a few fresh raspberries into the bottom of each shot glass before pouring in the custard.
- Tip: The raspberries add a light, fruity tartness that balances the caramelized sugar topping beautifully.
✨ Wrapping It Up
These no bake crème brûlée shots are creamy, smooth, and so easy to pull together. You can make them ahead, switch up the flavors, and serve them straight from the fridge. The mix of silky vanilla custard and crisp caramelized sugar makes this one of those mini desserts everyone always remembers.
Pudding Recipes You Might Like
- Eggless Malt Chocolate Pudding Log - smooth, chocolatey, and completely no bake.
- Eggless Chocolate Pudding Pots - creamy little desserts that set beautifully in the fridge.
- No Bake Chocolate Flan - rich chocolate custard with a glossy finish.
- Caramel Chocolate Panna Cotta - another quick make-ahead dessert with a silky caramel flavor.
Make It ✨ Snap It 📸 Share It! 🍨
If you whip up one of my desserts, I'd love to see it! 😍 Tag me on Instagram or Facebook so I can check out your creation. I'll be reposting my favorites and giving shout-outs in my stories! 🎉
🎥 You can also find full dessert video tutorials on my YouTube channel. I post new dessert recipes there all the time, so come join me in the kitchen on YouTube!
It's always fun to see your unique twists on my recipes, so don't be shy, snap a pic and share it! 📢🍰 #CupcakeSavvysKitchen
Helpful Questions About Crème Brûlée Shots
Yes, absolutely. You can make the custard up to two days ahead and keep it covered in the fridge. Just torch the sugar right before serving so the caramelized top stays crisp and contrasts perfectly with the creamy vanilla custard.
Yes, you can swap in vanilla extract for vanilla bean paste using the same amount (about one teaspoon). The flavor will still be delicious, just a little lighter on that deep vanilla aroma.
Keep the kitchen torch moving in small circles over the surface so the sugar melts evenly. Hold it a few inches away from the custard and use extra fine sugar for a smooth, even caramel layer without burnt spots.
Standard shot glasses between 1.5 and 2 ounces work best. This recipe makes around 12 servings, depending on size. You can also use small ramekins or dessert bowls if that's what you have on hand.
Yes, you can. Sprinkle sugar on top and place the shots under a hot oven broiler for a minute or two until the tops turn golden. Just make sure your shot glasses or ramekins are oven-proof before doing this, or they could crack from the heat. Keep a close eye while broiling so the sugar melts evenly without burning.
That usually happens when the custard gets too hot and the egg yolks overcook. Next time, take it off the heat as soon as it thickens and starts to bubble at the edges. Straining the mixture before chilling helps too.
No Bake Crème Brûlée Shots (Vanilla Custard Dessert)
INGREDIENTS
- 40 g (3 tablespoon) sugar
- 10 g (1 tablespoon) cornstarch
- ¼ teaspoon (¼ teaspoon) salt
- 3 (3) egg yolks
- 450 ml (16 oz) heavy ream
- 5 ml (1 teaspoon) vanilla bean paste
Topping
- 50 g (4 tablespoon) superfine sugar caster sugar


INSTRUCTIONS
- Combine Dry Ingredients: Add sugar, cornstarch, and salt to a saucepan. Whisk to combine.
- Add Egg Yolks: Add the egg yolks to the same saucepan. Whisk until combined.
- Mix in Cream and Vanilla: Add the cream and vanilla bean paste. Whisk again until well combined.
- Cook the Mixture: Place the saucepan over medium-high heat. Whisk constantly to prevent the mixture from burning. Continue whisking. You will notice the whisk starts to leave trails when the mixture thickens. As is starts to simmer, take it off the heat.
- Strain the Mixture: Strain through a fine-mesh strainer into a jug to remove any small bits of cooked egg.
- Pour into Glasses: Pour the mixture into shot glasses or small ramekins. Depending on the size of your shot glasses, this recipe yields approximately 12 servings.
- Refrigerate: Refrigerate for at least 2 hours or up to 2 days before serving.
- Torch the Sugar: To serve, sprinkle a thin layer of extra fine sugar on top of each custard. Use a kitchen torch to melt and brown the sugar. Move the torch constantly to avoid burning the sugar.
NOTES
- Whisk Constantly: Stops the custard from catching or burning.
- Simmer Gently: Activates the cornstarch for a smooth texture.
- Strain for Silkiness: Removes any egg bits for a perfect custard.
- Torch Carefully: Keep the torch moving to avoid burning the sugar.
- Storage: Make up to 2 days ahead and torch just before serving.
- Tip: Use oven-proof glasses or ramekins so they don't crack under the broiler heat.


Maria says
Delicious! A hit!
Fay says
Yes! Glad you like them as much as I do!
Mel says
Love that they are no bake! Great recipe.
Fay says
I agree and so creamy and silky!
Claudette says
Why, in the TIPS, does it say, Tip: Use oven-proof glasses or ramekins so they don't crack under the broiler heat." since you don't put them under the broiler? Is this a mistake or should they go under the broiler? Thank you. Can't wait to try this.
Fay says
Hi Claudette, Not a mistake, probably just wasn't worded the best! Sorry! A broiler can be used when a kitchen torch is not available. But it will need to be quick, otherwise they may "cook" too much and curdle.