
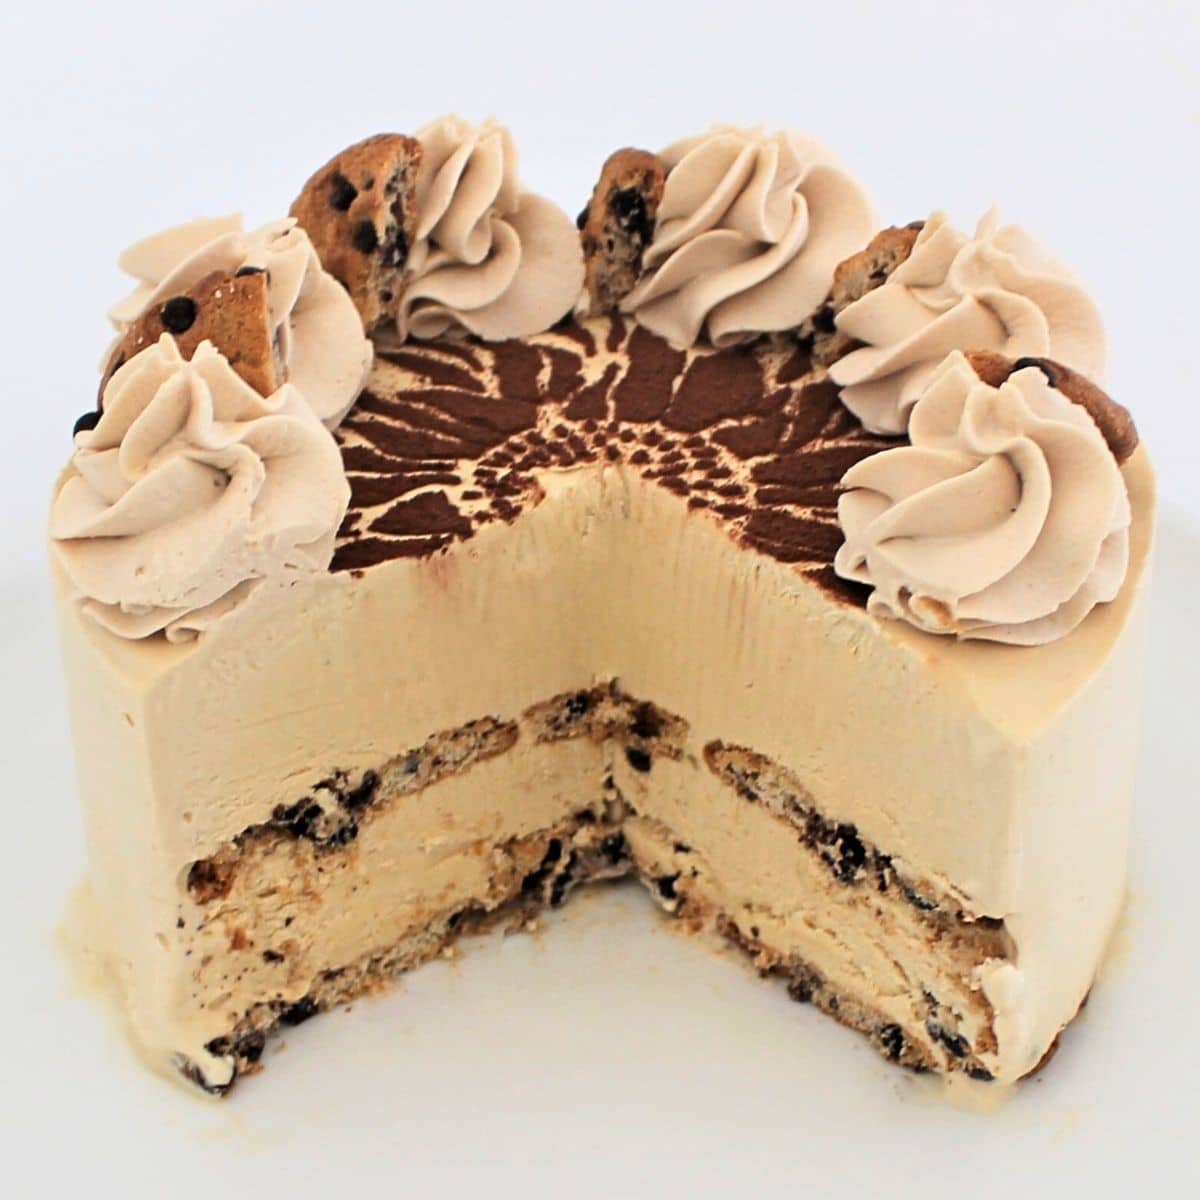
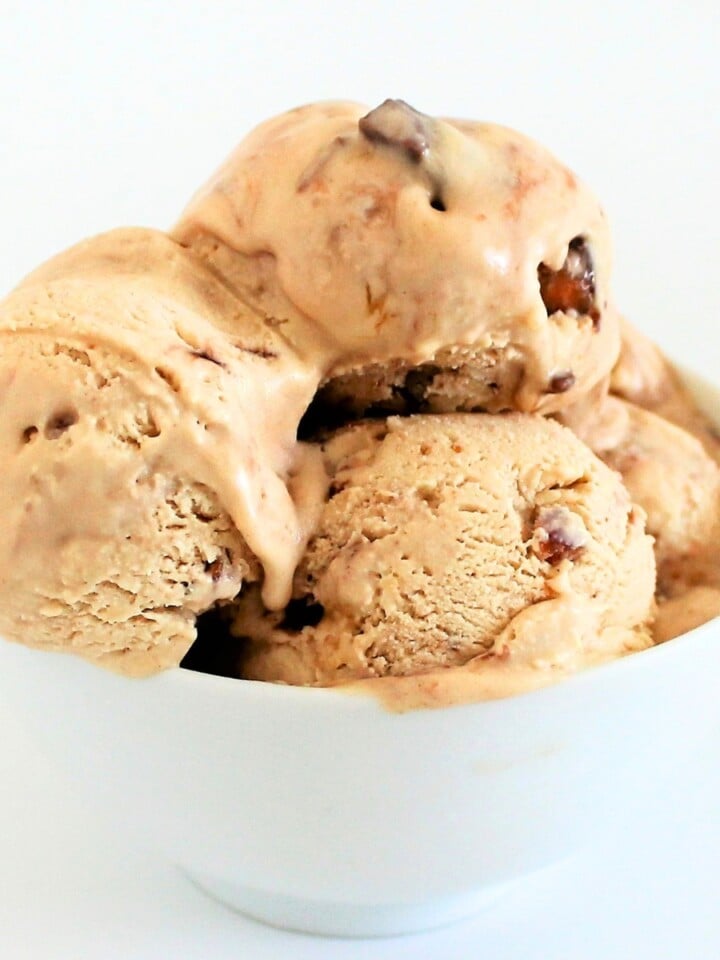
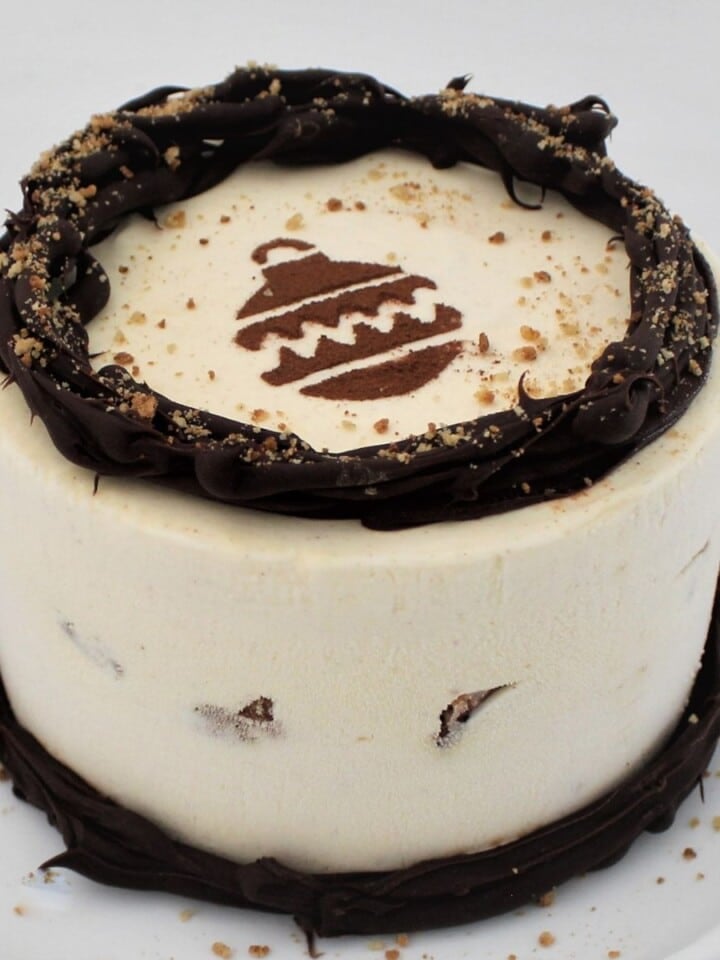
This Cappuccino Coffee Ice Cream Cake recipe is a dreamy dessert where smooth coffee ice cream meets your favorite chocolate chip cookies. These cookies soften up into cakey layers that perfectly complement the creamy ice cream.
And it doesn't stop there! You'll top it all off with velvety chocolate whipped cream, adding a hint of sweet vanilla and rich chocolate. Finish with a light sprinkle of cocoa, and there you have it – a dessert that's as stunning to look at as it is delicious!
Why You'll Love My Coffee Ice Cream Cake
Get ready - this Cappuccino Coffee Ice Cream Cake is about to become your go-to for an indulgent, memorable dessert that speaks directly to your coffee-loving heart.
It's an excellent choice for anyone looking a change from the traditional dessert path. The smooth blend of coffee-flavored ice cream and soft chocolate chip cookies provides a pleasant mix of taste and texture. Not too heavy yet still packed with favor and it's particularly refreshing for coffee enthusiasts.
If coffee isn't your thing can still make a stunning version of this delicious Ice Cream Cake my Vanilla Ice Cream Recipe or my 2-Ingredient Caramel Ice Cream Recipe!

Ingredients In My Coffee Ice Cream Cake Recipe
- Heavy Cream: The foundation for the ice cream cake and topping, heavy cream is whipped to create a light, airy texture. For the ice cream, it adds richness and creaminess. In the topping, it provides the fluffy consistency of the whipped cream.
- Sweetened Condensed Milk: This is mixed with the heavy cream to form the base of the ice cream. It adds sweetness and a smooth, dense texture, helping the ice cream set without needing an ice cream maker.
- Coffee Sachets: These sachets are the flavor stars of the coffee ice cream cake recipe, infusing the ice cream with a deep, robust coffee flavor. Using a coffee cappuccino sachet or two adds a hint of sweetness and richness typical of a cappuccino.
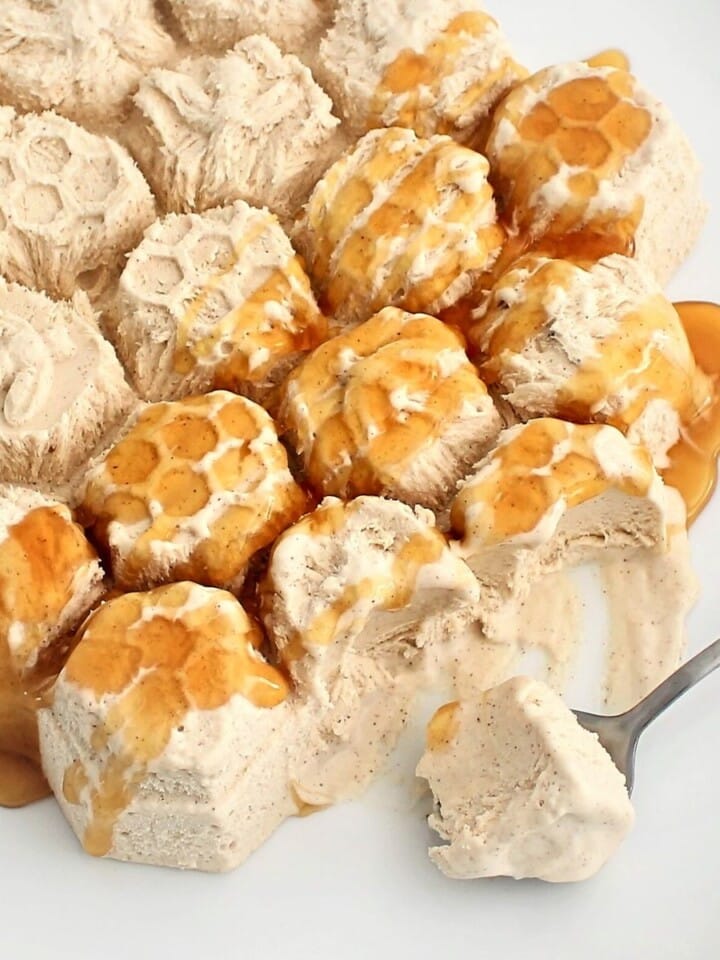
- Chocolate Chip Cookies: The cookies act as layers and add texture to the cake. They soften slightly in the ice cream, offering a cake-like consistency that complements the creamy layers. The additional cookies are used for garnish, adding a crunch and visual appeal to the finished cake.
- Powdered Sugar: Used in the whipped cream topping, powdered sugar sweetens the cream without making it grainy, ensuring a smooth texture.
- Vanilla Extract: A classic flavor enhancer, vanilla adds depth and warmth to the whipped cream topping, complementing both the chocolate and coffee flavors.
- Chocolate Sauce: This is mixed into the whipped cream topping to add a rich, chocolatey flavor, creating a beautiful contrast with the coffee-infused ice cream.
- Cocoa Powder or Chocolate Powder: Used for dusting on top of the ice cream cake, it not only adds a subtle chocolate flavor but also gives the cake an elegant, finished look.

How To Make My Coffee Ice Cream Cake
Prepare the Ice Cream Cake Mould:
Line an adjustable mousse ring with an acetate cake collar on a parchment-lined baking tray. Alternatively, you can use a 7” springform pan lined with parchment paper. This setup will help in molding the cake and ensuring easy removal once it's set.

Mix the Ice Cream Base:
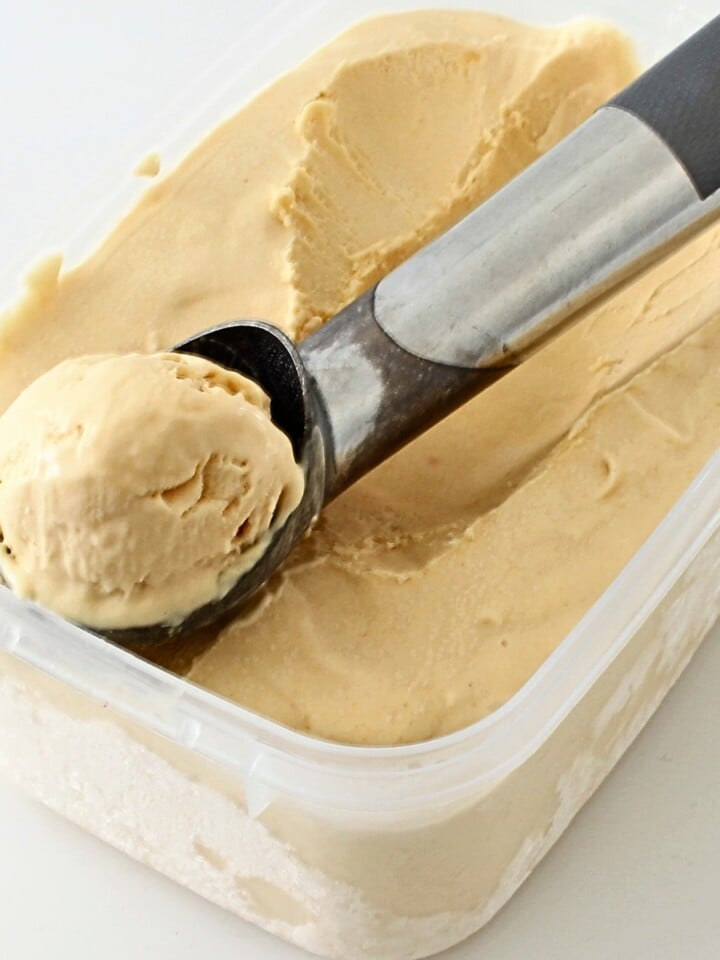
Pour heavy cream, sweetened condensed milk, and a coffee cappuccino sachet (or two) into a medium-sized bowl. Start mixing at a medium speed until the ingredients are well combined. Gradually increase to high speed and continue mixing until the mixture thickens and the volume increases by at least one-third. This process incorporates air into the mixture, giving the ice cream a light and creamy texture.


Layer the Base and Ice Cream:
Begin by arranging a layer of chocolate chip cookies at the base of your prepared mould. Break additional cookies as needed to fill in any gaps, ensuring a complete layer.

Pour half of the whipped ice cream mixture over the cookie layer, spreading it evenly. Place another layer of cookies over the ice cream, followed by the remaining half of the ice cream mixture. Smooth the top layer with a spatula to ensure it's flat and even.


Freezing the Cake:
Carefully transfer the cake into the freezer. Allow it to set for at least an hour before covering it with cling wrap to prevent ice crystals from forming. Leave it to freeze overnight, ensuring it's fully firm and set.
Prepare the Whipped Cream Topping:
While the cake is setting, prepare the whipped cream topping. In a bowl, combine heavy cream, powdered sugar, vanilla extract, and chocolate sauce. Whip the mixture until it forms stiff peaks, ready for decorating.

Decorate the Cake:
Once the cake is set, remove it from the freezer and from the mould. Peel off the acetate collar or parchment paper gently.

Place a stencil on top of the cake and dust with with cocoa powder or chocolate powder. Carefully remove the stencil to reveal the pattern.

Fill a piping bag fitted with a 1M tip with the whipped cream mixture. Pipe swirls around the edge of the cake.
Cut the remaining cookies into quarters and place a piece between each whipped cream swirl, adding a decorative and crunchy element.

Serving:
Store the cake in the freezer until you're ready to serve. To serve, take the cake out of the freezer about 10 minutes before slicing to let it soften slightly. This makes cutting easier and enhances the flavors.
Dip a sharp knife in hot water and wipe it clean between slices for neat, smooth cuts.


My Top Tip
When you're making this Cappuccino Coffee Ice Cream Cake, the most crucial tip is to get the freezing just right. It's not just about letting the ice cream set, but also about preserving the perfect texture and layers of your cake. Here's how you nail it:
- Freeze Patiently: After layering those yummy cookies and the creamy ice cream, give your cake a good overnight freeze. This patience pays off by ensuring each layer sets beautifully, keeping the cookies nicely textured, not too soft.
- Cover to Protect: An hour into freezing, snugly wrap your cake in cling wrap. This little step is big on keeping ice crystals away, so your ice cream stays smooth and dreamy.
- Final Chill: Done with the whipped cream and those fancy toppings? Pop the cake back in the freezer. This makes sure your whipped cream keeps its cool and the cake stays firm until it's showtime.
- Serving the Perfect Slices: Take the cake out of the freezer about 10 minutes before you're ready to dive in. This bit of softening makes slicing a breeze and really lets those rich flavors shine through.
Stick to these freezing tips, and you'll be the proud maker of a Cappuccino Coffee Ice Cream Cake recipe that's a hit on texture, taste, and those oh-so-important layers!

Flavor Variations
Playing with flavors can turn your Cappuccino Coffee Ice Cream Cake recipe into a new delight every time. Here are some suggestions for flavor variations:
Mocha Magic: Combine the rich flavors of coffee and chocolate by mixing in melted chocolate or cocoa powder into your ice cream base. This will give you a luxurious mocha flavor, perfect for chocolate lovers.
Caramel Delight: Swirl in some caramel sauce into your ice cream mixture before freezing. The sweetness of caramel paired with the bitterness of coffee makes for a decadent treat.
Nutty Affair: Mix in finely chopped nuts like almonds, hazelnuts, or pecans for a crunchy texture. You can also add a swirl of nut butter for a creamy, nutty flavor.
Spice It Up: For a warm, spicy note, add a pinch of cinnamon, nutmeg, or cardamom to your ice cream base. These spices pair wonderfully with coffee.
Coconut Dream: Use coconut cream instead of heavy cream and add shredded coconut for a tropical twist. Coconut and coffee are a delightful pairing.
Irish Cream: Add a splash of Irish cream liqueur to your ice cream mixture for an adult version. The creamy, whiskey-infused flavor complements the coffee beautifully.
More Ice Cream Recipes
- Peanut Butter Ice Cream
- Tim Tam Slam Ice Cream Recipe
- Snickers Ice Cream (No Churn)
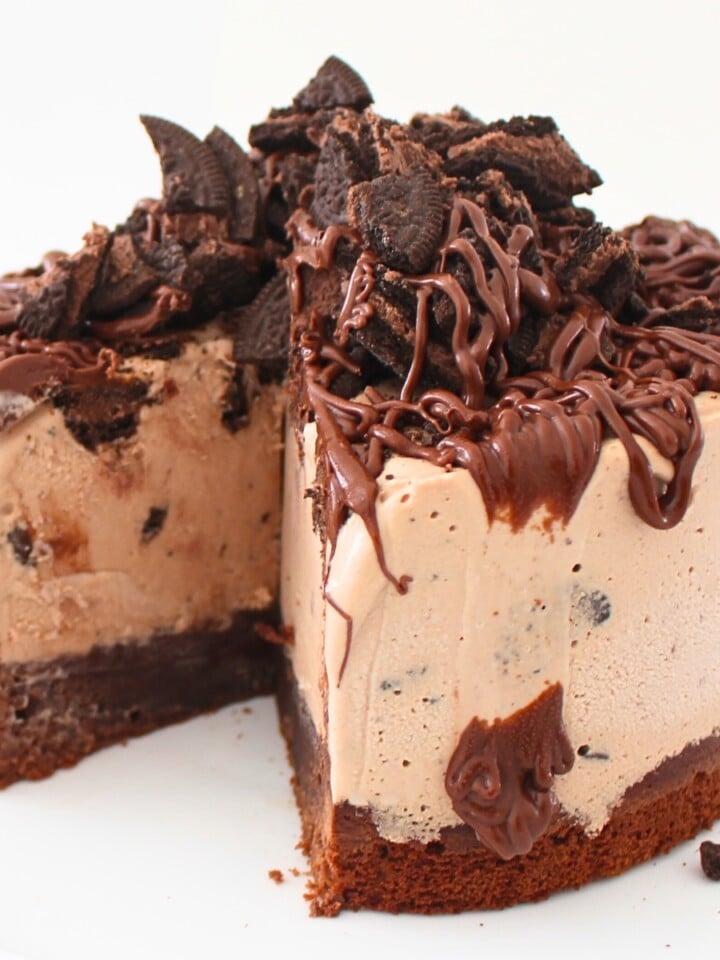
- Nutella Brownie Ice Cream Cake
Common Questions For My Ice Cream Cake Recipe
Yes, you can use a regular cake pan lined with plastic wrap or parchment paper for easy removal. Just ensure you leave enough overhang to lift the cake out once it's set. You could also use a 6" springform pan
It's best to freeze the cake overnight, or for at least 6-8 hours, to ensure it's completely set and the layers are firm.
Absolutely! You can use instant coffee or even brewed espresso. Just ensure it's strong enough to impart a good coffee flavor. Adjust the quantity to suit your taste preference.
Yes, you can use dairy-free alternatives like coconut cream instead of heavy cream and a dairy-free condensed milk alternative. Just note that the texture and flavor will vary from the original.
Certainly! A splash of coffee liqueur, Irish cream, or even a whiskey can add a lovely depth of flavor. Just be cautious with the quantity to ensure the ice cream sets properly.
Remove the cake from the freezer and let it sit at room temperature for about 10 minutes before slicing. Using a knife dipped in hot water can also make slicing easier.
Yes, this cake is perfect for making ahead. You can prepare and freeze it up to a week in advance. Just add the whipped cream topping and final decorations before serving.
Cappuccino Coffee Ice Cream Cake
INGREDIENTS
Ice Cream
- 600 ml (2 ½ cups) heavy cream
- 395 g (14 oz) sweetened condensed milk
- 2 (2) coffee sachet cappuccino flavor
Layers
- 10 (10) chocolate chip cookies
Topping
- 1 cup (1 cup) heavy cream
- 1 tablespoon (1 tablespoon) powdered sugar
- 1 teaspoon (1 teaspoon) vanilla extract
- 1 tablespoon (1 tablespoon) chocolate sauce
Garnish
- 2 (2) chocolate chip cookies quartered
- 2 teaspoon (2 teaspoon) cocoa powder
INSTRUCTIONS
Ice Cream Cake
- Assemble an adjustable mousse ring, setting it to a 7" diameter, and line it with an acetate cake collar. Place this on a baking tray lined with parchment paper. Alternatively, line a 7” springform pan with parchment for easy removal later.
- In a medium-sized bowl, combine heavy cream, sweetened condensed milk, and the cappuccino coffee sachets.
- Start mixing at a medium speed until ingredients are well combined, then gradually increase to high speed. Continue beating until the mixture visibly thickens and the volume increases by at least one-third, ensuring a light, creamy texture.
- Lay the chocolate chip cookies at the base of the prepared mousse ring or springform pan, ensuring the entire bottom is covered. Break additional cookies to fill in any gaps.
- Gently pour half of the ice cream mixture over the cookie layer, ensuring an even spread.
- Add another layer of whole and broken cookies, then top with the remaining ice cream mixture.
- Smooth the top layer with a silicone spatula for an even, flat surface.
- Carefully transfer the cake into the freezer and allow it to set overnight. After the first hour, cover the cake with cling wrap to prevent ice crystals from forming.
- Once fully set, gently release the cake from the mousse ring or springform pan. Peel off the acetate collar or parchment paper from the sides with care to maintain the cake's structure. Place it on an attractive serving plate.
Topping
- In a mixing bowl, combine heavy cream, powdered sugar, vanilla extract, and chocolate sauce. Whip the mixture until it forms stiff peaks, indicating it's ready to be piped. If using a stick blender, place ingredients in a tall beaker.
- Carefully dust the top of the cake with cocoa powder or chocolate powder through a stencil for a professional, patterned appearance.
- Transfer the chocolate whipped cream into a piping bag fitted with a 1M tip, and pipe uniform swirls around the perimeter of the cake.
Garnish
- Slice the remaining cookies into quarters and place a piece between each whipped cream swirl for an elegant look.
- Store the cake in the freezer until it's time to serve.
- To serve, remove the cake from the freezer about 10 minutes before slicing. This allows the cake to soften slightly for easier cutting.
- Dip a sharp knife in hot water and wipe it clean between slices to ensure clean, smooth cuts.
NOTES
NUTRITION
Video Tutorials You Might Like


Leave a Reply