
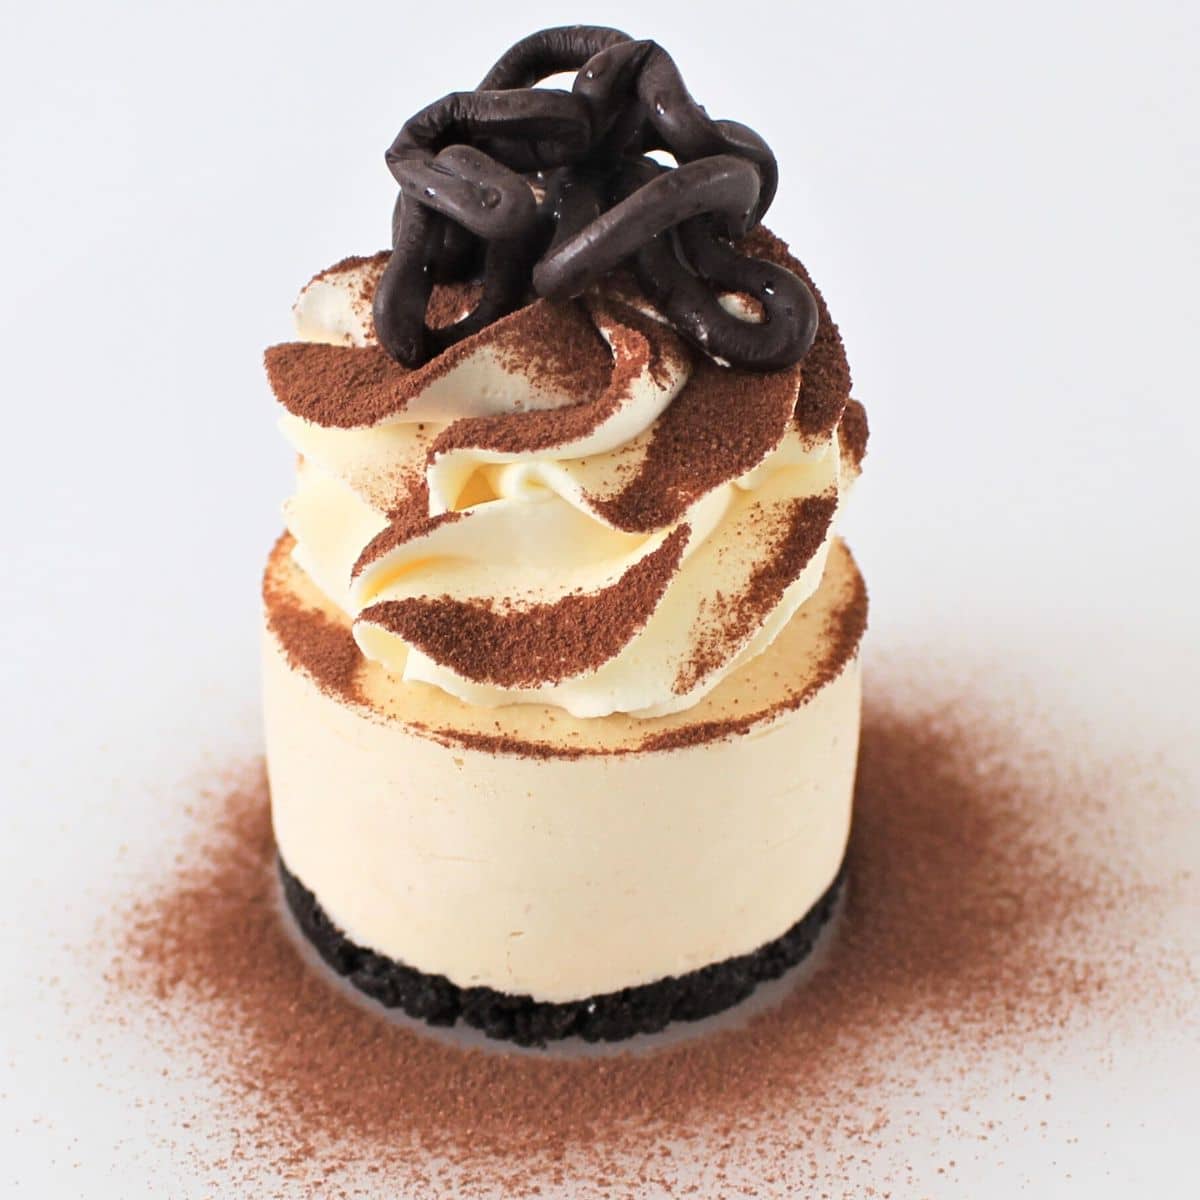
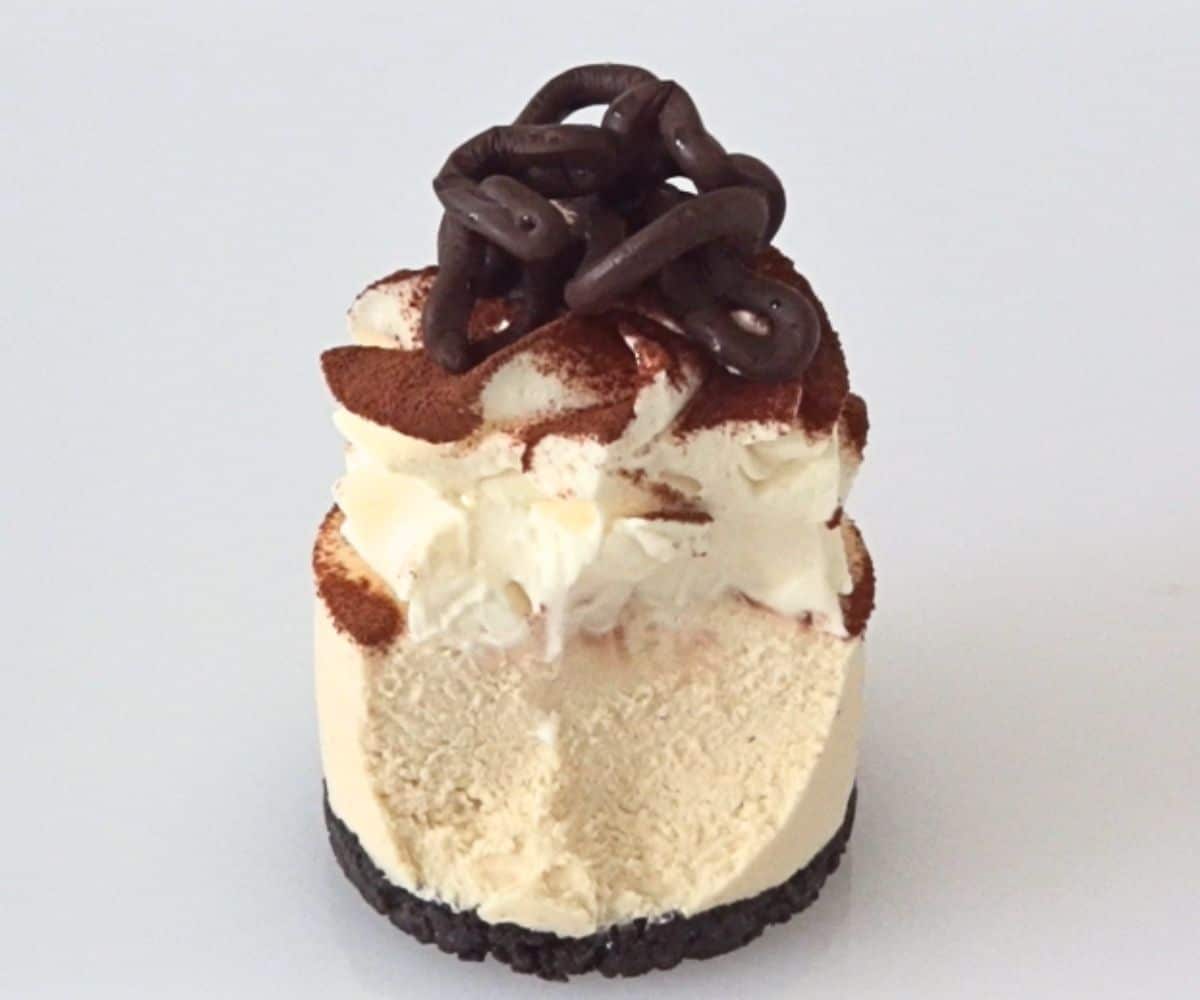
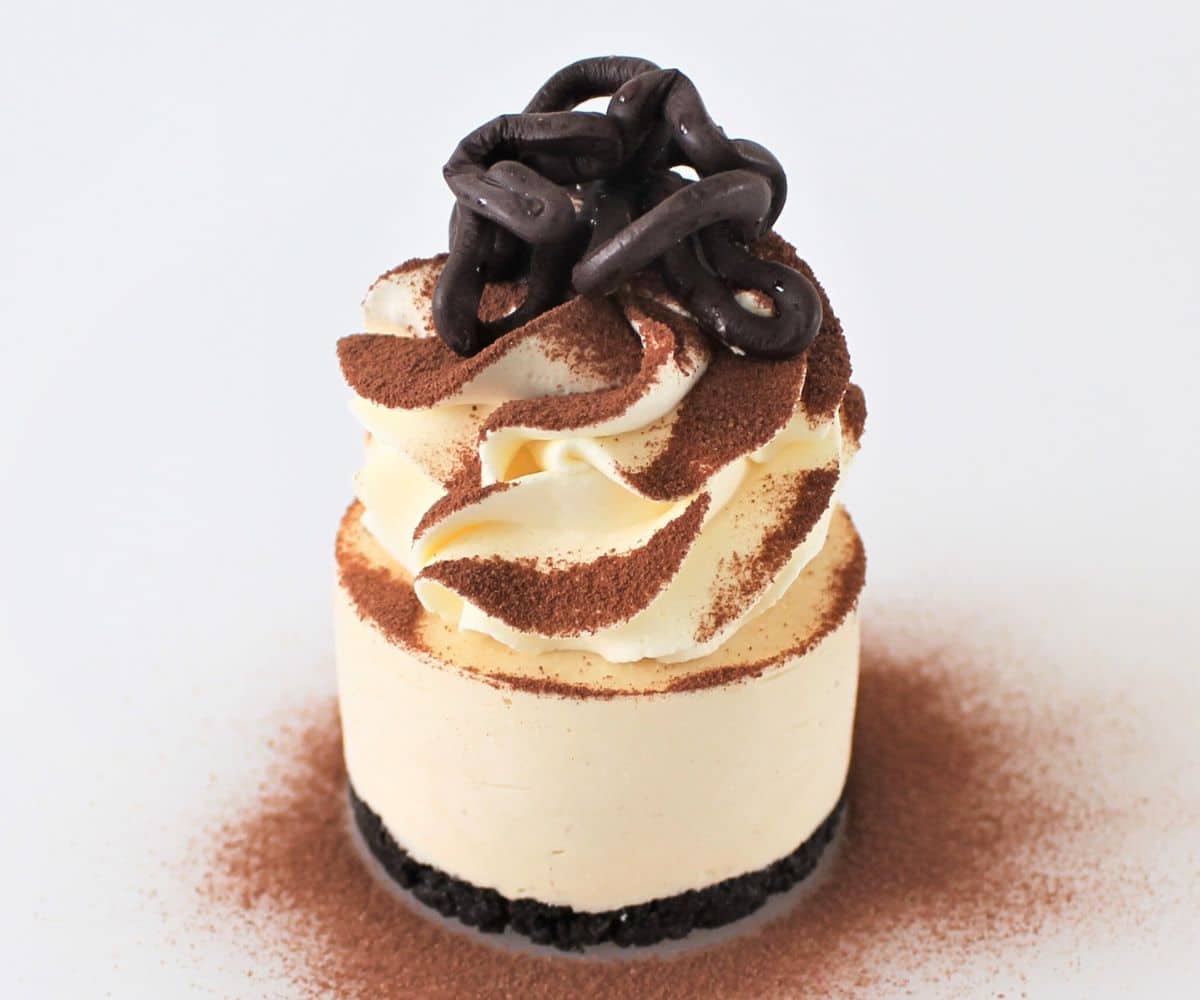
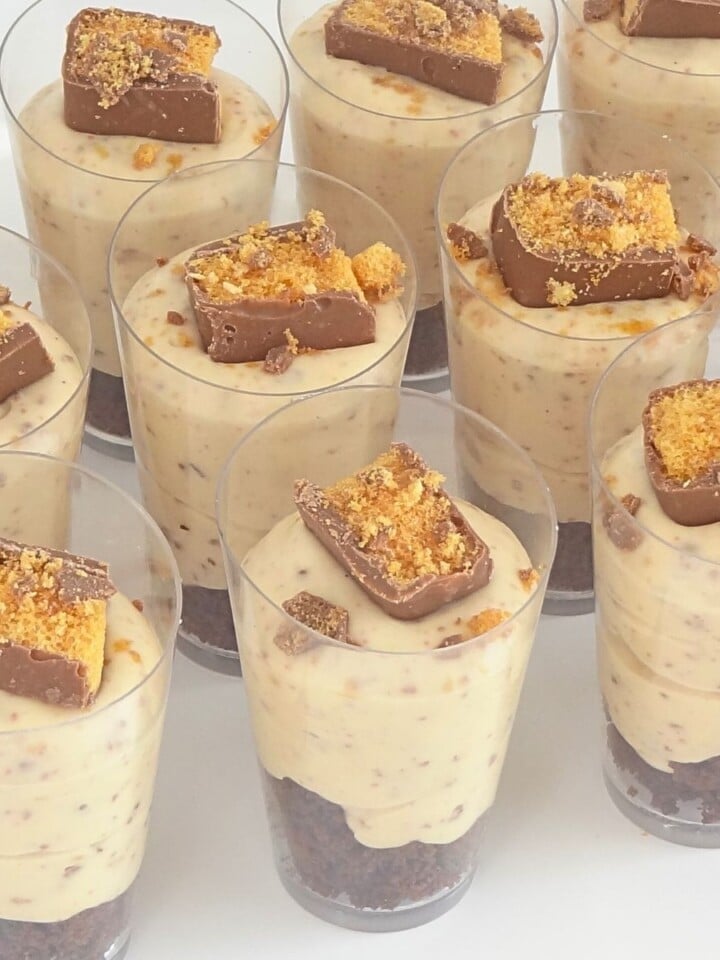
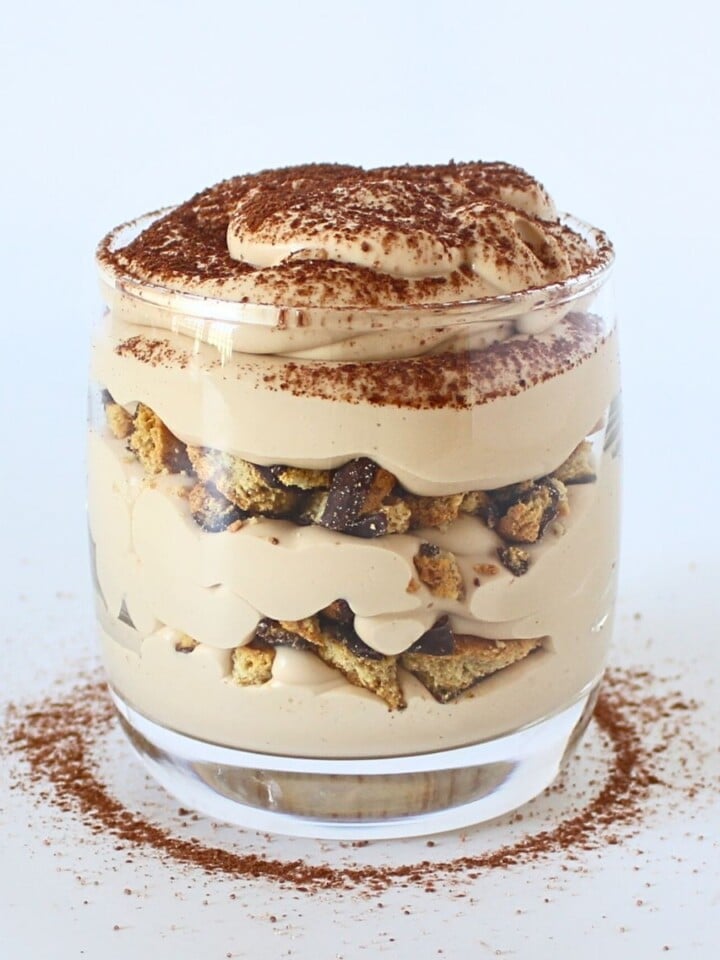
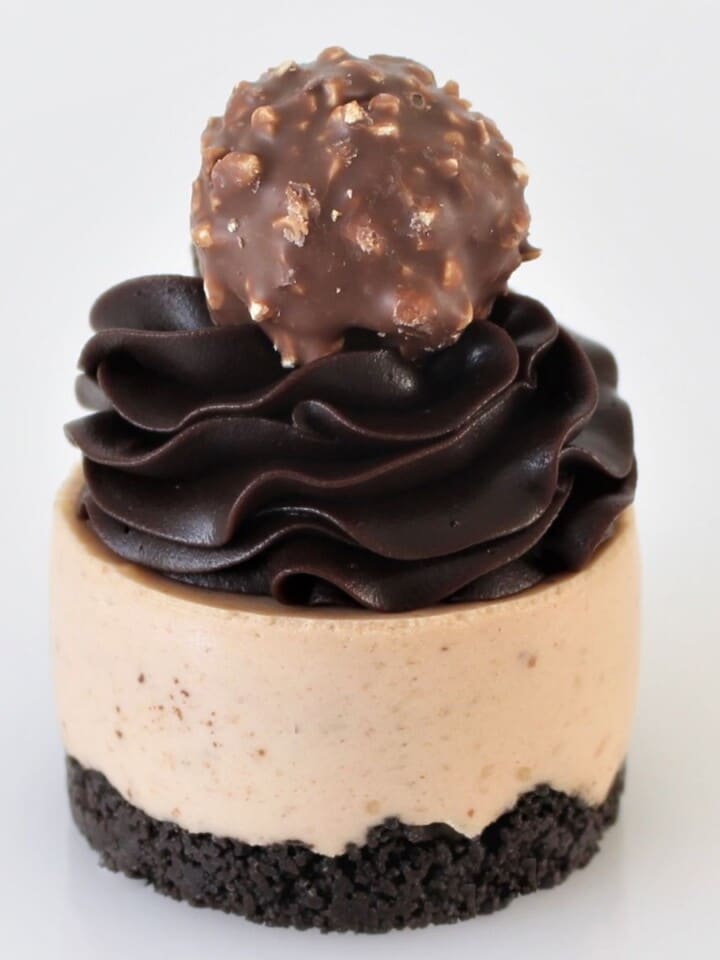
Enjoy the delicious blend of coffee and chocolate with these no-bake Mini Cappuccino Coffee Cheesecakes, with a creamy filling on a crunchy cookie base, topped with whipped cream and cocoa.
Why Are These Coffee Cheesecakes So Good?
These mini coffee cheesecakes are awesome for so many reasons! First, they mix that deep, bold coffee taste with the creamy softness of cheesecake, so every bite is just the right mix of flavors and feels. The coffee flavor isn't just a background note; it's front and center, giving you that cappuccino kick you love.
Plus, there's no baking involved. That means no messing with the oven, no waiting, and no stress over cracks on top of your cheesecake. You just mix, let it set, and it's ready to enjoy. And since they're mini, they're super easy to dish out and look so cute.
If mini cheesecakes are your thing, you're in the right spot! I'm confident you'll adore my Mini Tiramisu Cheesecakes, Mini Mars Bar Cheesecakes, and don't miss out on our Mint Chocolate Chip Mini Cheesecakes or our decadent Mini Chocolate and Peanut Butter Mini Cheesecakes.
Ingredients In Mini Coffee Cheesecakes
- Chocolate Cookie Crumbs: These form the base or crust of the coffee cheesecakes, providing a crunchy texture that contrasts with the creamy filling. The chocolate flavor also complements the coffee in the filling.
- Melted Unsalted Butter: This binds the cookie crumbs together, helping the base hold its shape once it sets.
- Cream Cheese: The main ingredient for the cheesecake filling, giving it that classic, creamy texture and rich taste.
- Sugar: Sweetens the filling, balancing the bold flavors of the coffee and the tanginess of the cream cheese.
- Vanilla: Adds a warm, aromatic flavor that enhances the overall taste of the cheesecakes.
- Cappuccino Instant Coffee: This gives the cheesecakes their coffee flavor, making the dessert a perfect pick for coffee lovers. You can adjust the amount based on how strong you want the coffee flavor to be.
- Gelatine: Helps the cheesecake filling set, giving it a firm yet creamy texture without the need for baking.
- Hot Water: Used to dissolve the gelatine before it's added to the filling, ensuring a smooth texture without lumps.
- Heavy Cream: Adds richness and lightness to the filling, and when whipped, it contributes to the fluffy texture of the cream topping.
For the topping and garnish:
- Heavy Cream (for the topping): Whipped into stiff peaks with a bit of sugar and vanilla to create a light, airy cream topping for the coffee cheesecakes.
- Powdered Sugar: Sweetens the whipped cream topping slightly, without weighing it down.
- Vanilla (for the topping): Adds flavor to the whipped cream, complementing the coffee filling.
- Powdered Chocolate or Cocoa Powder: Used for dusting over the whipped cream topping, adding a hint of chocolate flavor that pairs well with the coffee.
- Melted Chocolate: Used to create chocolate garnishes that add a decorative touch and an extra bit of chocolate flavor.
How To Make Mini Coffee Cheesecakes
Preparing the Base:
Combine Crumbs and Butter: Start by thoroughly mixing your chocolate cookie crumbs with the melted butter until the mixture resembles wet sand.

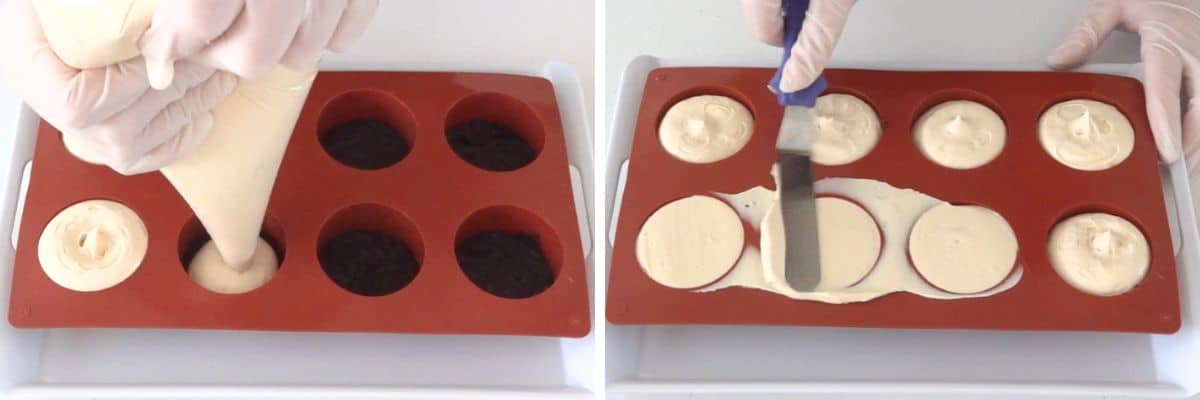
Shape the Base: Evenly distribute the crumb mixture among the cavities of your round silicone molds or a cupcake tray lined with paper cups. Use the back of a spoon or the bottom of a glass to press down firmly.
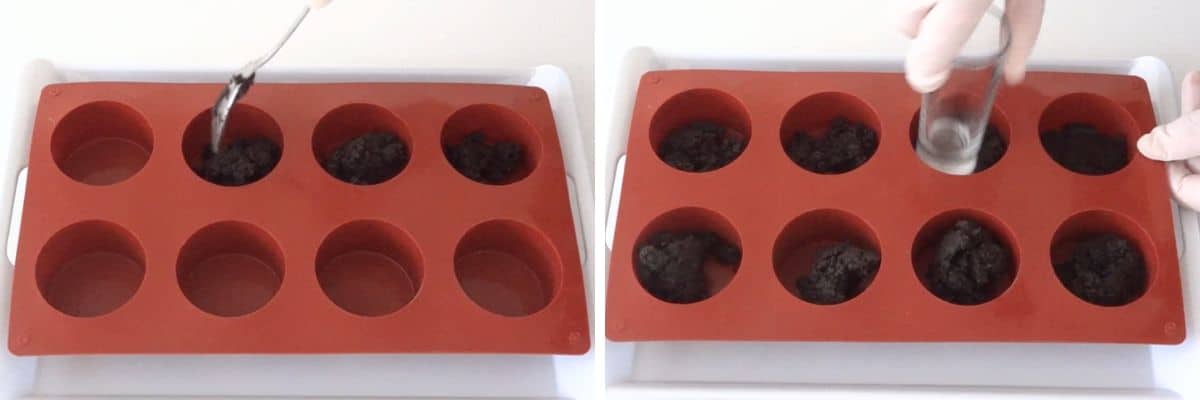
Set in the Fridge: Place the molds or tray in the refrigerator. The chill time allows the butter to solidify, which is key to a firm and crunchy base.
Making the Filling:
Mix Cream Cheese Base: In a large bowl, whip together the cream cheese, sugar, and vanilla extract until the mixture is smooth and free of lumps. The smoothness is important for a creamy filling.
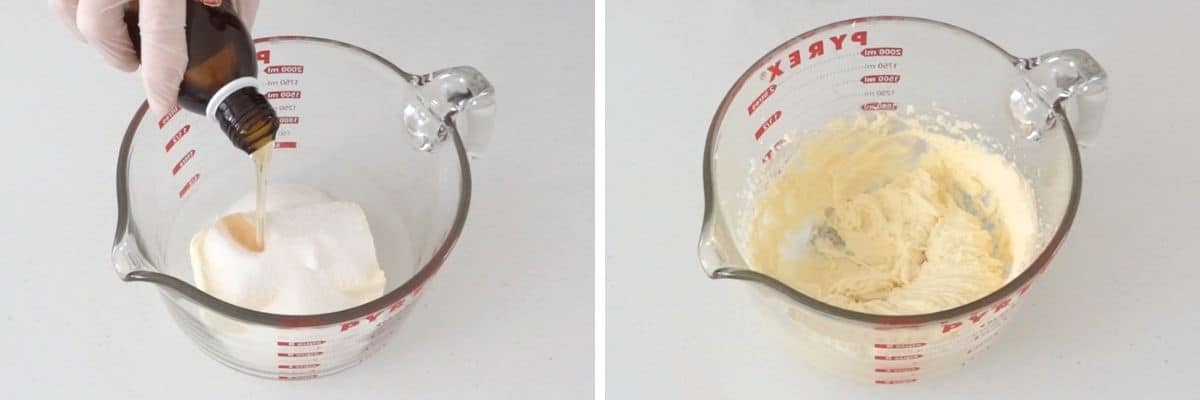
Incorporate Coffee Flavor: Blend in the cappuccino instant coffee powder until fully integrated. The amount of coffee can be adjusted depending on your taste preference for a stronger or milder coffee flavor.

Prepare Gelatine: In a separate, small bowl, dissolve the gelatine in hot water, stirring briskly until completely dissolved. It's important that no granules remain, as this ensures a smooth consistency in your filling.

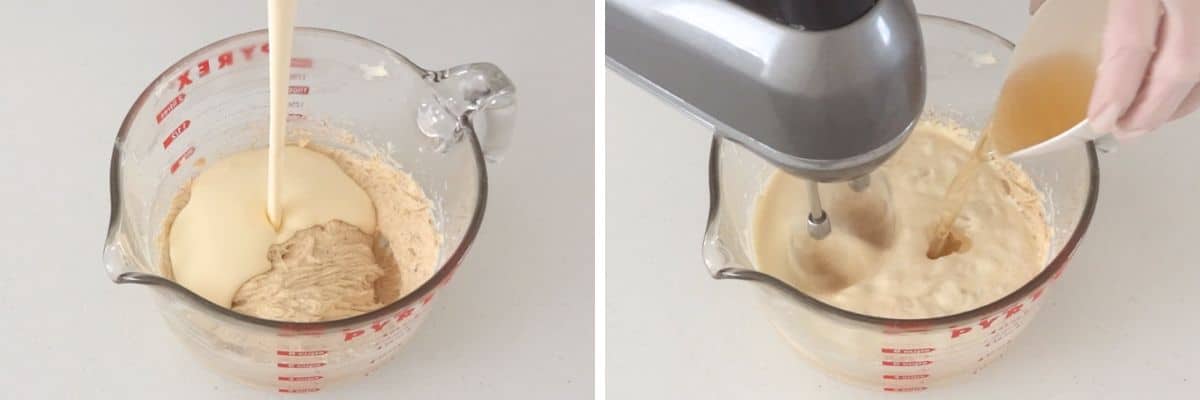
Combine Everything: Slowly add the heavy cream to your cream cheese mixture, continuing to mix. Then, while still mixing, gradually pour in the hot gelatine solution. Mix until the filling thickens slightly, which indicates it's well combined and ready to set.
Fill the Bases: Spoon or pipe the filling onto your chilled bases, filling almost to the top. Use a spatula or the back of a spoon to smooth out the surface for a neat finish.
Freeze to Set: Transfer the cheesecakes to the freezer. Freezing is essential for the cheesecakes to solidify properly, making them easier to handle and serve.
Creating the Chocolate Garnish:
Shape Your Garnishes: Pipe your melted chocolate into squiggle shapes onto a sheet of parchment paper or directly into cold water to set. This creative touch not only adds a decorative flair but also an extra chocolatey bite.

Whipping Up the Cream Topping:
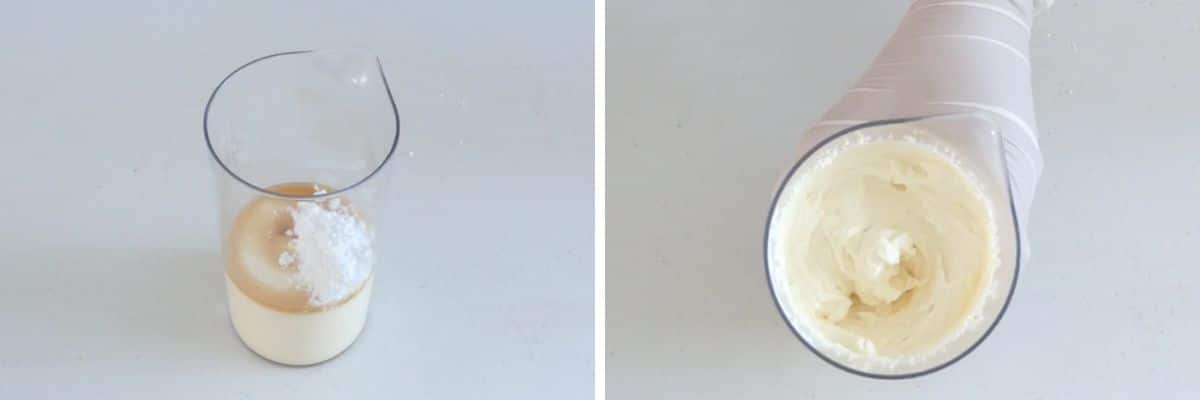
Whip the Cream: Beat the heavy cream, powdered sugar, and vanilla extract until stiff peaks form. The key here is to achieve a consistency that's firm enough to hold its shape when piped, but still silky and light.
Final Assembly:
Unmold Cheesecakes: Carefully remove the set coffee cheesecakes from their molds. If using silicone molds, gently push from the bottom. For cupcake trays, use a knife to loosen the edges before lifting them out.

Decorate with Whipped Cream: Fill a piping bag fitted with a 1M piping tip with your whipped cream and pipe onto each mini cheesecake. Aim for a generous, swirling peak that looks inviting.

Add Cocoa Dusting: Use a fine sieve to lightly dust the top of the whipped cream with powdered chocolate or cocoa powder. This not only adds a touch of elegance but also intensifies the chocolate flavor.
Place Chocolate Garnish: Carefully position a chocolate squiggle atop each cheesecake, pressing lightly to secure it in the whipped cream.

Chill Before Serving: Allow the cheesecakes to thaw in the refrigerator for a few hours. This step is important to help get the perfect creaminess for serving.
Prop Tip
When dissolving the gelatine in hot water, make sure it's completely smooth and free of lumps before adding it to the cream cheese mixture. This makes sure your cheesecake filling sets evenly, giving a perfectly smooth and creamy texture every time.
Serving Suggestions For Coffee Cheesecakes
- Coffee Pairing: Serve with a cup of espresso or your favorite coffee. This highlights the cheesecake's coffee flavor.
- Add Fresh Berries: Toss some raspberries or strawberries on the side. They add color and a tangy kick that balances the rich dessert.
- Drizzle Sauces: Go for caramel or chocolate sauce over the top. It adds sweetness and makes your cheesecakes look extra special.
More Cheesecake Recipes
- Mini Chocolate and Peanut Butter Cheesecakes
- Chocolate Cheesecake No-Bake Dessert Boxes
- Honeycomb Mousse Dessert Cups
- Coffee Mousse Mocha Verrines


Tools and Equipment
 Buy Now →
  Buy Now →
  Buy Now →
  Buy Now →
  Buy Now →
  Buy Now →
  Buy Now →
 Common Questions About Mini Coffee Cheesecakes
Yes, you can use regular instant coffee as a substitute. The flavor will be slightly different, so adjust the amount to suit your taste.
No worries! You can use a muffin tin lined with paper or foil liners. They work just as well for shaping your mini cheesecakes.
Absolutely. These cheesecakes are perfect for making ahead. Just keep them in the freezer and move them to the fridge a couple of hours before serving.
Stored in an airtight container, they can last up to 5 days in the fridge. This makes them great for prepping ahead for parties or snacks.
No-Bake Cappuccino Mini Cheesecakes Recipe
Ingredients
Base
- 135 g chocolate cookie crumbs
- 50 g butter unsalted, melted
Filling
- 250 g cream cheese
- ½ cup sugar
- 2 teaspoon vanilla
- 2 instant cappuccino coffee sachets
- 2 teaspoon gelatine powder
- 2 tablespoon water hot
- 400 ml heavy cream
Cream Topping
- 250 ml heavy cream
- 1 teaspoon vanilla
- 1 tablespoon powdered sugar
Garnish
- ½ tablespoon cocoa powder or chocolate powder
- ½ cup dark chocolate melted
Instructions
Base
- Mix the melted butter with the cookie crumbs well.
- Distribute the mixture evenly among 10-12 cavities (depending on size) in round silicone moulds or a cupcake tray lined with baking cups.
- Press firmly to form a compact base. Refrigerate to set.
Filling
- Blend the cream cheese, sugar, and vanilla with a hand mixer until smooth.
- Mix in the instant coffee satchels.
- Dissolve gelatine in hot water; mix well.
- Add heavy cream to the cream cheese mixture, then the gelatine while mixing until thick.
- Pipe the filling over the bases, smoothing the tops with an angled spatula. Freeze for 6 hours or overnight.
Chocolate Garnish
- Pipe chocolate squiggles into cold water with ice.
- Let set, then carefully remove with a fork and place on a paper towel.
Cream Topping:
- Whip cream, vanilla, and powdered sugar until stiff peaks form.
Assembly
- Once they've frozen solid (after at least 6 hours or overnight), gently push each cheesecake out of its silicone mold or peel away the baking cup if you've used a cupcake tray. Place onto a serving plate.
- Scoop the whipped cream mixture into a piping bag fitted with a 1M piping tip or any similar star-shaped tip.
- Hold the piping bag vertically over the center of each cheesecake and gently squeeze to release the cream and pipe a swirl.
- Using a small sieve or a tea strainer, lightly dust the top of the whipped cream with powdered chocolate or cocoa powder.
- Make a chocolate squiggle and gently press it into the whipped cream on each cheesecake.
Serving
- Place the assembled mini cheesecakes in the refrigerator for about two hours to thaw. This step is crucial for transforming them from frozen treats to creamy, delicious bites that are the perfect texture.
- Once they've thawed, your no-bake cappuccino mini cheesecakes are ready to be serve chilled from the refrigerator.


Christine Frank says
I plan on making these in small plastic dishes for a dessert buffet, not using a mold. Do they still require the freezing step or just refrigeration?
Fay says
Hi Christine! If you're using cups for assembly. There is no need to freeze providing you're serving them in the cups.
Roxanne Pavone says
non of these recipes have how much of the ingredients to use
Fay says
Hi Roxanne! All recipes have a recipe card at the end of the post with detailed measurements and instructions to print if you wish.
kushi says
These coffee cheesecakes look so delicious. Thanks for sharing.
Fay says
You're very welcome Kushi! I'm glad you like them.
Harriet Young says
These were so good. Made them as dessert for a dinner party and everyone loved them. The coffee flavour is amazing.
Fay says
How fabulous! I can't resist anything with coffee! lol
DK says
Wow - the technique it takes to make this so pretty is absolutely amazing! What an amazing tasting and beautifully crafted dessert!
Fay says
You're too kind. Thank you so much! I promise it's very easy! Just take it one step at a time and one element at a time and before you know it, voila!
Ieva says
Great recipe. I was worried that i wouldn't be able to make them as pretty as yours, and whilst mine do not quite stand up to the elegance of your cheesecakes, they still look great and taste delicious. Made them for a special occasion and all my friends were raving about them.
Fay says
How fabulous! I'm sure they look amazing!
Heather says
So flavorful, these mini coffee cheesecakes are absolutely delicious! Easy to make and sure to impress, thanks so much!
Fay says
That's great Heather. Glad you like them.