
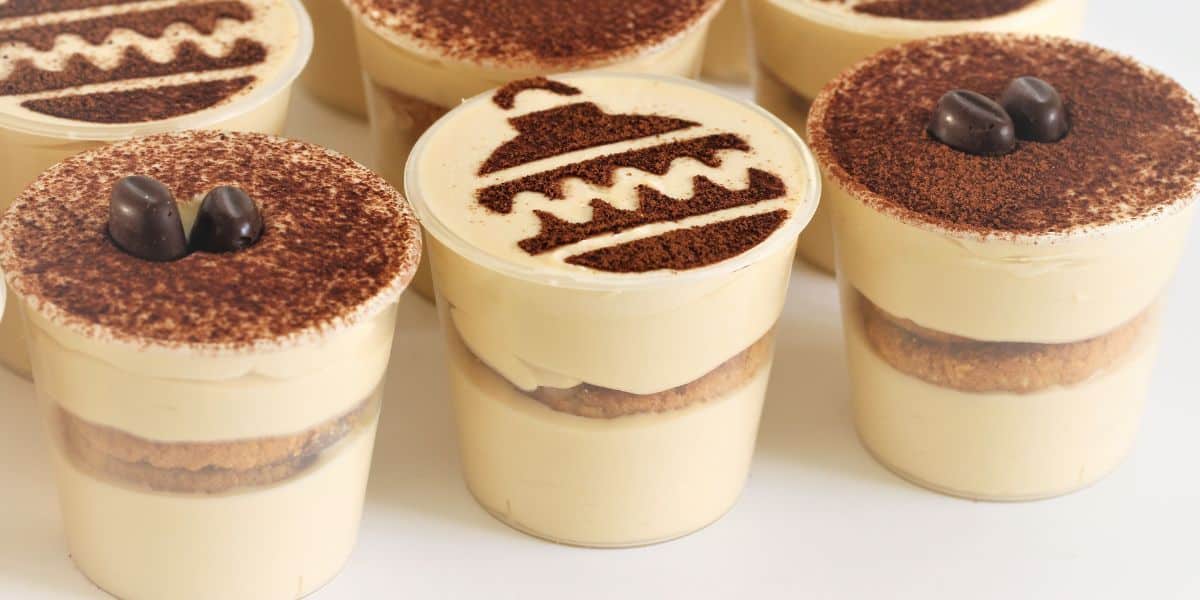
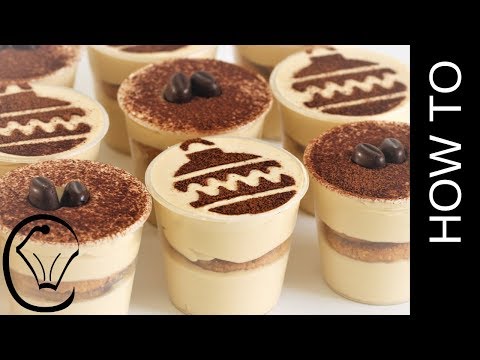
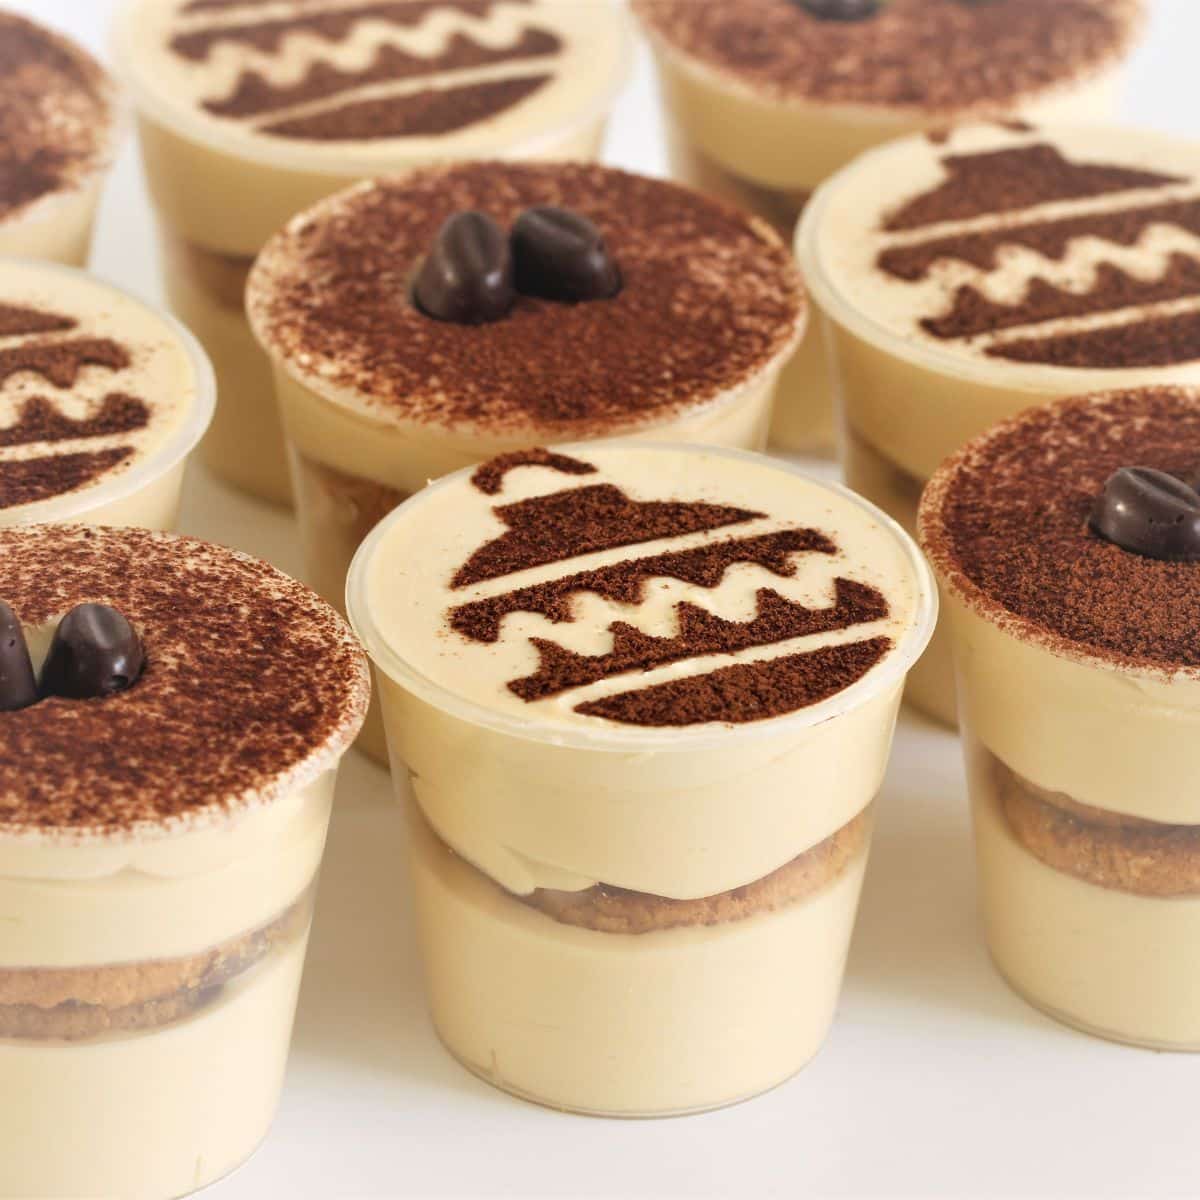
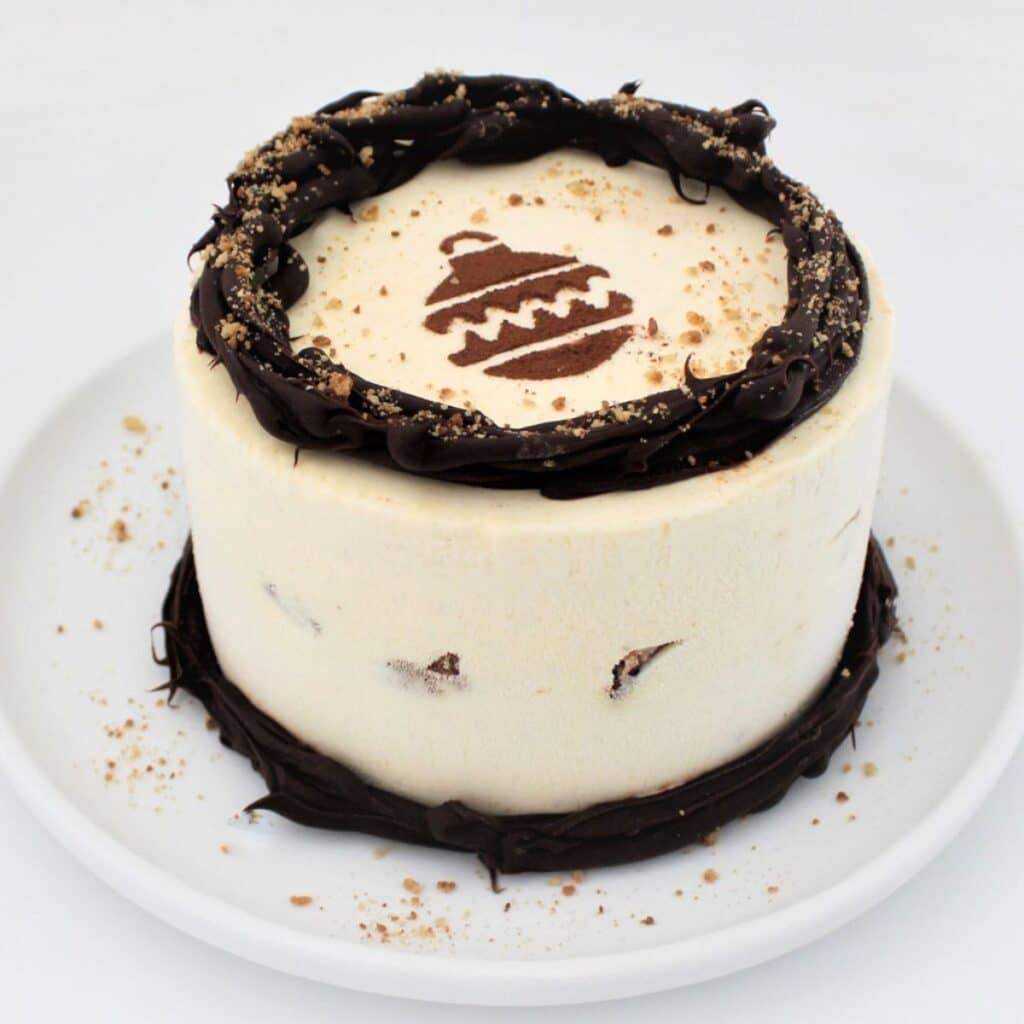
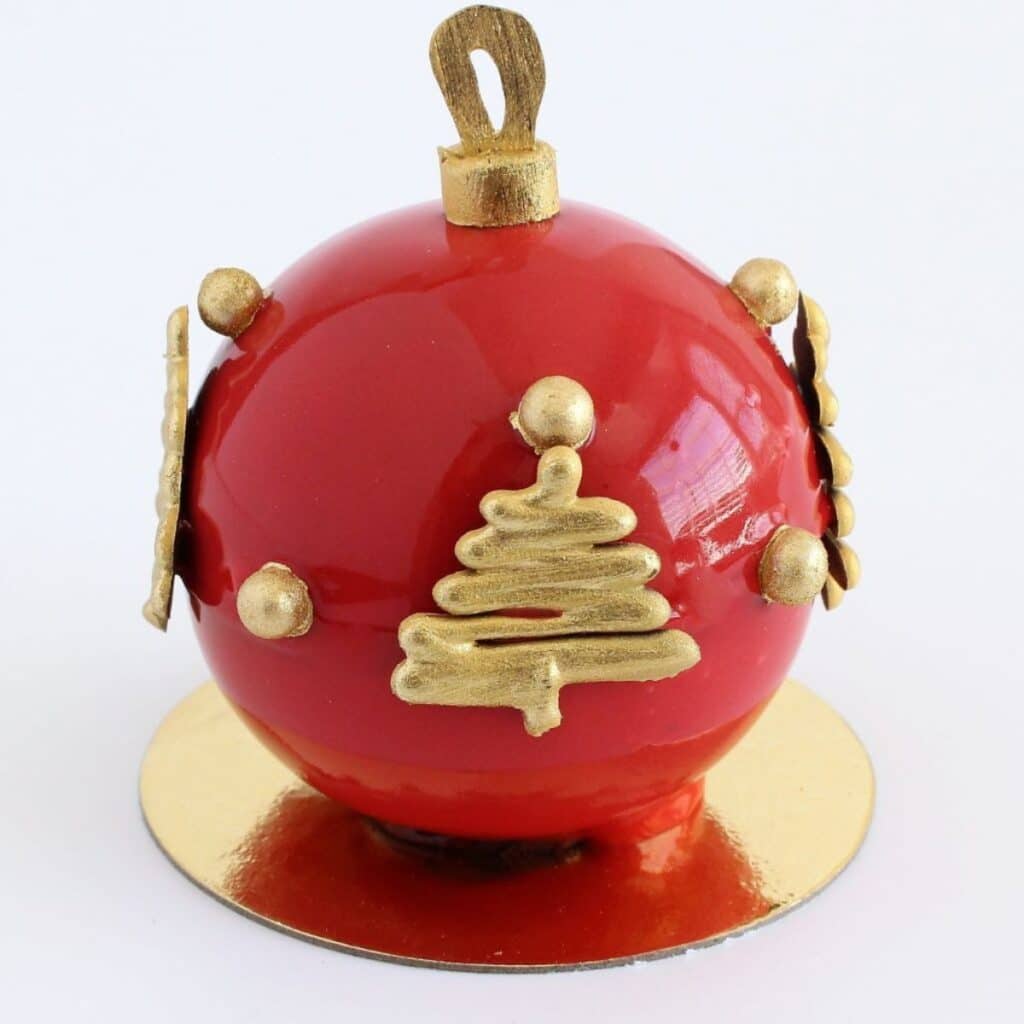
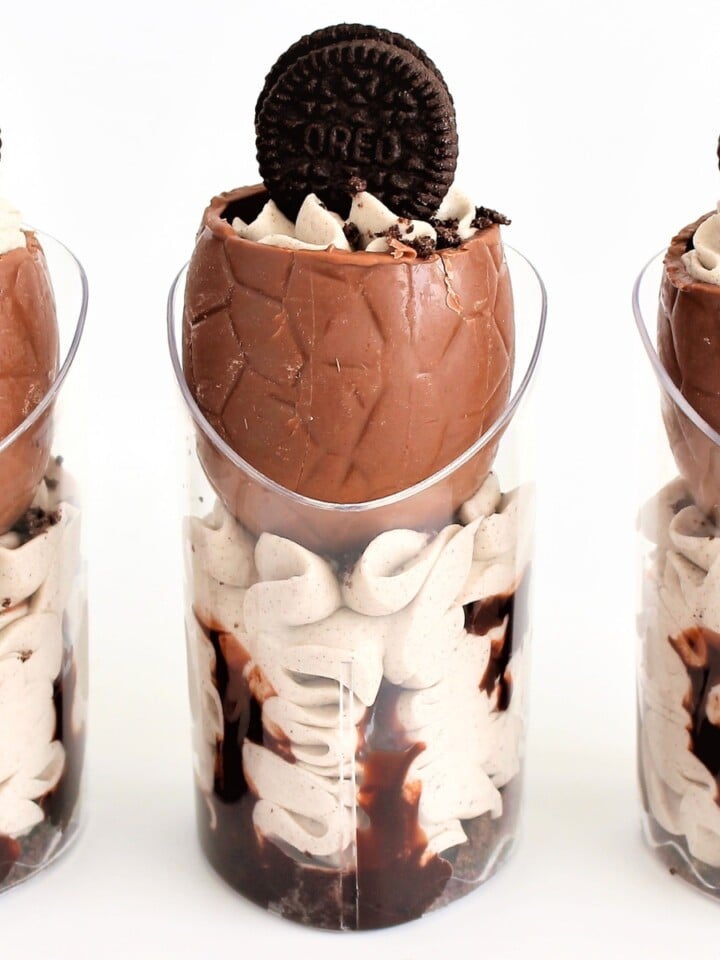
Christmas Ornament Coffee Cheesecake Dessert Cups. This recipe combines the rich, comforting flavors of coffee and cheesecake in a cute, individual serving size. It's a simple yet impressive dessert that's sure to be a hit.

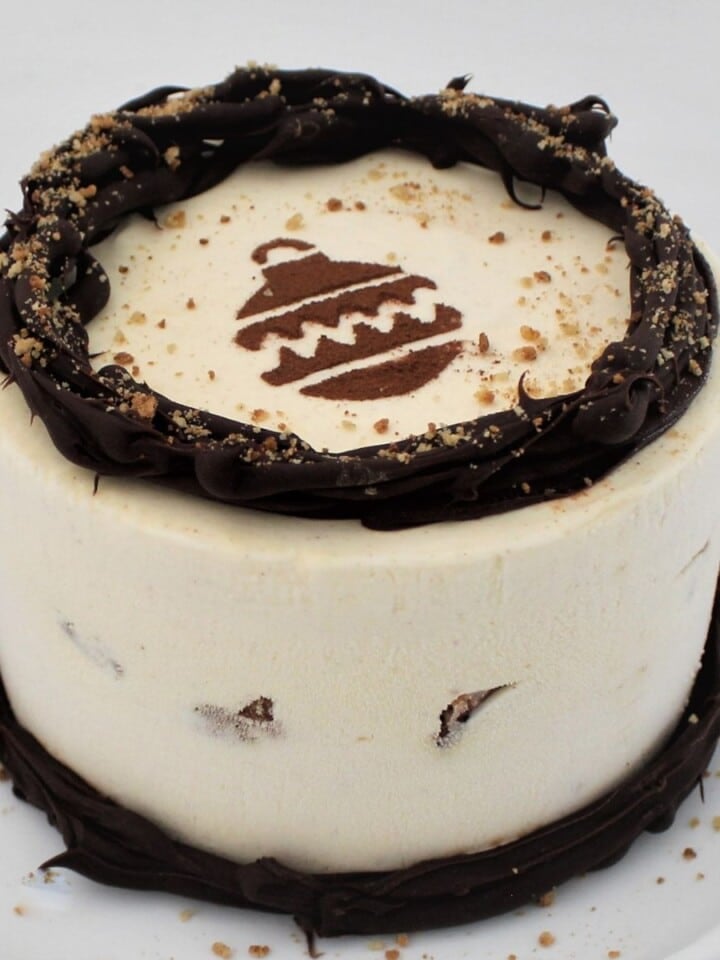
The idea behind these dessert cups is really simple. We layer a smooth, coffee-infused cheesecake mixture with your favorite biscuits, which, when refrigerated, turn into a soft, cake-like layer. The final touch, a dusting of cocoa or chocolate powder through a festive stencil, adds a cute Christmas ornament design on each cup.
This recipe is not just about great taste; it's also about presentation. While it's easy to prepare, the result look great, making it an excellent choice for holiday parties or as a special treat for family dinners. The cups are convenient for serving and can be made in advance, saving you time on the day of your event.
Ingredients For Christmas Coffee Cheesecake Dessert Cups
- Cream Cheese: This is the base of the cheesecake. Cream cheese provides a rich, creamy texture and a slightly tangy flavor that is characteristic of cheesecake.
- Granulated Sugar: Sugar sweetens the mixture, balancing the tanginess of the cream cheese. It also contributes to the smooth texture of the cheesecake.
- Vanilla Extract: Vanilla adds a subtle, sweet fragrance and flavor, enhancing the overall taste of the dessert.
- Cold Coffee: The coffee adds a depth of flavor, bringing in a mild bitterness and rich aroma that pairs well with the creaminess of the cheesecake.
- Whipping Cream: Whipping cream is beaten into the cream cheese mixture to create a light, airy texture. It also adds richness to the dessert.
- Biscuits: The biscuits act as a layer or base in the dessert cups. They absorb moisture from the cheesecake mixture, softening into a cake-like texture, and add a contrasting texture.
- Drinking Chocolate or Cocoa Powder: Used for dusting, it not only adds a hint of chocolate flavor but also serves an aesthetic purpose, creating a festive Christmas ornament design on the surface of each dessert cup.
How To Make Mini Christmas Coffee Cheesecake Cups
Coffee Cheesecake
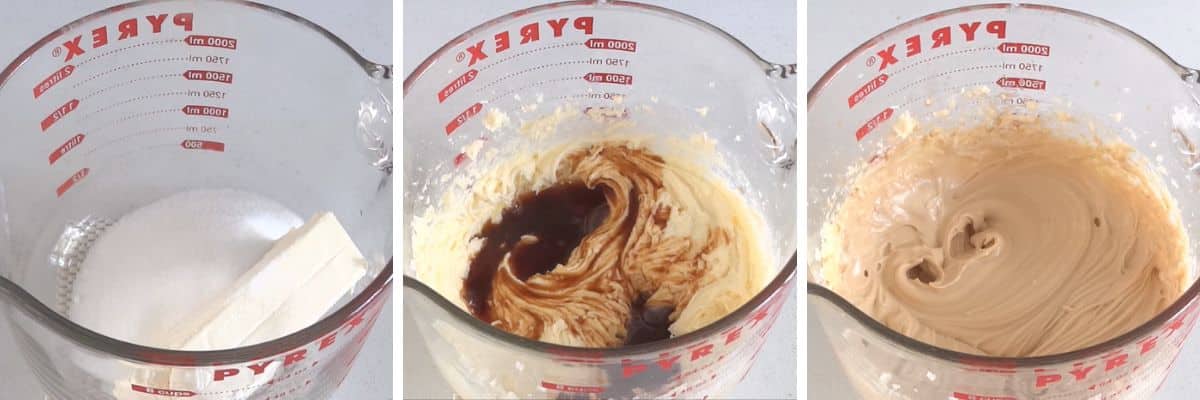
Mix Cream Cheese and Sugar: In a bowl, beat together cream cheese and cup sugar until smooth.
Add Vanilla and Coffee: Mix in vanilla extract and cold coffee.
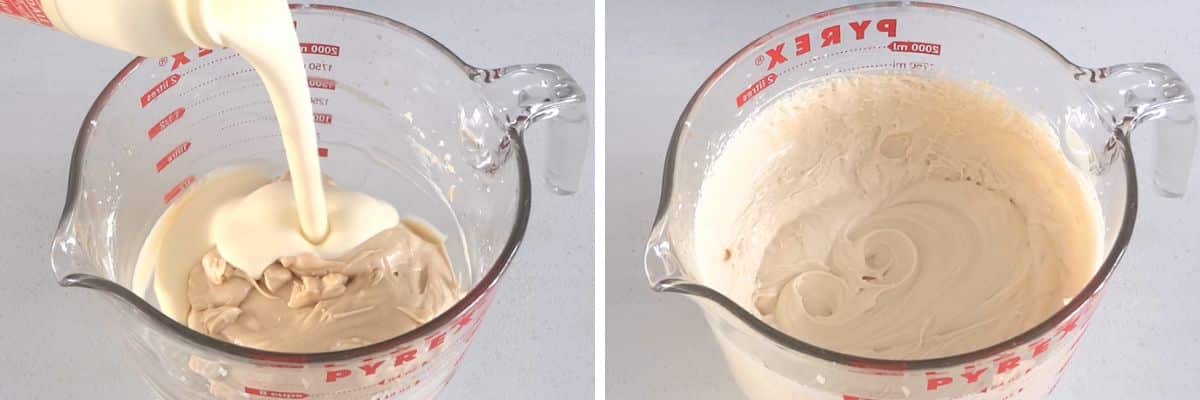
Scrape and Add Heavy Cream: Scrape the sides of the bowl and add 300ml heavy cream. Whip until the mixture is thick and smooth.
Assemble in Cups: Fill mini dessert cups halfway with the cream cheese mixture, add a layer of your favorite cookies, and top with more mixture. Smooth the tops.

Chill: Refrigerate for at least 2 hours to soften the cookies.
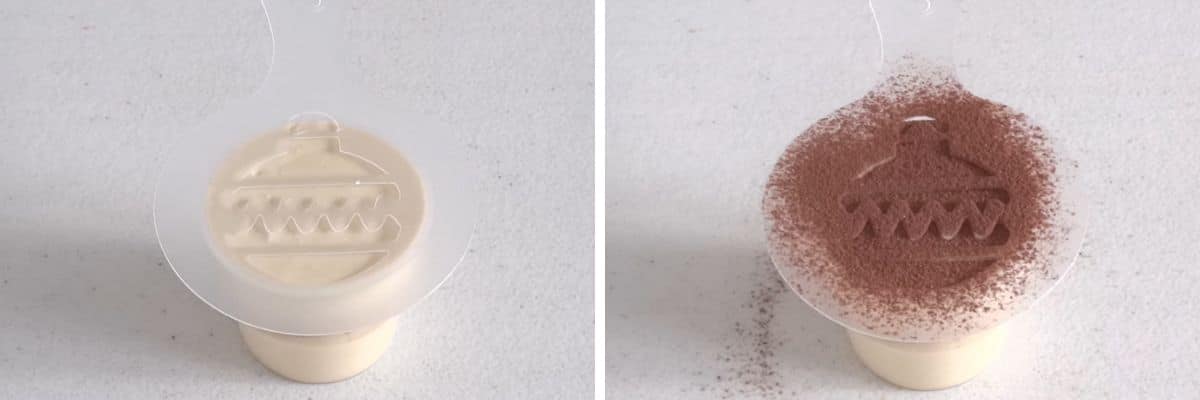
Decorate: Use a Christmas-themed stencil and cocoa powder to create a festive design on top of each cup. Optionally, add chocolate coffee beans to every second cup.

Refrigerate Until Serving: Keep the cups chilled until ready to serve.
Chocolate Coffee Beans
Melt Chocolate: Melt ⅓ cup of chocolate (dark or milk) in a microwave-safe bowl or double boiler, stirring regularly.
Fill Mould: Pipe or spoon the melted chocolate into coffee bean silicone mould cavities.
Remove Air Bubbles: Tap the mould to settle the chocolate and remove air bubbles. Scrape off excess chocolate for a smooth surface.
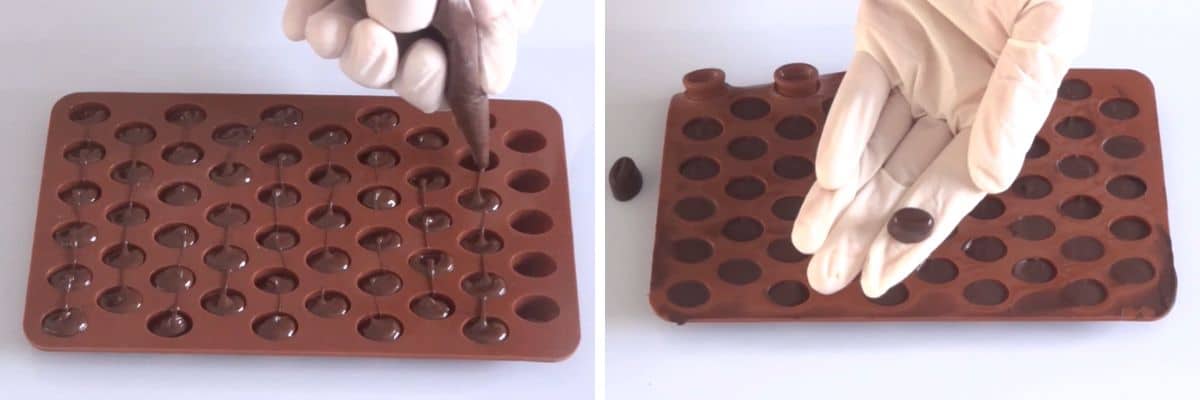
Let Set: Allow the chocolate to dry completely, either at room temperature or in the refrigerator (about 20 minutes).
Unmould: Once set, pop the chocolate coffee beans out of the mould.
Fay's Top Tip
One important tip for making the Christmas Ornament Coffee Cheesecake Dessert Cups is to have the cream cheese at room temperature before mixing. This allows it to blend smoothly with the sugar and other ingredients, preventing lumps and creating a smooth, creamy texture. It also helps the whipping cream incorporate better, resulting in a light and fluffy consistency.
Recipe Variations
- Mocha Cheesecake Cups: Add a tablespoon of cocoa powder to the cheesecake mixture for a chocolate-coffee flavor. Top with a sprinkle of chocolate shavings instead of cocoa powder.
- Berry Cheesecake Cups: Replace the coffee with 2 tablespoons of berry puree (like raspberry or strawberry). Top with fresh berries and a dusting of powdered sugar.
- Caramel Cheesecake Cups: Swirl in some caramel sauce into the cheesecake mixture for a rich, caramel flavor. Drizzle more caramel sauce on top before serving.
- Peppermint Cheesecake Cups: Add a few drops of peppermint extract instead of vanilla, and mix in crushed candy canes for a festive twist. Top with a sprinkle of crushed candy canes.
- Spiced Cheesecake Cups: Incorporate ½ teaspoon of cinnamon and a pinch of nutmeg into the cheesecake mixture for a warm, spiced flavor. Garnish with a sprinkle of ground cinnamon on top.
- Nutty Cheesecake Cups: Fold in finely chopped nuts like pecans or walnuts into the cheesecake mixture. Top with a sprinkle of chopped nuts and a drizzle of honey or maple syrup.
- Matcha Cheesecake Cups: Add a teaspoon of matcha powder to the cheesecake mixture for a green tea flavor. Top with a light dusting of matcha powder for a unique, earthy twist.
- Tropical Cheesecake Cups: Replace the coffee with coconut milk and mix in shredded coconut. Top with toasted coconut flakes and a slice of fresh pineapple or mango.
- Boozy Cheesecake Cups: Add a splash of your favorite liqueur, such as Baileys, Kahlúa, or Amaretto, to the cheesecake mixture. Garnish with a liqueur-flavored whipped cream.
More Christmas Recipes You Might Like
Frequently Asked Questions
Yes, you can use decaffeinated coffee if you prefer to avoid caffeine. The flavor will still be rich and enjoyable.
You can use any biscuits that pair well with coffee, such as graham crackers, digestive biscuits, or even ladyfingers. Choose your favorite or whatever you have on hand.
The dessert cups can be stored in the refrigerator for up to 3 days. Just ensure they are covered to prevent them from absorbing other odors.
For a lighter version, you can use whipped topping or a light cream cheese. However, keep in mind that the texture and richness will be slightly different from the original recipe.
Yes, you can use dark, milk, or white chocolate depending on your preference. The process remains the same for all types of chocolate.
Christmas Ornament Coffee Cheesecake Dessert Cups
INGREDIENTS
Coffee Cheesecake
- 250 g (8 ⅚ oz) cream cheese
- ½ cup (½ cup) sugar
- 2 teaspoon (2 teaspoon) vanilla extract
- ½ shot (⅛ cups) coffee cold
- 300 ml (1 ¼ cups) heavy cream
- 12 (12) cookies use your favourite
- 2 teaspoon (2 teaspoon) cocoa powder
Chocolate Coffee Beans
- ⅓ cup dark chocolate or milk melted
INSTRUCTIONS
Coffee Cheesecake
- In a mixing bowl, combine cream cheese and sugar. Beat the mixture until smooth and well-combined.
- Add vanilla extract and cold coffee to the cream cheese mixture.
- Mix again until all ingredients are well incorporated.
- Scrape down the sides of the bowl to ensure all ingredients are included.
- Add heavy cream to the mixture.
- Whip the mixture again until it becomes thick and smooth.
- Take mini dessert cups and fill each one halfway with the cream cheese mixture.
- Add a layer of your chosen biscuits to each cup.
- Continue filling the cups with the remaining cream cheese mixture, ensuring the biscuits are fully covered.
- Use a spatula or the back of a spoon to smooth the tops of the dessert.
- Refrigerate the dessert cups for at least 2 hours. This allows the biscuits to soften and take on a cake-like texture.
- Before serving, place a Christmas-themed stencil (such as a Christmas ornament shape) on the surface of each dessert cup.
- Dust the top of each dessert with drinking chocolate or cocoa powder, using the stencil to create a festive design.
- Carefully remove the stencil to reveal the Christmas ornament design.
- Optionally, top every second dessert with chocolate coffee beans.
- Keep the Christmas Ornament Coffee Cheesecake Dessert Cups refrigerated until ready to serve.
Chocolate Coffee Beans
- Use a microwave-safe bowl to melt the chocolate. Heat it in the microwave in short bursts of about 20-30 seconds, stirring between each interval to ensure even melting and to prevent burning. Alternatively, you can melt the chocolate using a double boiler on the stove.
- Carefully pipe or spoon it into the cavities of your coffee bean silicone mould.
- Gently tap the mould on the counter to settle the chocolate and remove any air bubbles.
- Use a spatula or the back of a knife to scrape off any excess chocolate and ensure a smooth, even surface on each bean.
- Allow the chocolate to dry completely. This can be done at room temperature, but for quicker setting, you can place the mould in the refrigerator. It should take about 20 minutes
- Once the chocolate has fully set and hardened, carefully pop each chocolate coffee bean out of the silicone mould.
NUTRITION
More Holiday Recipes - Video Tutorials
Alice says
Why are there never amounts for each ingredient in the recipe instructions? What am I missing?
Fay says
Hi Alice, there are always amounts for all ingredients. Please scroll to the bottom of the blog post for the full recipe card.