
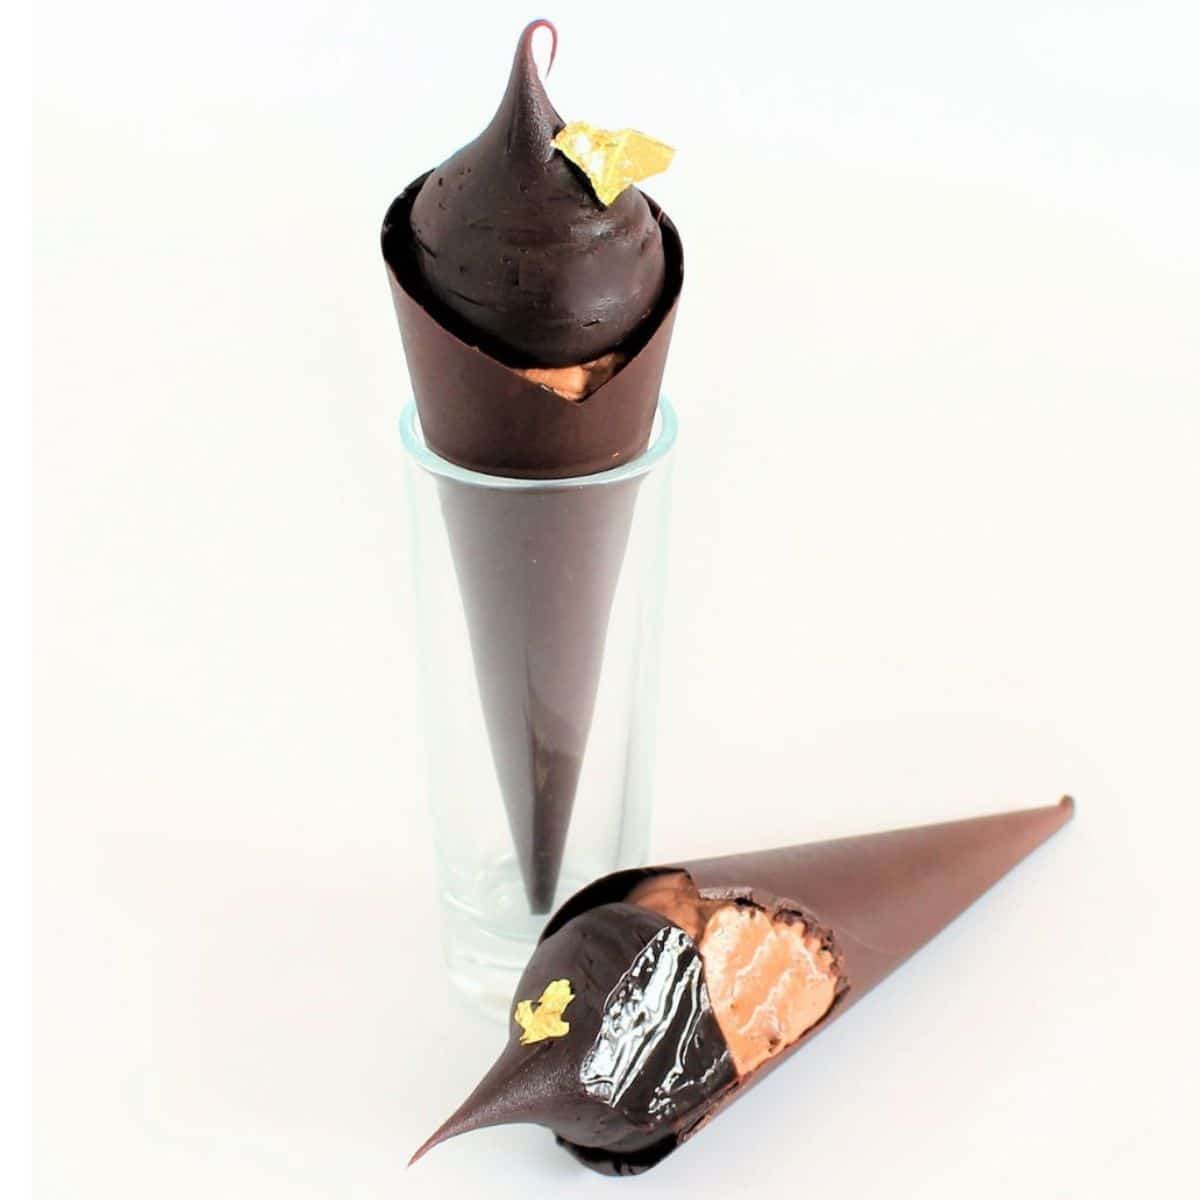
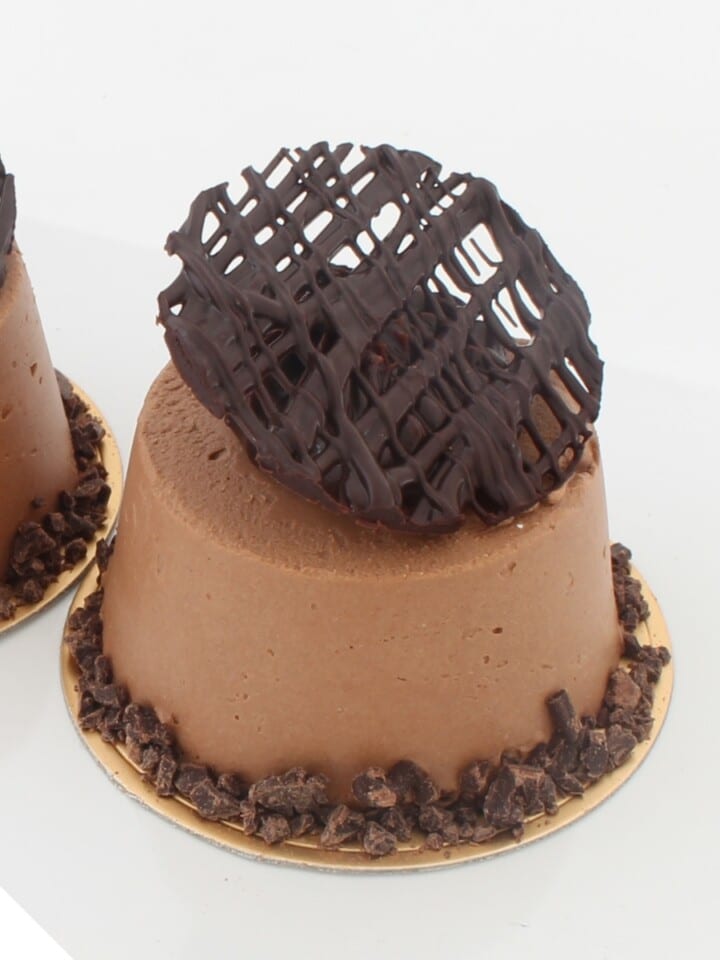
These chocolate cones filled with chocolate mousse are an absolute treat! Made with smooth, melt-in-your-mouth chocolate mousse tucked inside crunchy chocolate cones, they're like a little piece of chocolate heaven. Just like eating a chocolate ice cream cone filled with chocolate mousse instead of ice cream!
SUMMARISE AND SAVE THIS RECIPE
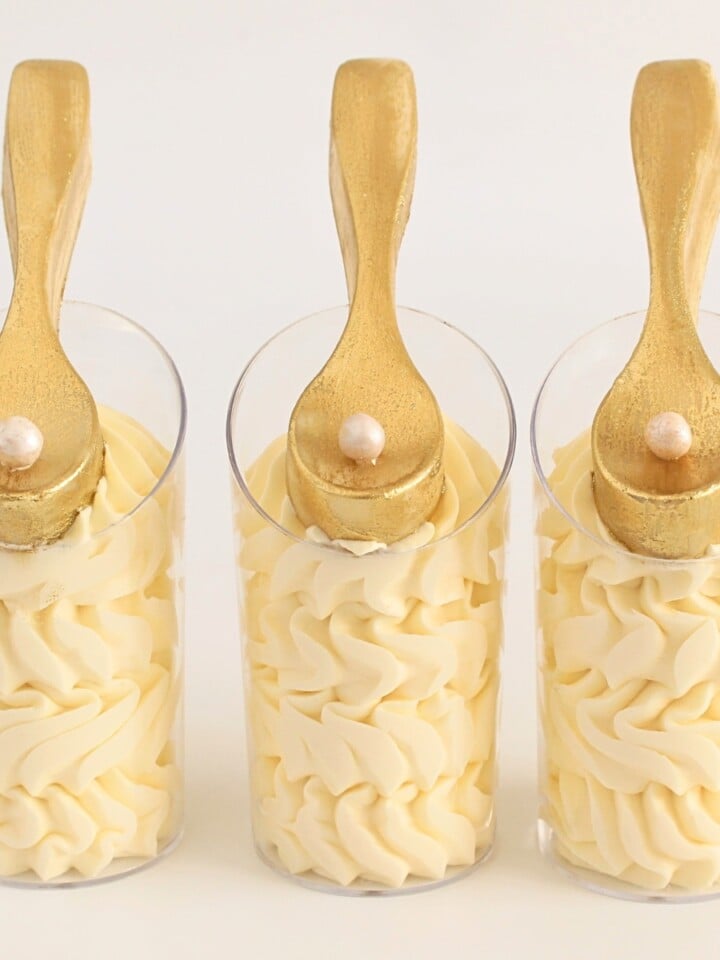
Each chocolate cone is topped with a dollop of rich chocolate ganache, making them even more irresistible. And the final touch? A tiny bit of edible gold leaf on top that adds a bit of fancy flair. They're perfect for when you want to impress your friends or just enjoy a really good chocolate fix. These cones cones filled with chocolate mousse are not just tasty but also pretty cool to look at!
Why You'll Love My Chocolate Cones
This recipe is simple, using just chocolate and whipping cream, making it perfect for beginners or those short on time. Quality ingredients are key; good chocolate and cream elevate the taste. Despite its simplicity, you can experiment with different chocolates for variety.
This recipe shows that less is more, proving you can create something delicious with minimal ingredients. It's convenient since you only need a few items, easily found in any store. If you're not comfortable making chocolate cones, you can use chocolate-lined waffle cones from my Cheesecake Waffle Cone recipe.
Ingredients In My Chocolate Cones Filled With Chocolate Mousse
For The Chocolate Cones
Tempered Chocolate or Dark Compound Chocolate: You can use tempered chocolate for making the chocolate cones. If you would like an easier option, dark compound chocolate is an alternative that's easier to work with as it doesn't require tempering.
For the Chocolate Mousse
Dark Chocolate: This chocolate is melted and mixed with whipping cream to create the base of the mousse. The type of dark chocolate can vary based on personal preference, affecting the sweetness and intensity of the chocolate flavor in the mousse.
Whipping Cream: Whipping cream is used in two stages of the mousse. The first amount is heated and mixed with the chocolate to create a ganache, which is the base of the mousse. The additional cream is whipped to form stiff peaks and then folded into the cooled ganache to give the mousse its light, airy texture.
For the Chocolate Ganache
Dark Chocolate: Similar to the mousse, the choice of dark chocolate will influence the flavor of the ganache. This chocolate is melted with cream to create a rich, smooth ganache.
Whipping Cream: The cream is mixed with the chocolate to create the ganache. It helps in achieving the right consistency and adds creaminess.
Garnish: Edible Gold Leaf
This is used to add a decorative, luxurious touch to the finished cones. While it doesn't contribute to the flavor, it elevates the visual appeal of the dessert, making it look elegant and festive.
How To Make My Chocolate Cones Filled With Chocolate Mousse
1. Making Chocolate Cones:
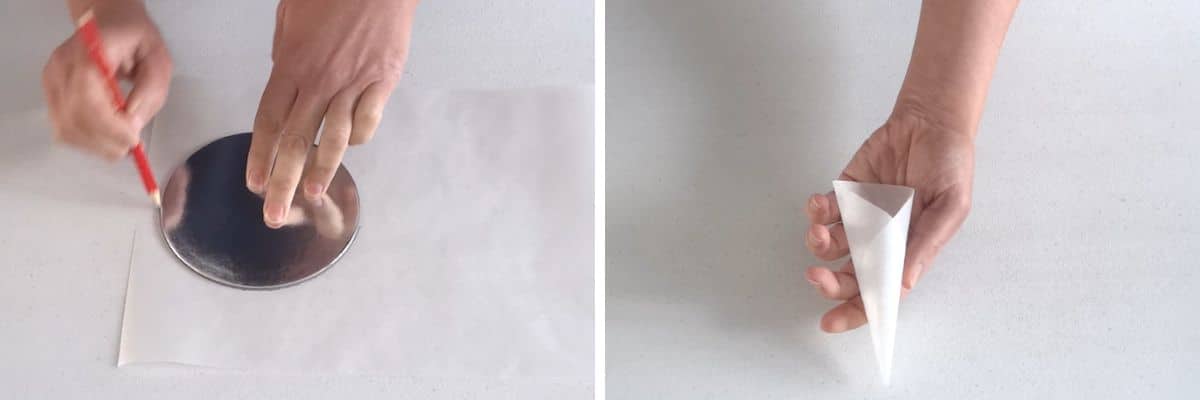
Prepare Parchment Cones: Cut parchment paper into 5-inch diameter circles. Then, shape each circle into a cone by rolling it and securing the shape with tape. Also, sure the cones are sturdy enough to hold the mousse later.
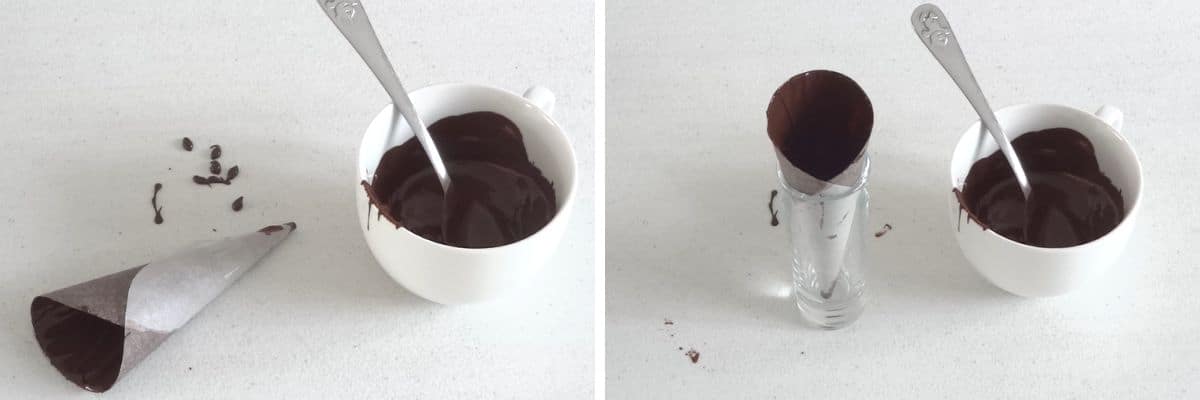
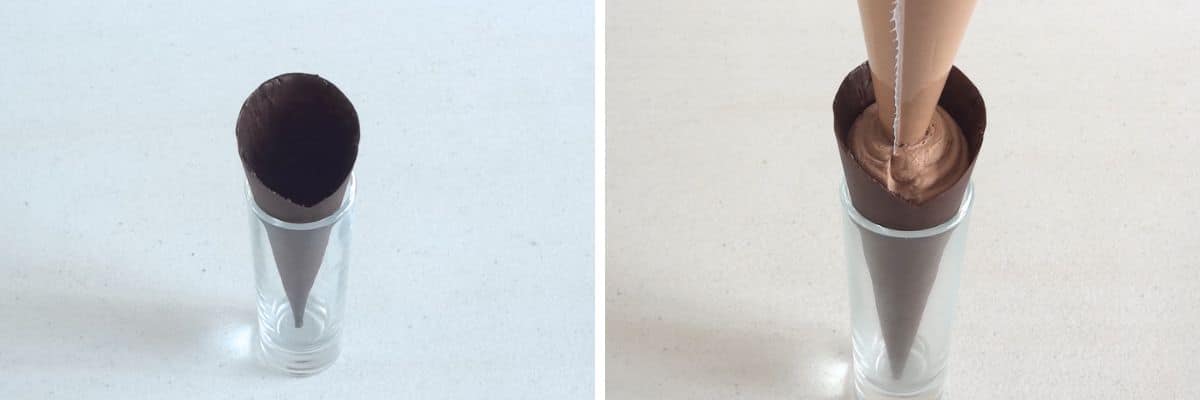
Chocolate Coating: Temper chocolate or use dark compound chocolate which doesn't need tempering. Then, using a food paint brush, brush the inside of each parchment cone with this melted chocolate, ensuring an even and complete coating. after that, stand the cone upright in a tall shot glass or a similar holder to dry. This positioning helps maintain their shape. Once the first chocolate layer is solid, apply a second coat for added thickness and durability, and let it dry again.
2. Making Chocolate Mousse:
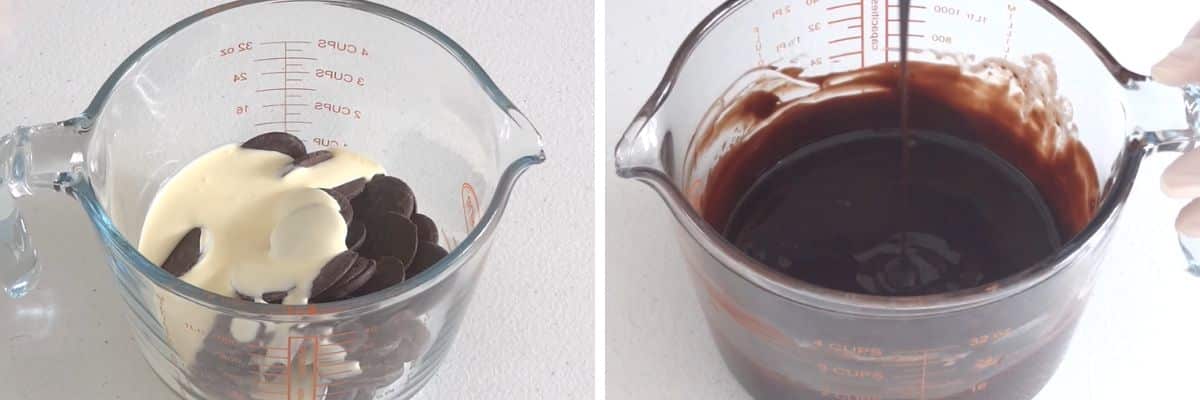
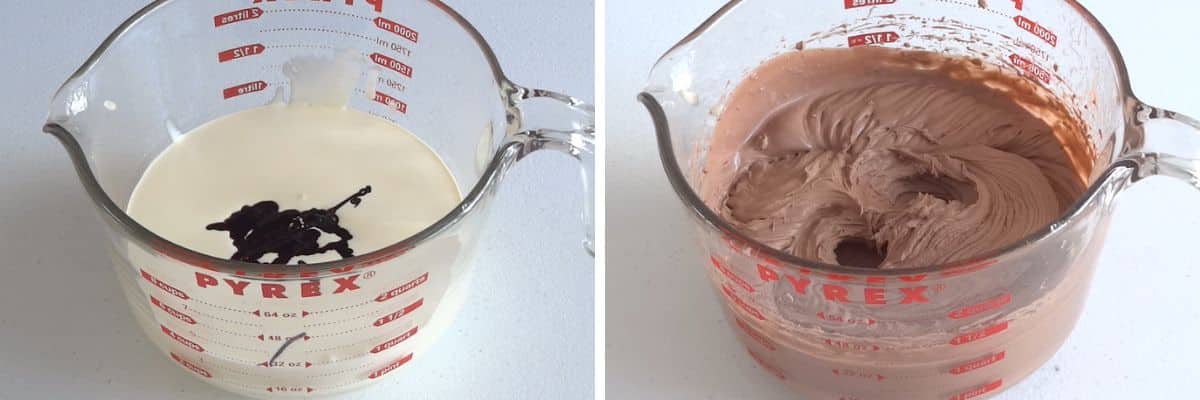
Microwave Chocolate and Cream: Combine 200g of dark chocolate with the heavy cream in a microwave-safe bowl. Then, heat the mixture in the microwave in 20-second increments, stirring each time, until the chocolate is fully melted and the mixture is smooth.
Cooling Process: Allow the chocolate-cream mixture to cool for about 5-10 minutes. It should be cool to the touch but still fluid.
Whip and Fold: Next in a separate bowl, add the cooled ganache mixture to the second batch of heavy cream. The, beat to stiff peaks being careful not to overmix as the mousse may split.
3. Filling the Cones:
Pipe in Mousse: Fill a piping bag with the chocolate mousse. Carefully pipe the mousse into the prepared chocolate cones, filling them to just below the rim. Refrigerate the filled cones to set the mousse while you prepare the ganache.
4. Making Chocolate Ganache:
Mix and Heat: In a microwave-safe bowl, mix dark chocolate with heavy cream. Then, microwave this mixture in 20-second bursts, stirring after each until it becomes smooth.
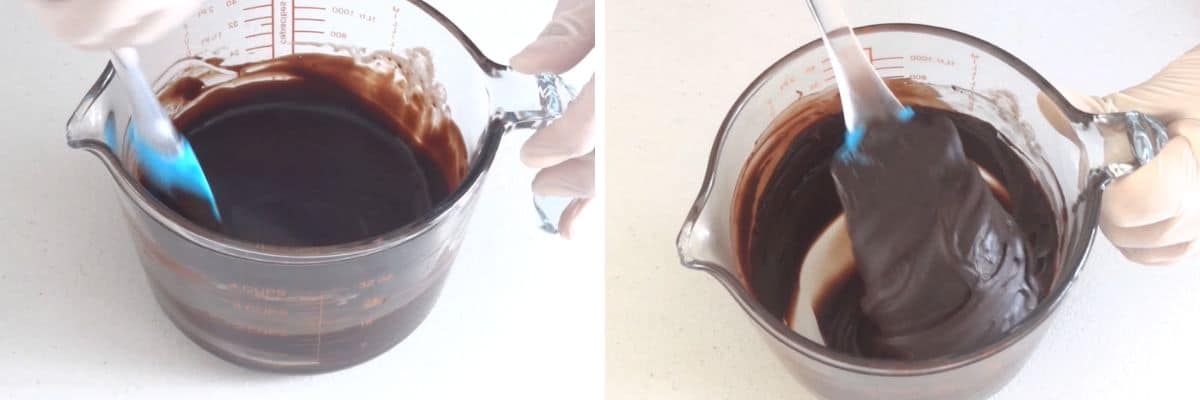
Thicken the Ganache: Allow the ganache to reach room temperature. Then, place it in the refrigerator. You should, stir it every 10 minutes until it achieves a thick consistency that's still soft enough to be piped.
5. Decorating the Cones:
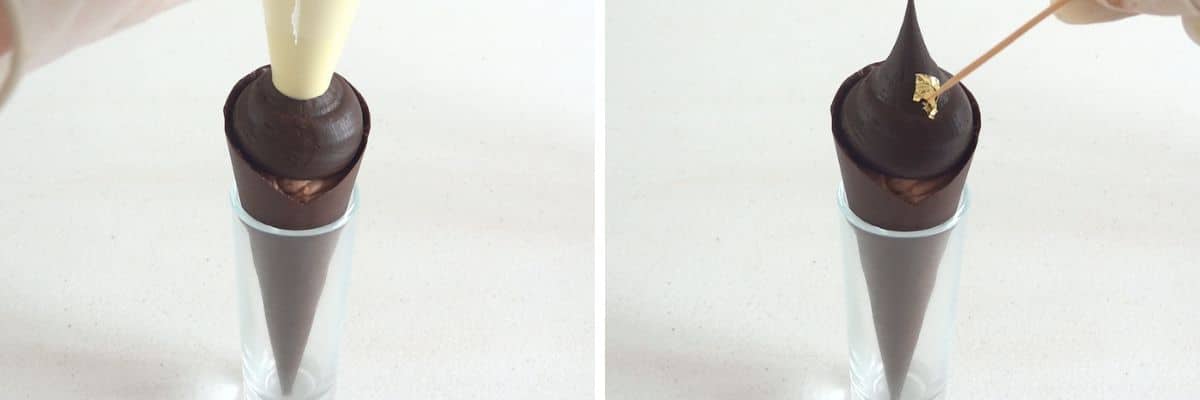
Ganache Topping: Fit a piping bag with a plain piping tip and fill it with the thickened ganache. Pipe a 'kiss' of ganache on top of each mousse-filled cone, creating a visually appealing swirl.
Gold Leaf Garnish: Delicately place a small piece of edible gold leaf on each ganache swirl using a toothpick. This not only adds a touch of luxury but also enhances the visual appeal.
6. Serving and Storage:
Serve these fabulous looking mousse-filled chocolate cones as a posh dessert option at parties or special occasions. I encourage you to enjoy them, fresh but you can store them in the refrigerator for a short period. If you make them, ahead, ensure you keep them in an airtight container to maintain freshness.
My Top Tip
My top tip would be to start with compound chocolate for the cones, especially if you're not familiar with or confident in tempering chocolate. Compound chocolate is user-friendly because it melts smoothly and sets up nicely without the need for tempering. This makes the process of making your chocolate cones much simpler and more foolproof, ensuring they have a good texture and hold their shape well against the creamy mousse filling.
For those who are more experienced in the kitchen and comfortable working with chocolate, consider using tempered chocolate as an upgrade. Tempered chocolate will give your cones a professional touch with a glossy finish and a crisp snap.
Suggestions For Variation
- Mint Chocolate Mousse: Add a few drops of mint extract to the chocolate mousse for a refreshing mint-chocolate flavor.
- Orange Zest Mousse: Incorporate some orange zest into the mousse for a citrusy note that complements the chocolate.
- Coffee-Infused Mousse: Mix in a small amount of espresso or strong coffee to the mousse for a mocha flavor.
- White Chocolate or Milk Chocolate Cones: Instead of dark chocolate, use white or milk chocolate for a sweeter, lighter-flavored cone. This can appeal to those who prefer less intense chocolate flavors.
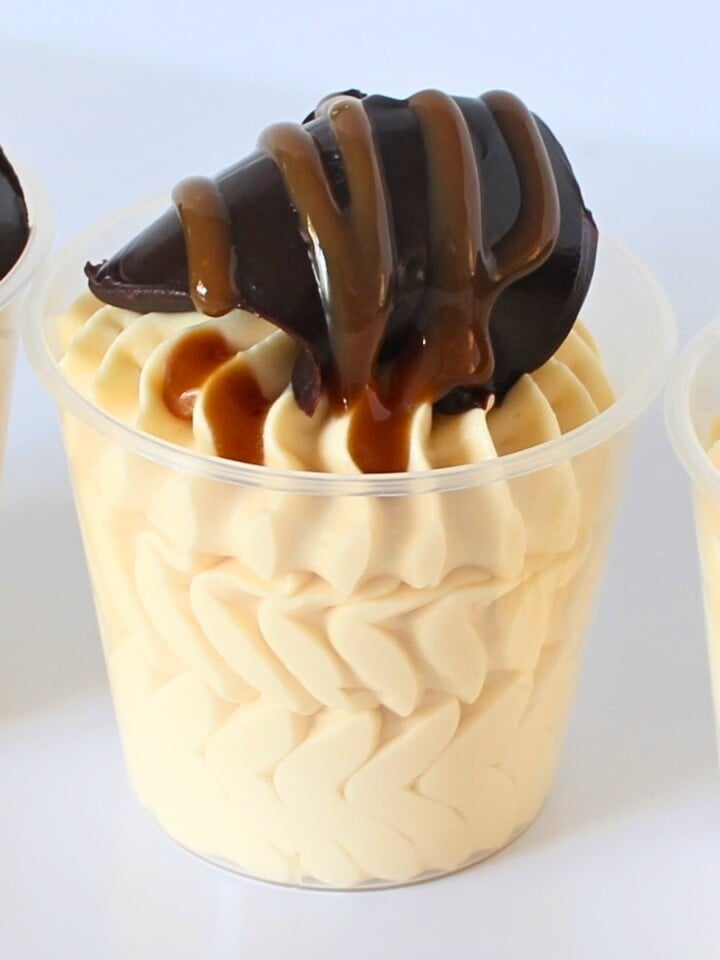
- Caramel Ganache: Mix caramel into the chocolate ganache for a rich and gooey topping.
- Raspberry Ganache: Add raspberry puree to the ganache for a fruity twist.
- Nutty Additions: Sprinkle chopped nuts like almonds, hazelnuts, or pistachios inside the cone before adding the mousse, or sprinkle them on top of the ganache for added crunch and flavor.
- Spice It Up: Add a pinch of cinnamon or chili powder to the chocolate mixture for an unexpected flavor kick.
- Alternative Garnishes: Replace the edible gold leaf with a sprinkle of sea salt, a dusting of cocoa powder, or even edible flowers for different aesthetic and flavor profiles.
- Layered Cones: Create layers inside the cone with different flavored mousses or alternate layers of mousse and crushed cookies or berries for a varied texture.
More Mousse Recipes
Yes, you can make the chocolate cones up to 5 days in advance. Store them in an airtight container at room temperature in a cool, dry place.
You can melt chocolate using a double boiler method. Place the chocolate in a heatproof bowl and set it over a pot of simmering water, ensuring the water doesn't touch the bottom of the bowl. Stir gently until melted and smooth.
There are a few reasons why mousse might not set. Ensure that the whipped cream is whipped to stiff peaks but not over-whipped. Also, the chocolate mixture should be cool but not too cold before folding into the whipped cream.
Over-whipped chocolate will start to look grainy and may begin to separate. Stop whipping as soon as you see stiff peaks forming to avoid this.
Absolutely! Milk chocolate can be used for a sweeter, creamier taste. However, it's softer than dark chocolate, so the texture of the mousse and ganache might be slightly different.
Yes, you can use various garnishes such as a dusting of cocoa powder, chocolate shavings, sprinkles, or even a fresh berry on top for a different look.
Yes, this recipe is naturally gluten-free, as it primarily uses chocolate and cream. Just ensure that the chocolate you use is certified gluten-free if you're catering to someone with celiac disease or severe gluten sensitivity.

Chocolate Cones Filled With Chocolate Mousse
INGREDIENTS
Chocolate Cones
- 500 g (17 ⅔ oz) dark chocolate tempered to compound chocolate
Chocolate Mousse
- 200 g (7 oz) dark chocolate
- 200 g (⅚ cups) heavy cream
- 400 g (1 ⅔ cups) heavy cream
Chocolate Ganache Kisses
- 300 g (1 5/7 cups) dark chocolate choose one you enjoy eating
- 150 g (5 2/7 oz) heavy cream
Garnish
- 1 teaspoon (1 teaspoon) gold edible leaf
INSTRUCTIONS
Chocolate Cones
- Cut 5-inch circles from parchment paper. Form them into cone shapes and secure with tape.
- Brush the inside of each parchment cone with melted chocolate. Place them upright in a tall shot glass to dry. Once dry, apply a second coat of chocolate and let dry again.
Chocolate Mousse
- In a bowl, add 200g of dark chocolate and 200g of heavy cream. Microwave in 20-second increments, stirring each time until the mixture is smooth and lump-free.
- Allow the chocolate mixture to cool for 5-10 minutes before using.
- In a large bowl, add 400g of heavy cream and the cooled chocolate mixture. Beat until stiff peaks form. Be careful not to overbeat as it may split.
- Pipe the chocolate mousse into the prepared chocolate cones. Refrigerate while preparing the ganache.
Chocolate Ganache Kisses
- Add the dark chocolate and heavy cream to a microwave-safe bowl. Microwave for 20 seconds, stir, and repeat until the mixture is smooth.
- Allow the mixture to come to room temperature. Then refrigerate, stirring every 10 minutes, until it reaches a thick, pipeable consistency (similar to peanut butter).
- Using a plain round piping tip, pipe a ganache "kiss" on top of each mousse-filled chocolate cone.
Garnish
- Place a small piece of edible gold leaf on each ganache kiss using a toothpick for an elegant finish.
NOTES
NUTRITION
Video Tutorials You Might Like


Leave a Reply