
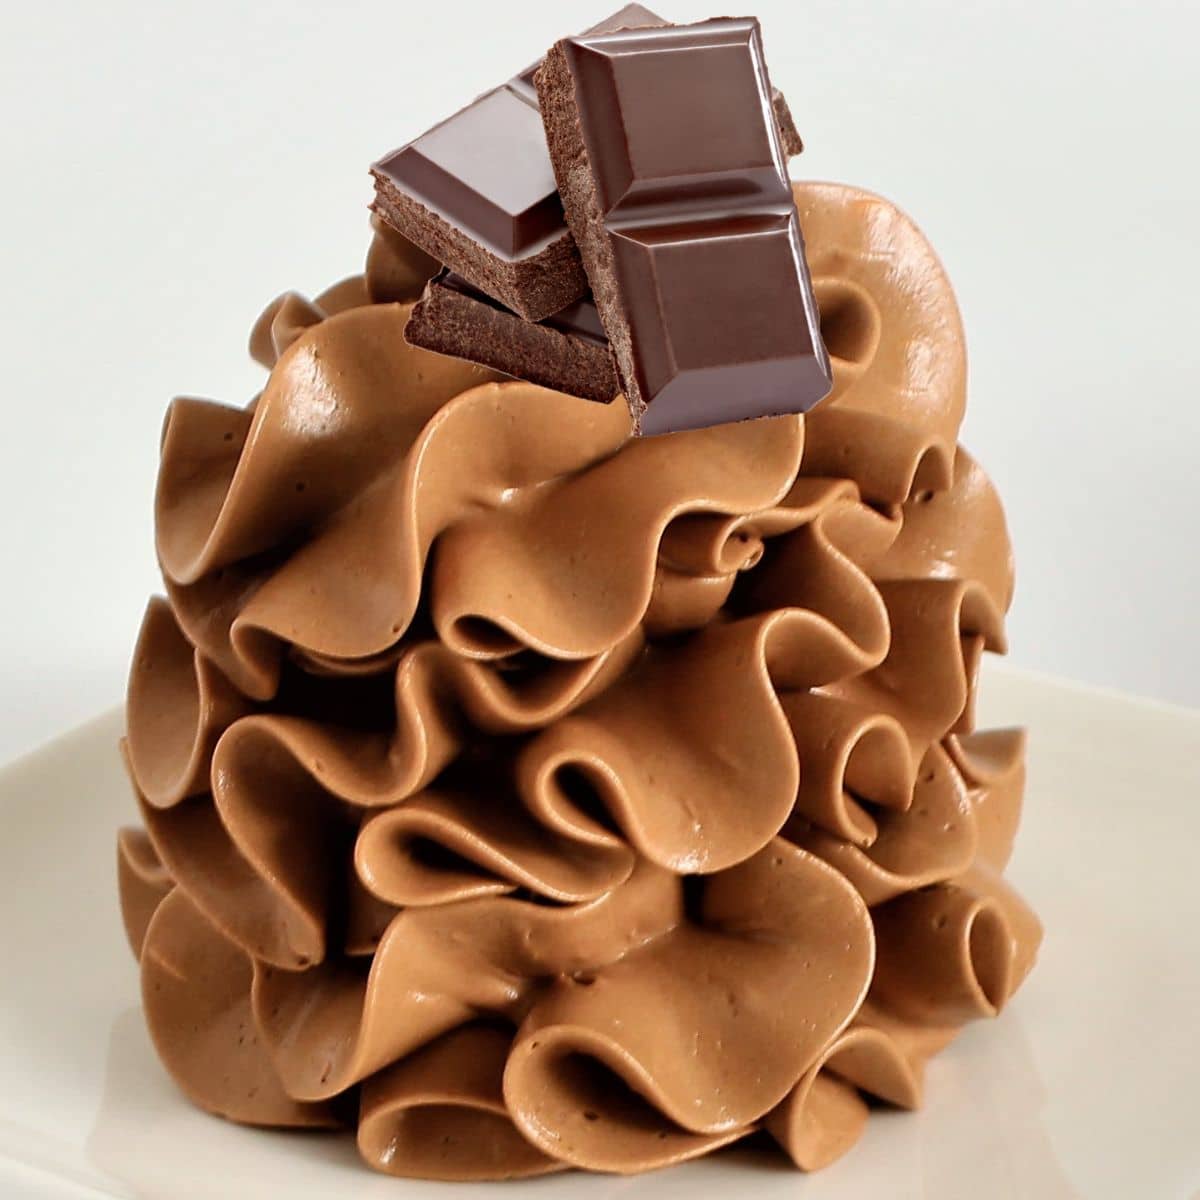
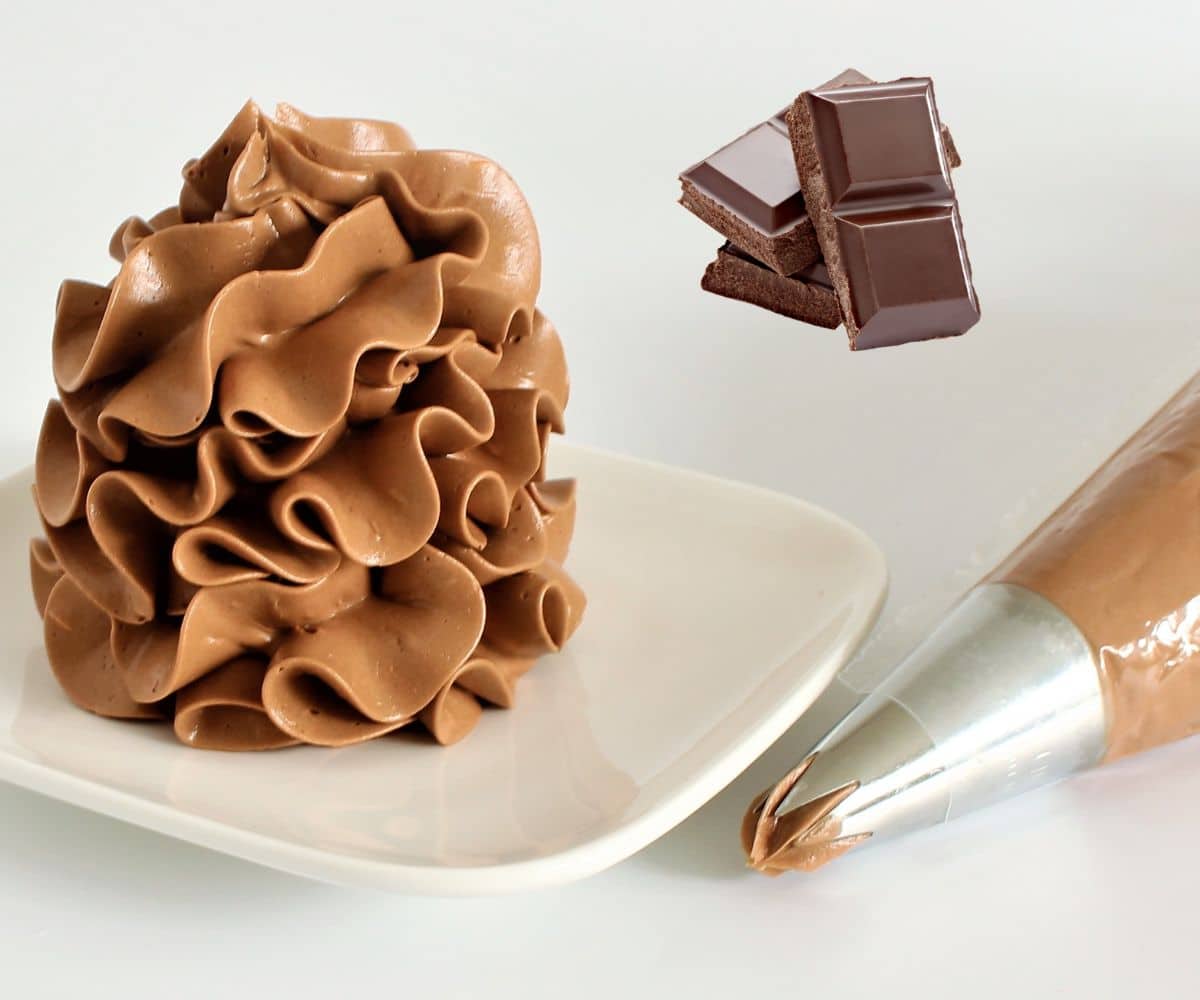
Treat yourself to a rich and silky Chocolate Condensed Milk Buttercream. This easy recipe combines the deep flavors of dark chocolate with the smoothness of condensed milk to create a luxurious frosting. With just three simple ingredients and no need for powdered sugar, this buttercream is smooth and grit-free. It's great for creating beautiful designs on cakes, cupcakes, and more.
Why Is This Buttercream So Good?
One reason this buttercream stands out is because of its silky smooth texture. You don't need to add any powdered sugar, thanks to the sweetened condensed milk, which already contains sugar. This helps you avoid the grittiness that sometimes comes with powdered sugar. You get a perfectly smooth frosting. Perfect for decorating your cakes and desserts, making everything you whip up look and taste fantastic.
Ingredients In Chocolate Condensed Milk Buttercream
- Unsalted Butter - This is the base of the buttercream, providing a rich and creamy texture. Using unsalted butter allows you to control the amount of salt in your frosting.
- Sweetened Condensed Milk - This adds a silky, creamy sweetness to the buttercream. It also eliminates the need for powdered sugar, which is typically used in frostings to add sweetness and bulk. The condensed milk keeps the buttercream smooth and free from the grittiness that sugar crystals can sometimes cause.
- Dark Chocolate - Melted into the buttercream, dark chocolate adds a deep and luxurious chocolate flavor. Choosing a type of dark chocolate you love means the buttercream will taste exactly to your liking.

How To Make Chocolate Condensed Milk Buttercream
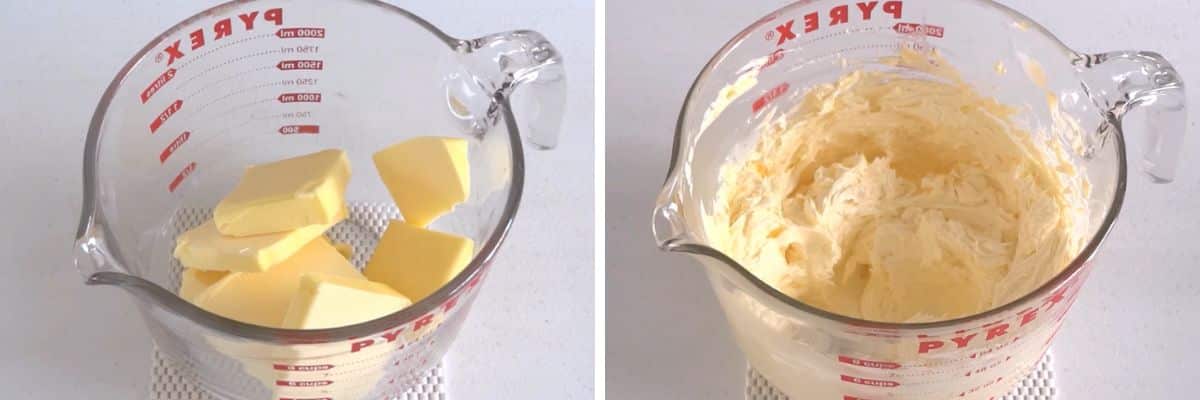
Start with Whipping the Butter: Begin by placing the softened butter into a mixing bowl. Using an electric mixer, whip the butter on a medium speed until it becomes light in color and fluffy. This step is important as it introduces air into the butter, ensuring that your buttercream is light and airy.
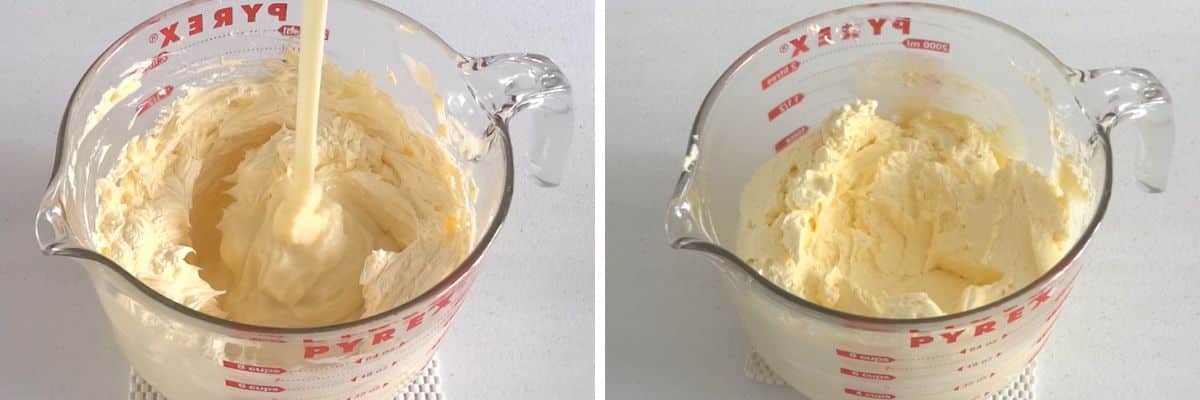
Add Sweetened Condensed Milk: Once the butter is whipped, pour the sweetened condensed milk into the bowl. Continue mixing at a medium speed until the milk is fully incorporated into the butter. You should see the mixture becoming smoother and creamier as you mix.
Incorporate the Melted Chocolate: With the chocolate melted and still warm (but not hot), add it to your butter and milk mixture. Keep the mixer running at a low to medium speed to blend the chocolate evenly throughout the buttercream. This will give it a rich chocolate flavor and a beautiful, consistent color.

Smooth Out the Buttercream: Take a silicone spatula and gently stir the buttercream by hand. This will knock out any large air bubbles and ensures that the texture of your buttercream is velvety and smooth.
Chill if Too Soft: If you find the buttercream is too soft, place it in the refrigerator for about 15-20 minutes. After chilling, give it another quick mix to regain a firm but spreadable consistency that’s ideal for detailed decorating work.
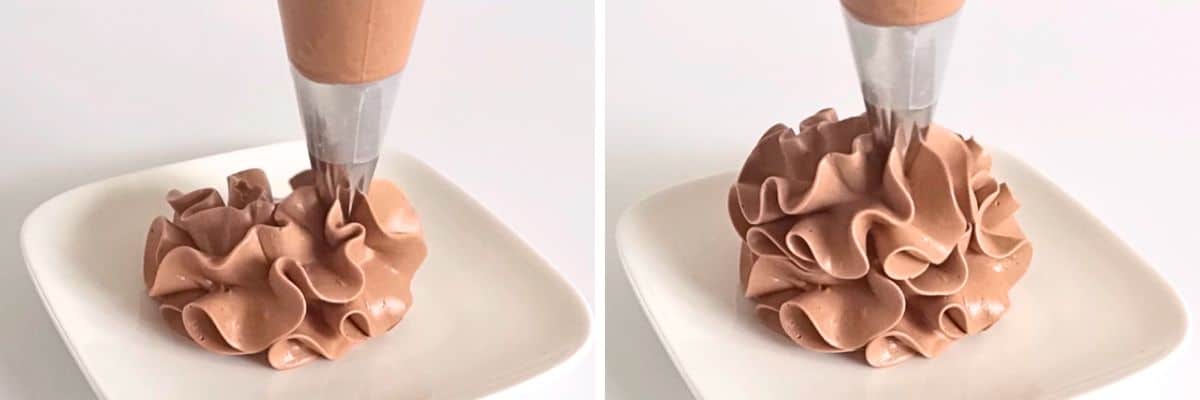
Ready for Use: Your Chocolate Condensed Milk Buttercream is now ready to be used. It’s excellent for covering cakes, filling pastries like whoopie pies and macarons, or creating decorative designs on cupcakes. The buttercream handles very well with piping bags and tips, allowing you to achieve professional-looking results.
Pro Tip
One pro tip for making your Chocolate Condensed Milk Buttercream perfect is to ensure your butter is properly softened before you start. If the butter is too cold, it won’t whip up light and fluffy, which is key for that silky smooth texture. However, if it’s melted or too soft, your buttercream might end up too runny. Aim for butter that's soft enough to leave an indent when pressed, but not so soft that it's greasy.
How To Use This Buttercream
- Cake Frosting: Use it as a rich, creamy frosting for chocolate or vanilla cakes. It spreads beautifully and can be used to create smooth sides and sharp edges on layered cakes.
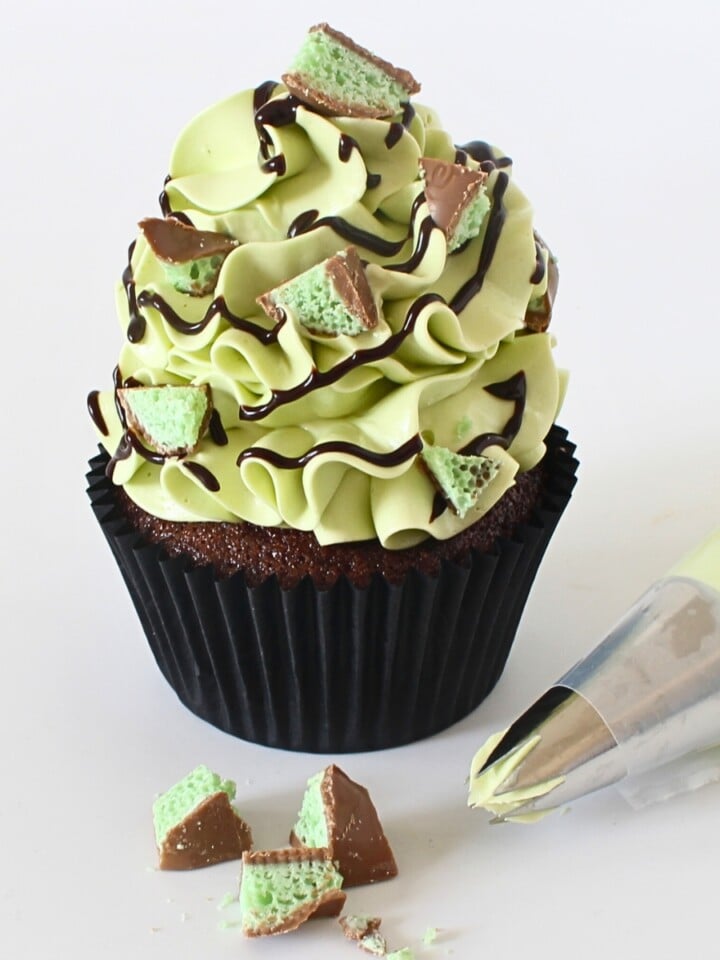
- Cupcake Topping: Pipe it onto cupcakes using a 1M Piping Tip. Whether you prefer simple swirls or more intricate designs like rosettes, this buttercream handles it all with ease.
- Filling for Pastries: It's perfect as a filling for pastries such as whoopie pies, macarons, or éclairs. Its smooth texture complements the light pastry and adds a burst of chocolate flavor.
- Dessert Topping: Dollop or spread it on top of desserts like brownies for an extra layer of chocolate richness.
- Cookie Sandwiches: Spread it between two cookies to make decadent cookie sandwiches. Choose cookies like chocolate chip, oatmeal, or even shortbread for a delicious treat.
If you're interested in seeing this buttercream in action, I have a whole playlist dedicated to Condensed Milk Buttercream on my YouTube channel. Check out the videos for some great tutorials on how to use this versatile frosting for cake decorating!
Frequently Asked Questions (FAQs)
Yes, you can use milk chocolate instead of dark chocolate. Just keep in mind that milk chocolate is sweeter than dark chocolate, so the buttercream will have a lighter, sweeter chocolate flavor.
You can store the Chocolate Condensed Milk Buttercream in an airtight container in the refrigerator for up to one week or freezer for up to two months. Let it come to room temperature and give it a quick whip before using to restore its creamy texture.
Reducing the sweetness in this particular recipe can be challenging because the sweetened condensed milk is inherently sweet. However, using a darker chocolate (with a higher cocoa percentage) or adding a pinch of salt can help balance the sweetness.
Chocolate Condensed Milk Buttercream
INGREDIENTS
- 500 g (2 ⅕ cups) butter unsalted and softened
- 395 g (14 oz) sweetened condensed milk
- ½ cup (½ cup) melted dark chocolate use a chocolate you enjoy eating
INSTRUCTIONS
- In a mixing bowl, add the softened butter. Whip it for 2-5 minutes until it's light and fluffy.
- Add the whole can of sweetened condensed milk to the whipped butter. Mix for 1-2 minutes until well blended.
- Add the warm melted chocolate to the bowl. Mix for another 1-2 minutes until everything is smooth.
- Use a silicone spatula to gently stir the buttercream, helping to smooth out any air bubbles.
- If the buttercream is too soft, refrigerate it for 15-20 minutes, then mix again to firm it up slightly.
- Your buttercream is now ready to use! It’s perfect for decorating cakes, or as a filling for whoopie pies, macarons, and cookie sandwiches.

Kira says
Can you substitute dark chocolate with white chocolate?
Fay says
Hi Kira! Yes, this also works with white or milk chocolate.
Leo says
I love this recipe and have been asked to cover a 10"and 7" in it. How many multiples of the recipe would I need.
Thankyou
Fay says
Are each of the cakes layered then stacked? If the 7" is layered and the 10" is layered I would go for two batches. Leftover buttercream freezes very well for 2 months. I would recommend a central dowel and if you live in a warm climate, refrigerate for as long as possible before serving because this buttercream, like all buttercreams, will soften in warm weather. I'm thrilled you like the recipe!
Holly says
This chocolate buttercream is so smooth and creamy, the right amount of sweetness. I like a bit more stable buttercream frosting, so I took Fay's tip and added 2 tablespoons of meringue powder and turned out beautifully, pipes like a dream with detail.
Fay says
How fabulous! Thank you for posting!
Emory says
When did you add the meringue powder? I am looking to do the same but am unsure of the process.
Fay says
Not all of my recipes use it. If you would like to use it, you can add it after the condensed milk.
Shannon says
About how many cupcakes do you think this recipe would pipe?
Fay says
It will pipe 24-36 depending on the size of the swirl.
Karen says
This is one of the easiest and most creamy smooth and tasty frosting recipes I’ve ever made! Love these buttercream recipes from you Fay! Thanks for keeping it sweet and easy!
Now if I could get my blackberry to keep from breaking(curdled) - ha!
Fay says
How fabulous! I’m thrilled you love it! Trust me with the blackberry, all you need to do is mix mix mix. Just step away from the mixer for at least 10 minutes and don’t touch! lol it will come back together beautifully! 🙂